


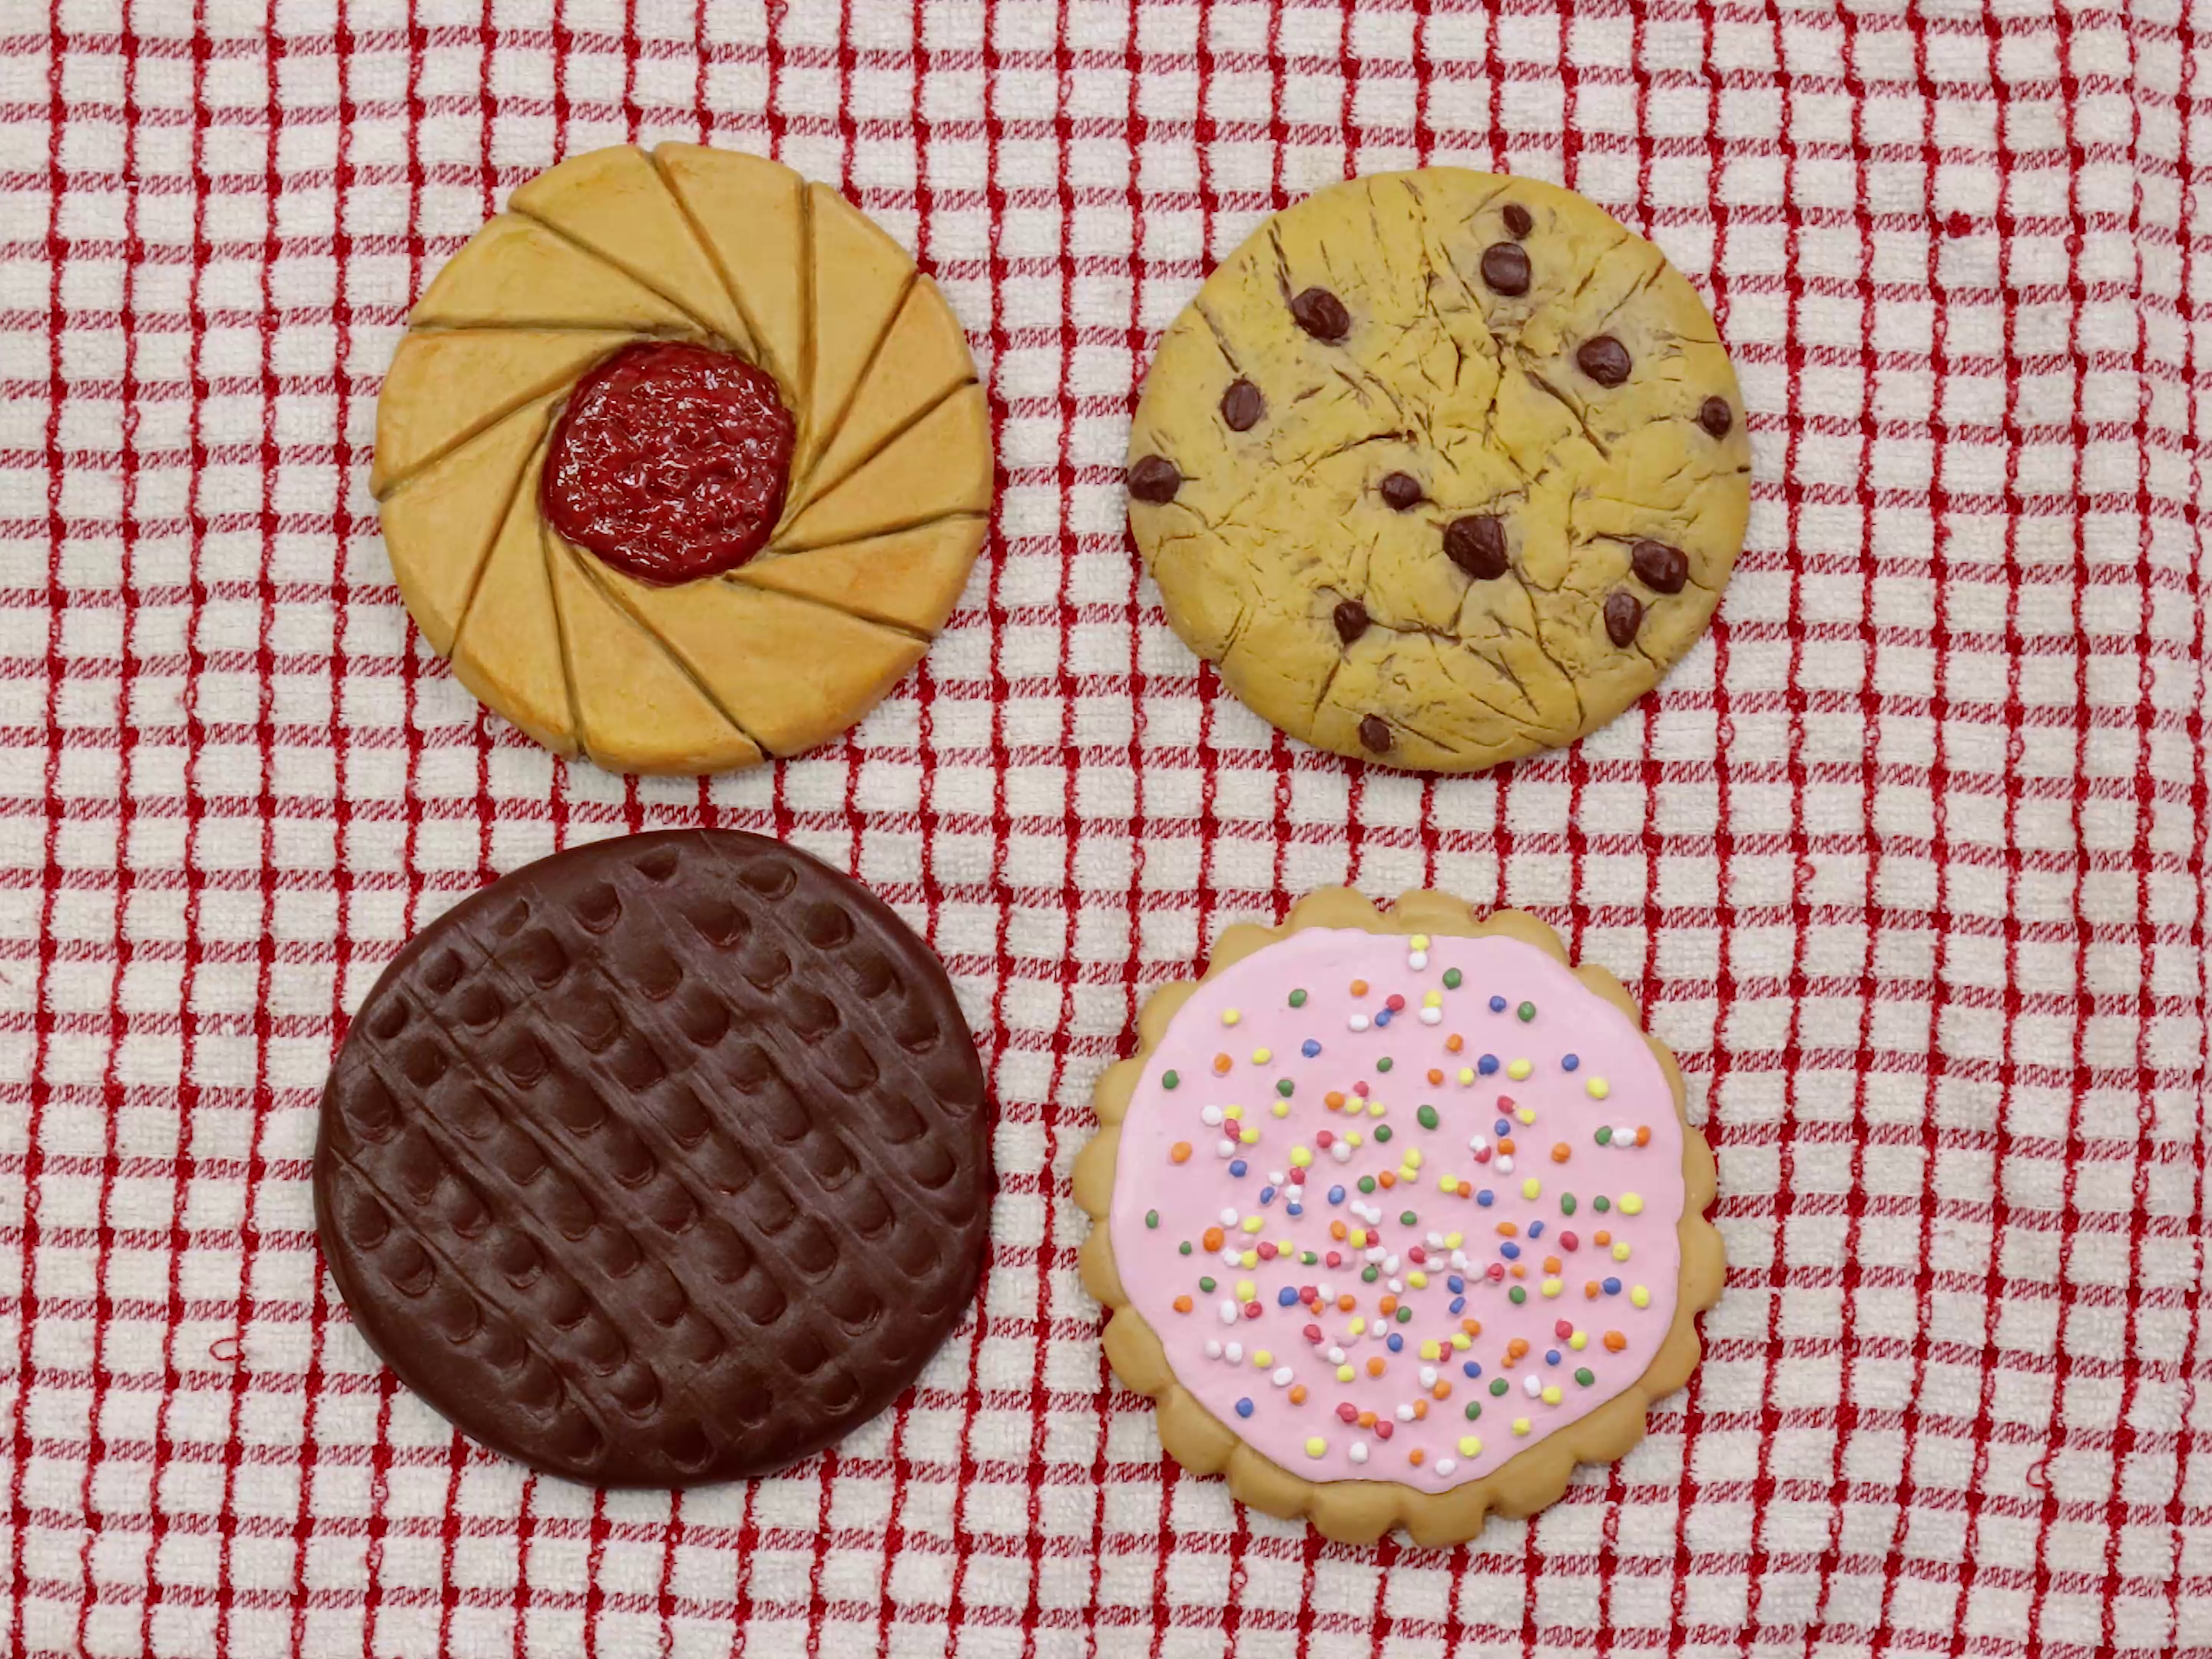
Cookie-themed air dry clay coasters
1. Clay cookie – choc chip edition!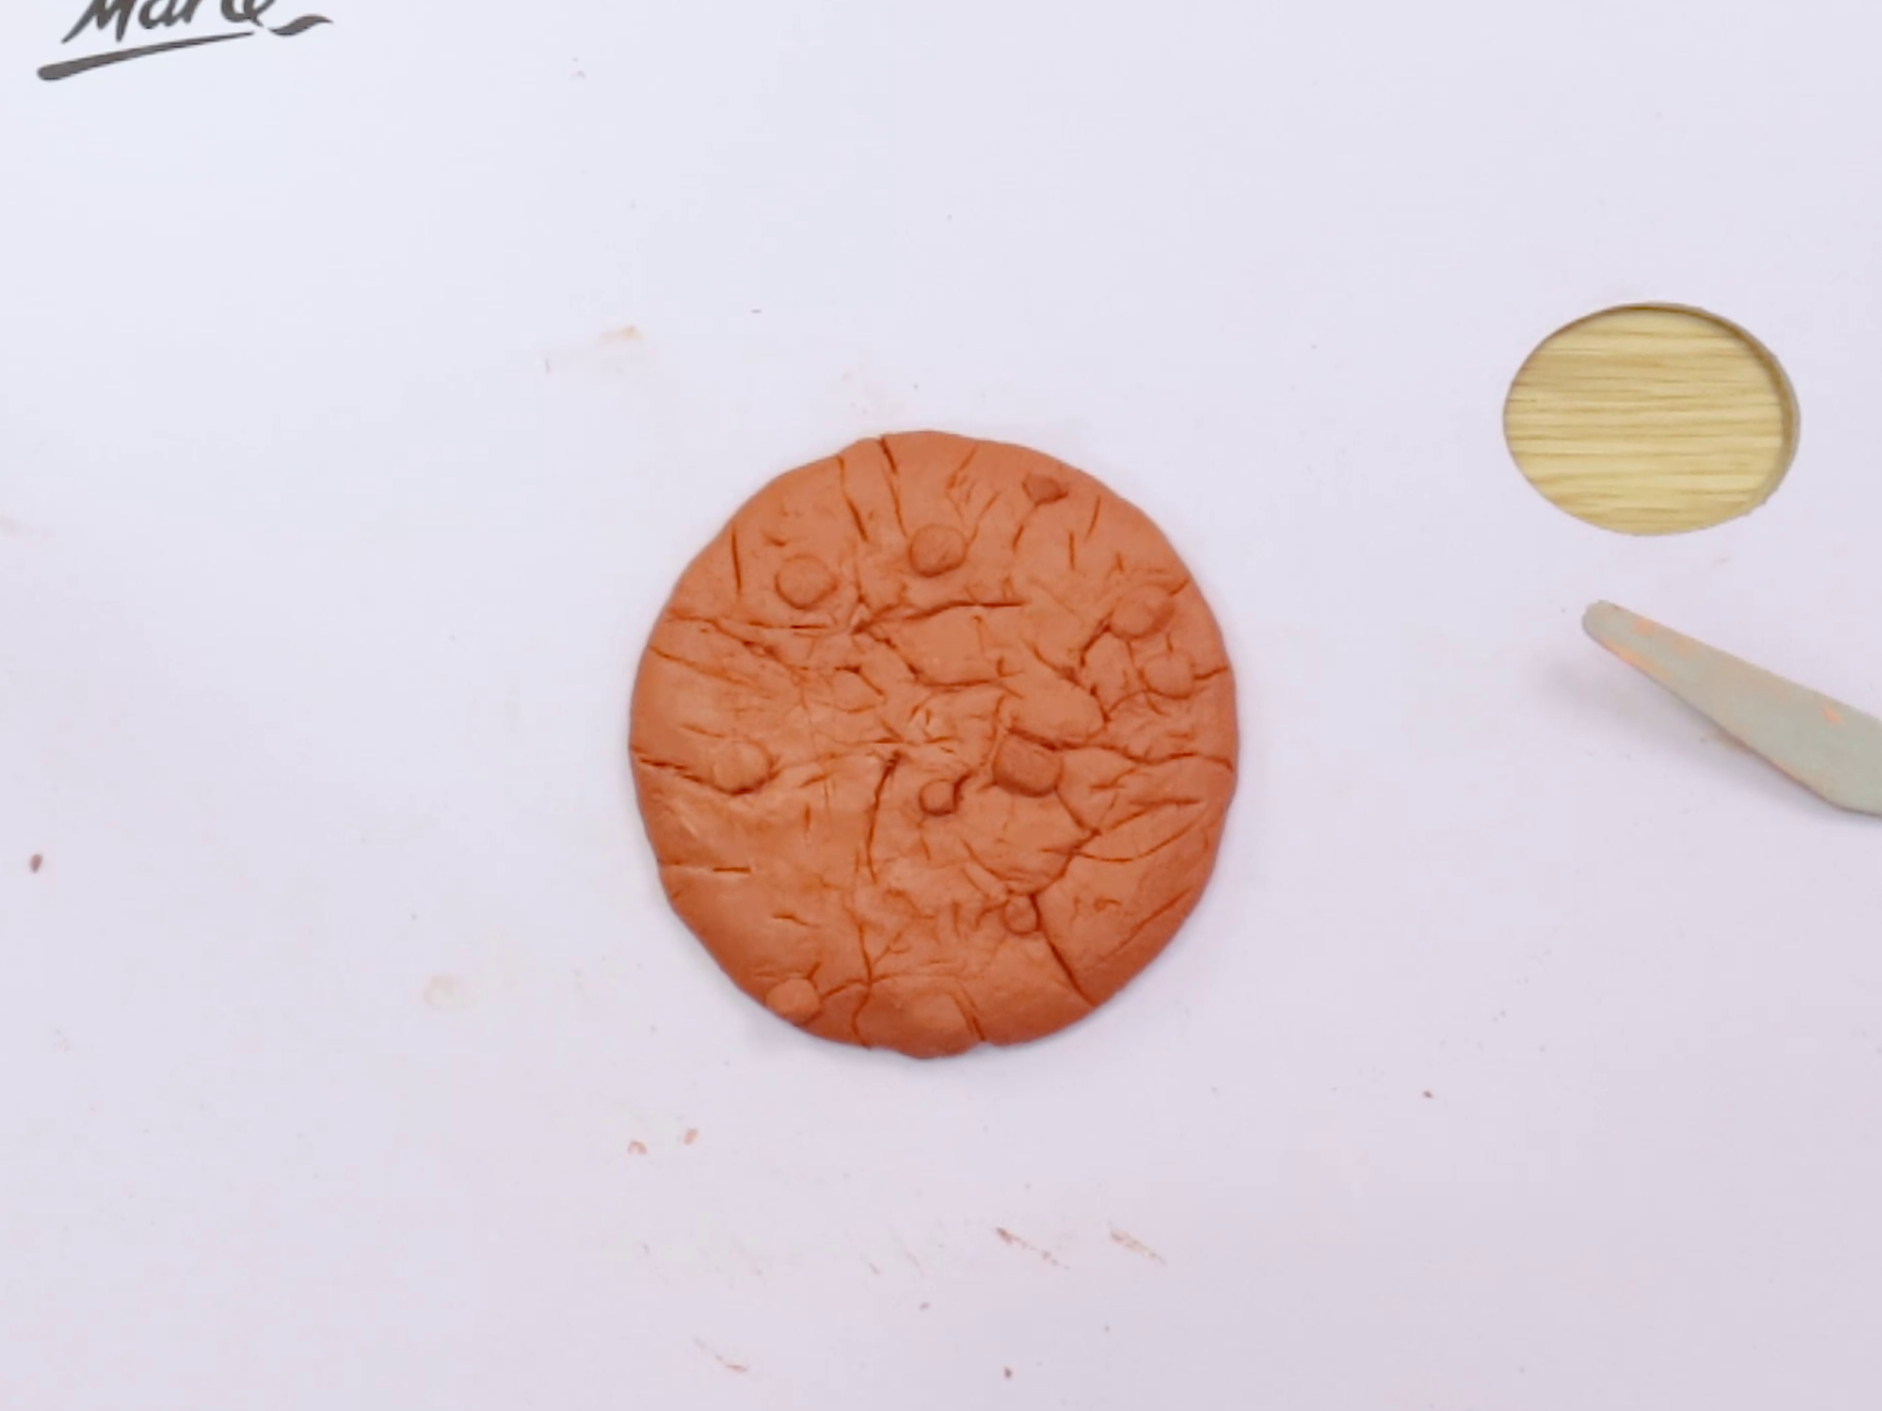
- Divide your clay block into four equal parts and wrap the unused pieces to keep them soft
- Roll one piece into a ball and press it over a cork coaster to form the base shape
- Slice the top slightly to flatten it with a palette knife for a sturdy mug base (save the cuttings)
- Add textured grooves using the knife, then smooth lightly with a damp finger
- Roll leftover clay into small uneven chunks for the chocolate chips and press them into the surface
- Do a quick mug test to check it sits flat, then set aside to dry
2. How to make clay sprinkles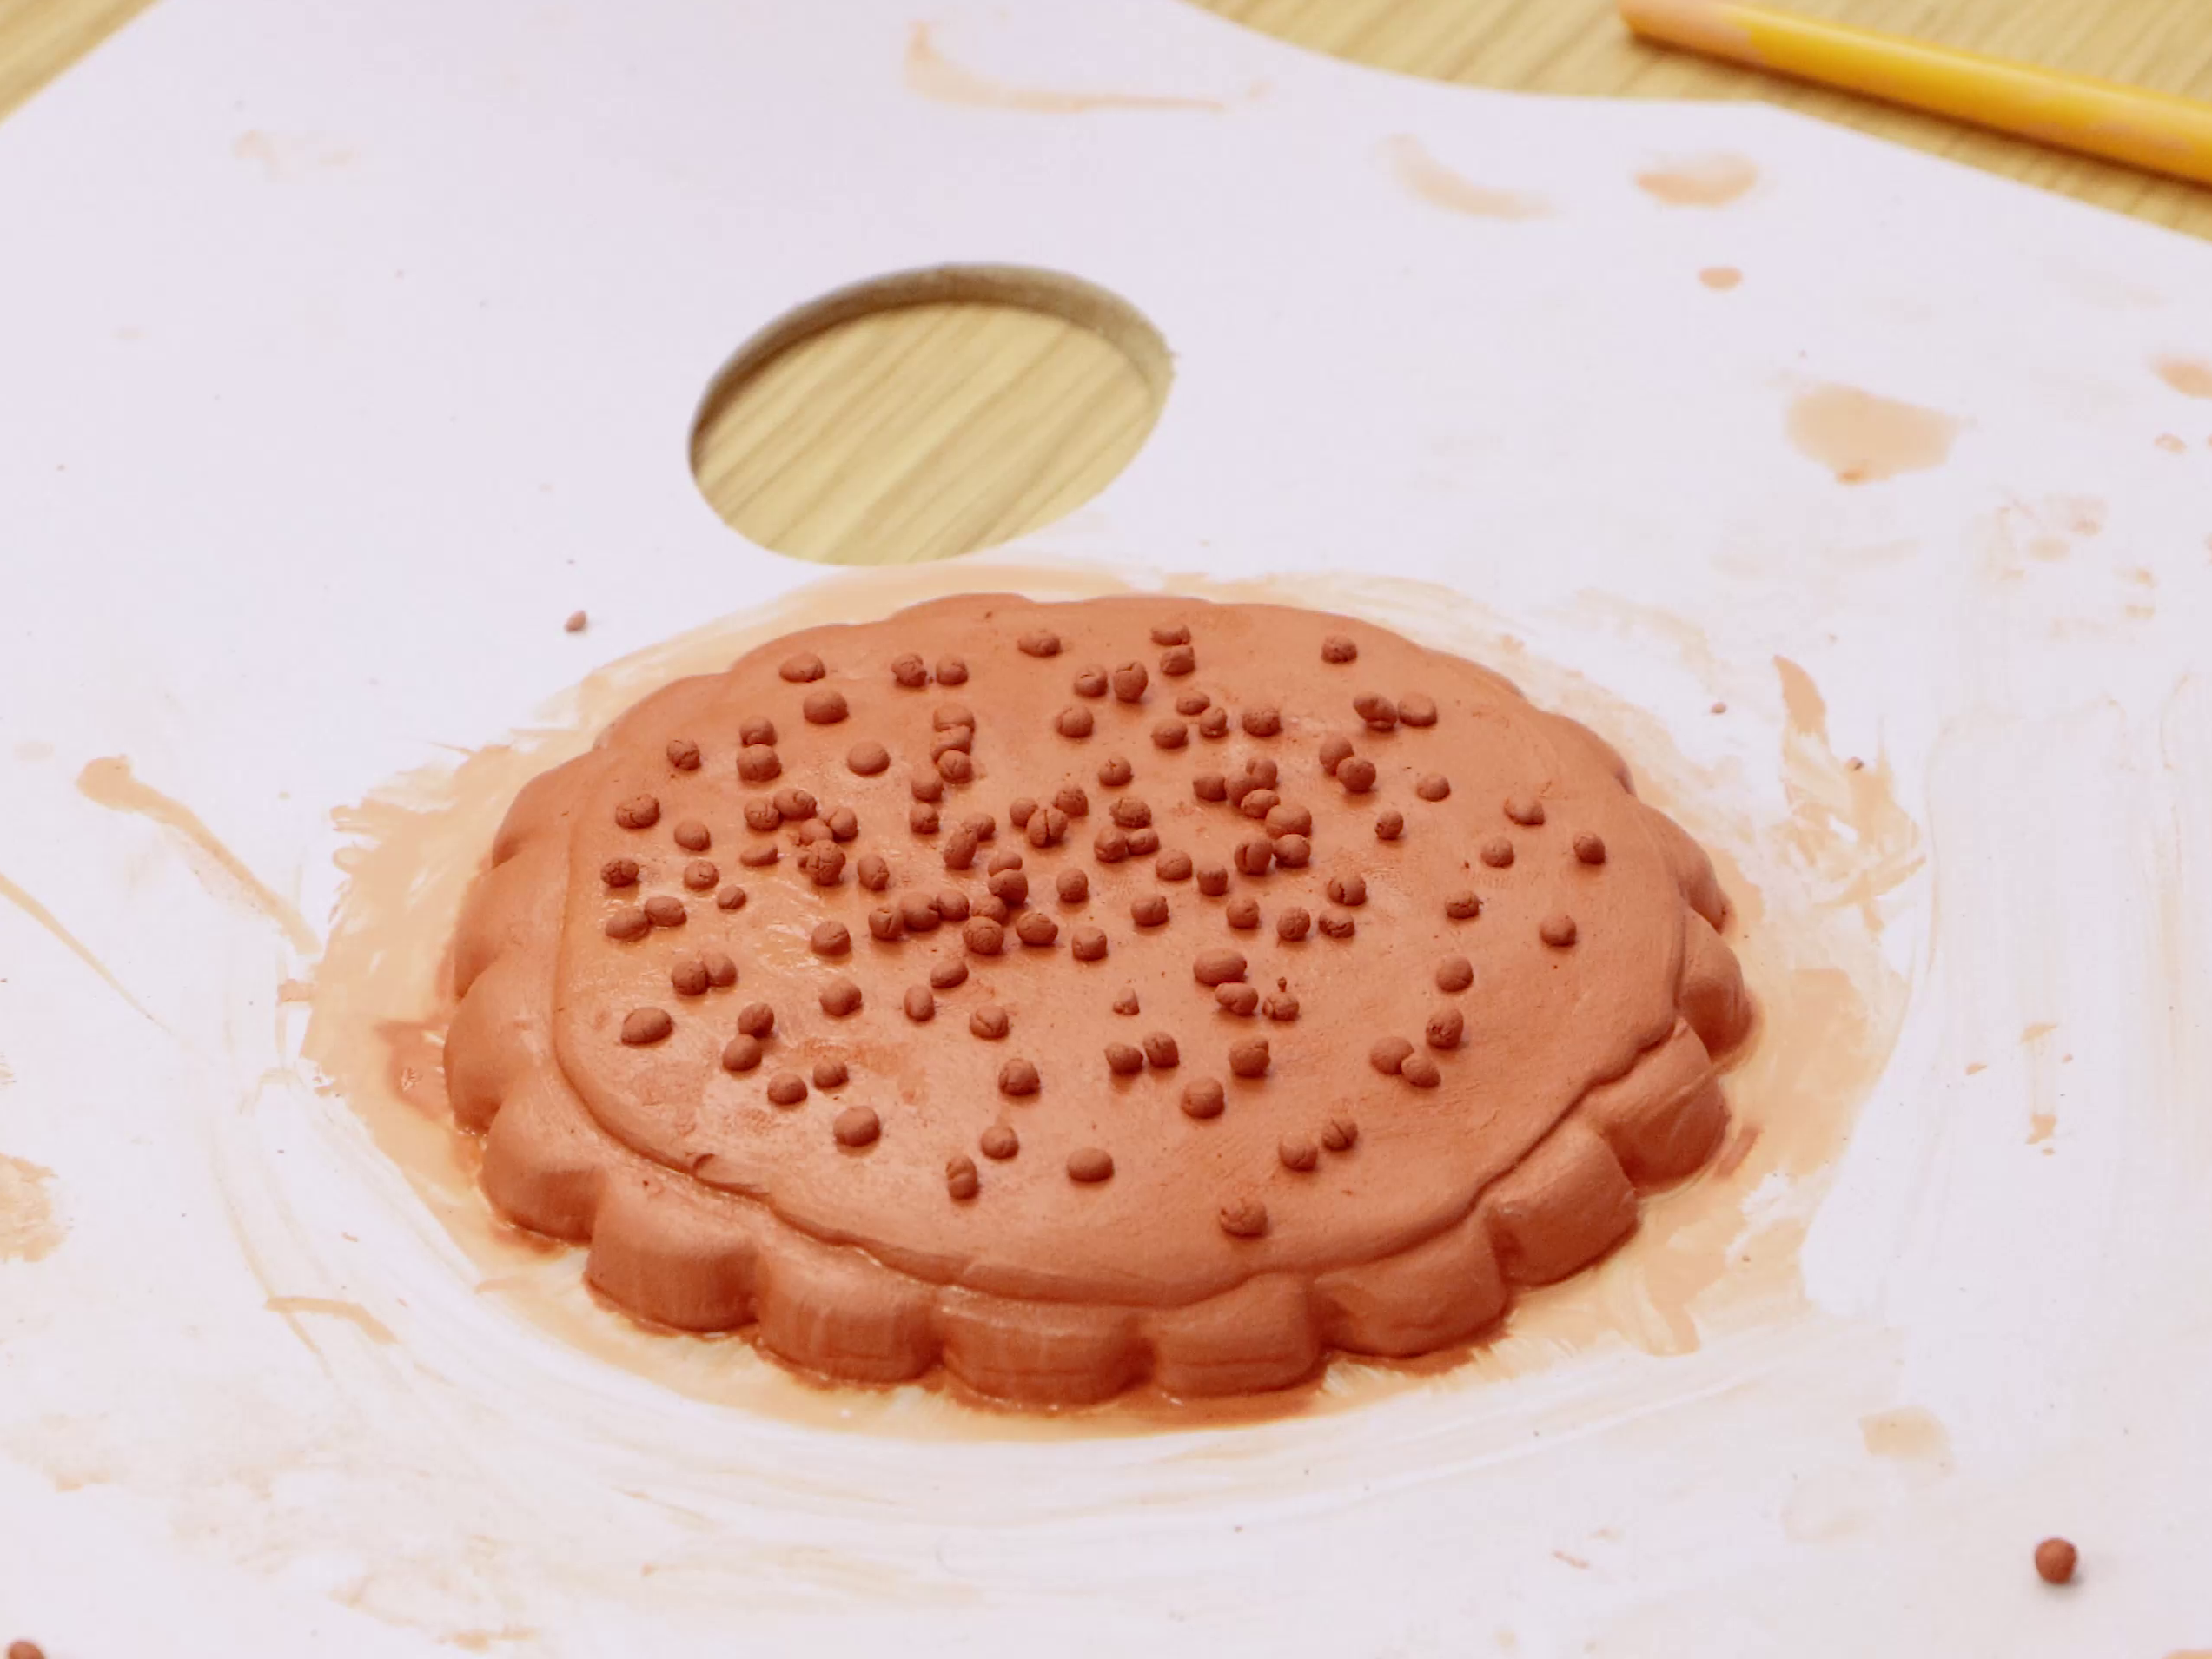
- Roll another portion of clay and cut of a small section (this will be the icing and sprinkles)
- Press the rest over a cork coaster
- Use something with a small, rounded edge to press scalloped shapes around the border
- Trim around the scallops with a palette knife
- Smooth the edges with a damp brush
- Roll a small piece of clay for the icing and flatten it into an organic circle shape before pressing on top
- Smooth with your finger and a little water, then soften the edge using a brush
- Roll out a very thin rope of clay, cut and roll it into tiny pieces, and press them onto the icing as sprinkles
- Do a final mug test to make sure it’s flat enough and set aside to dry
3. Clay biscuit… but add jam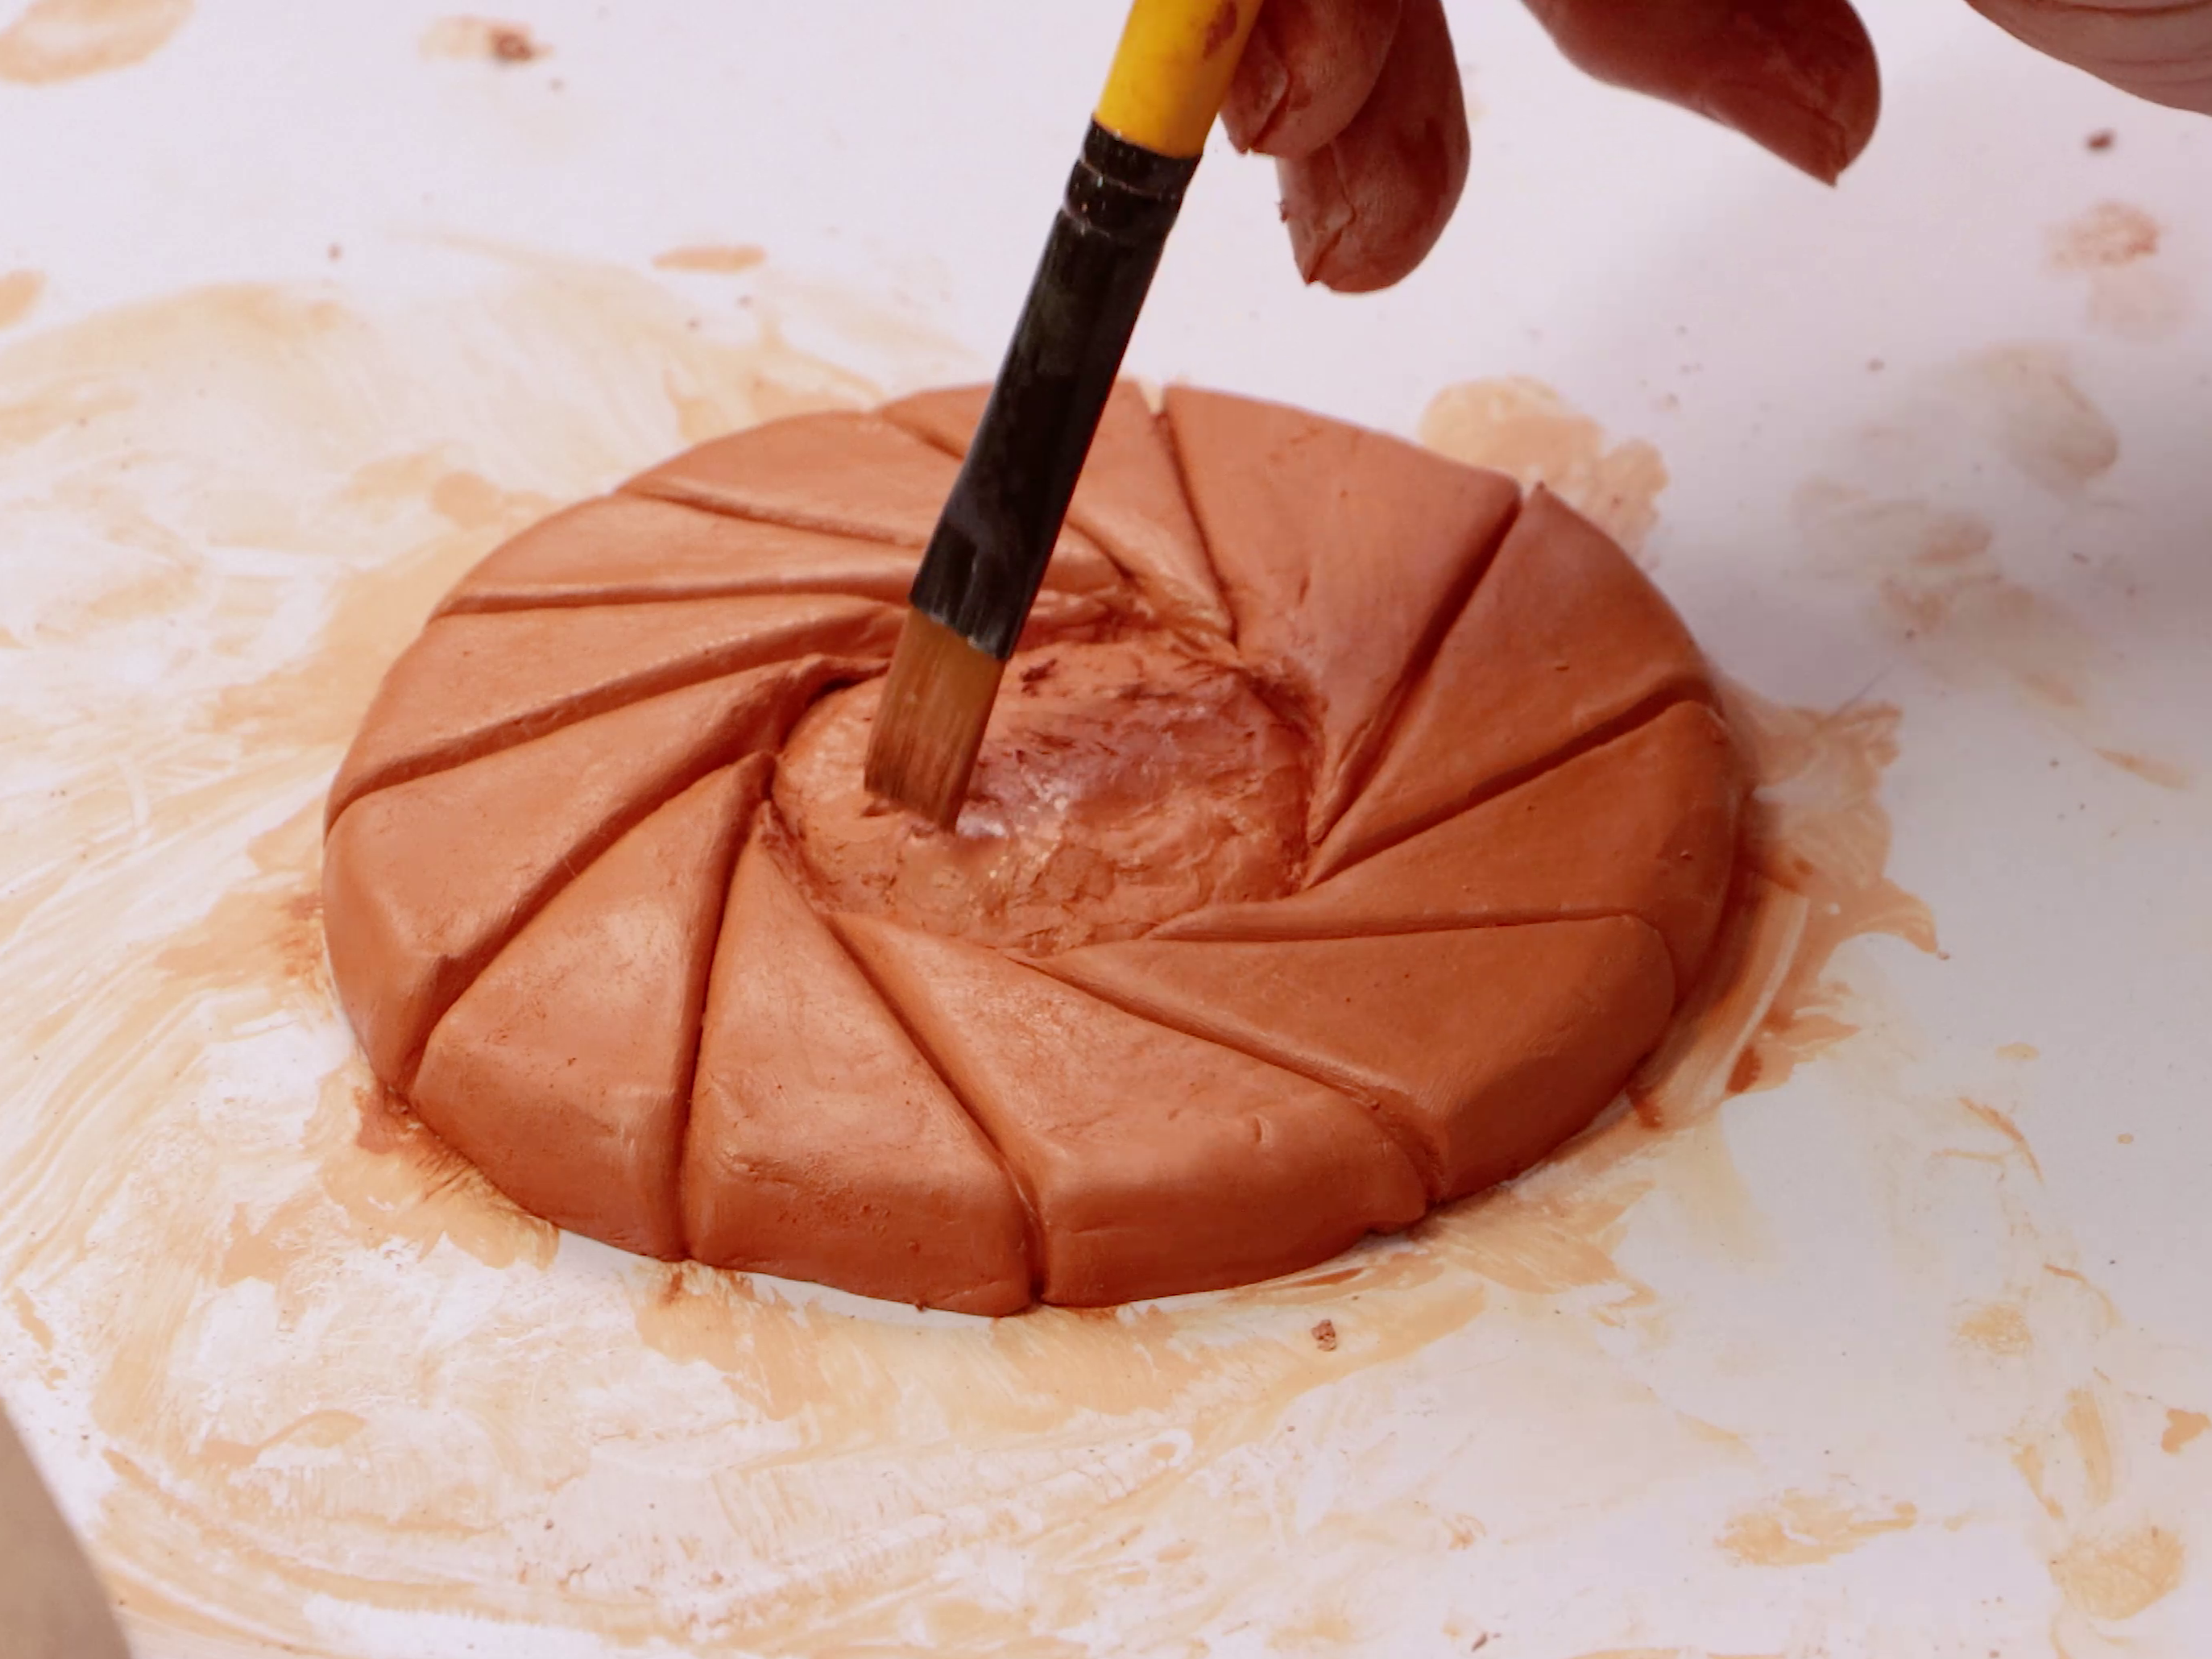
- Flatten another portion of clay evenly over a cork coaster
- Use a small round object (e.g., cup) to press a circular dent in the centre and remove a little clay to make space for the jam
- Rough up the texture inside the circle using the back of your palette knife or brush
- Carve curved lines radiating around the jam and smooth gently with a brush
- Do a test to make sure your mug sits flat, then set aside to dry
4. Now onto the chocolate digestive
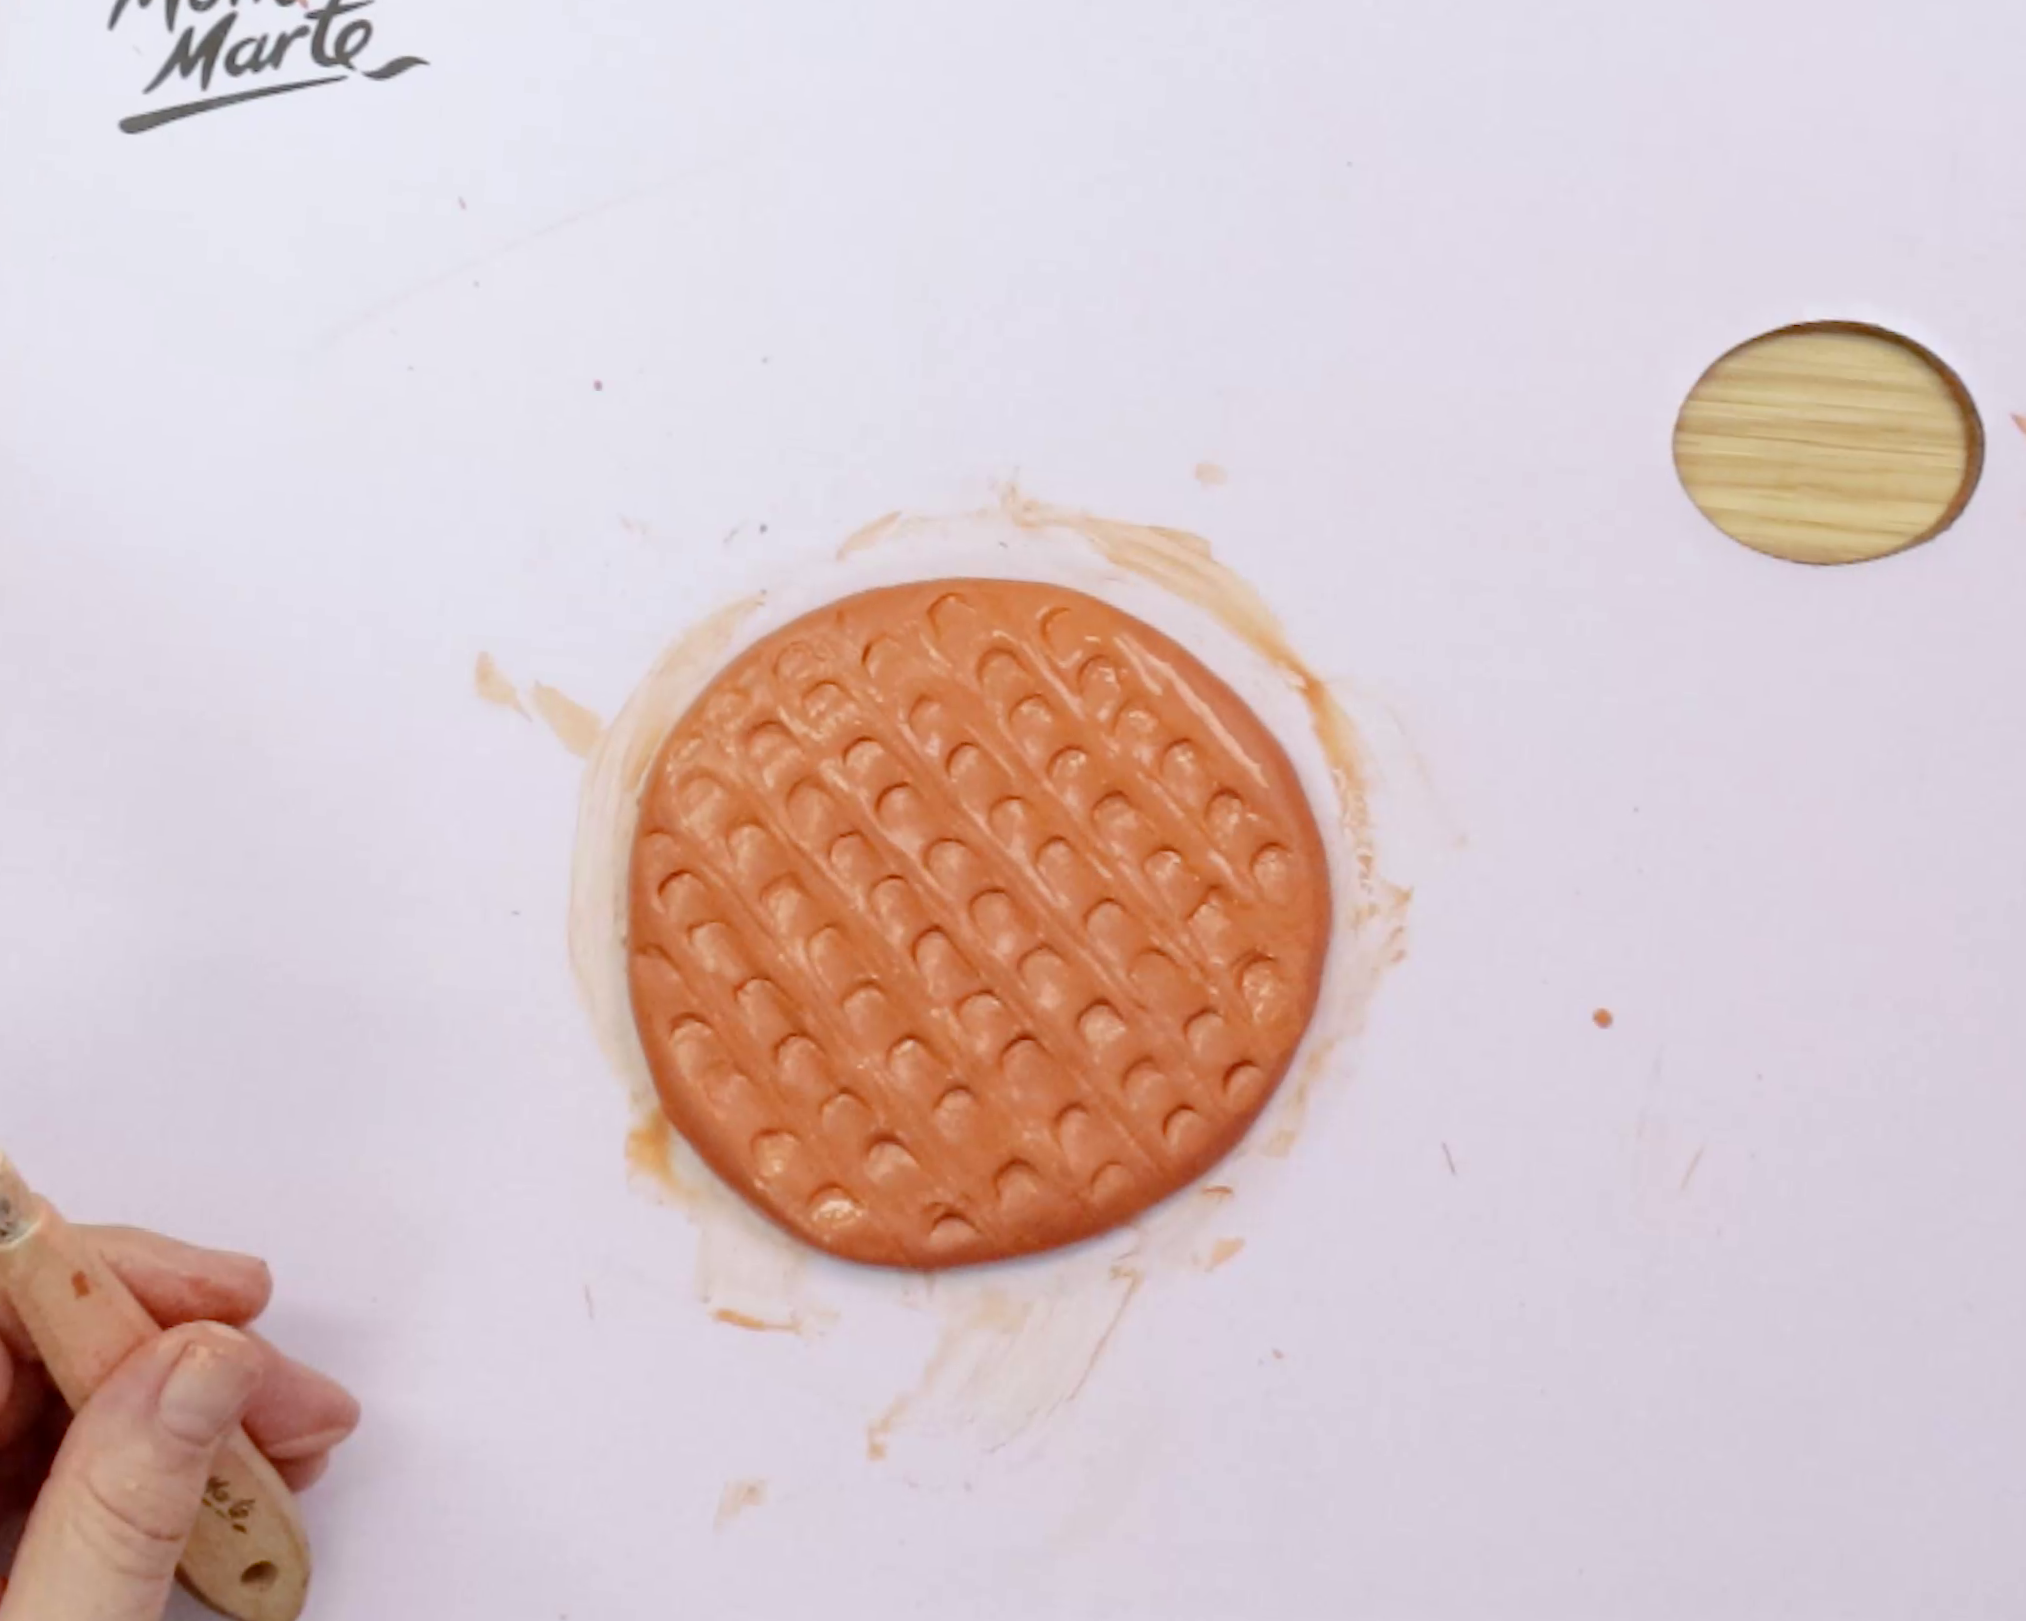
- Press the clay over the cork coaster and roll it flat
- Draw an 8x8 grid and mark scalloped indents with your palette knife in each grid
- Soften the divots with a damp brush, reworking any that fade
- Check that the coaster is flat and smooth before leaving it to dry
5. Sealing air dry clay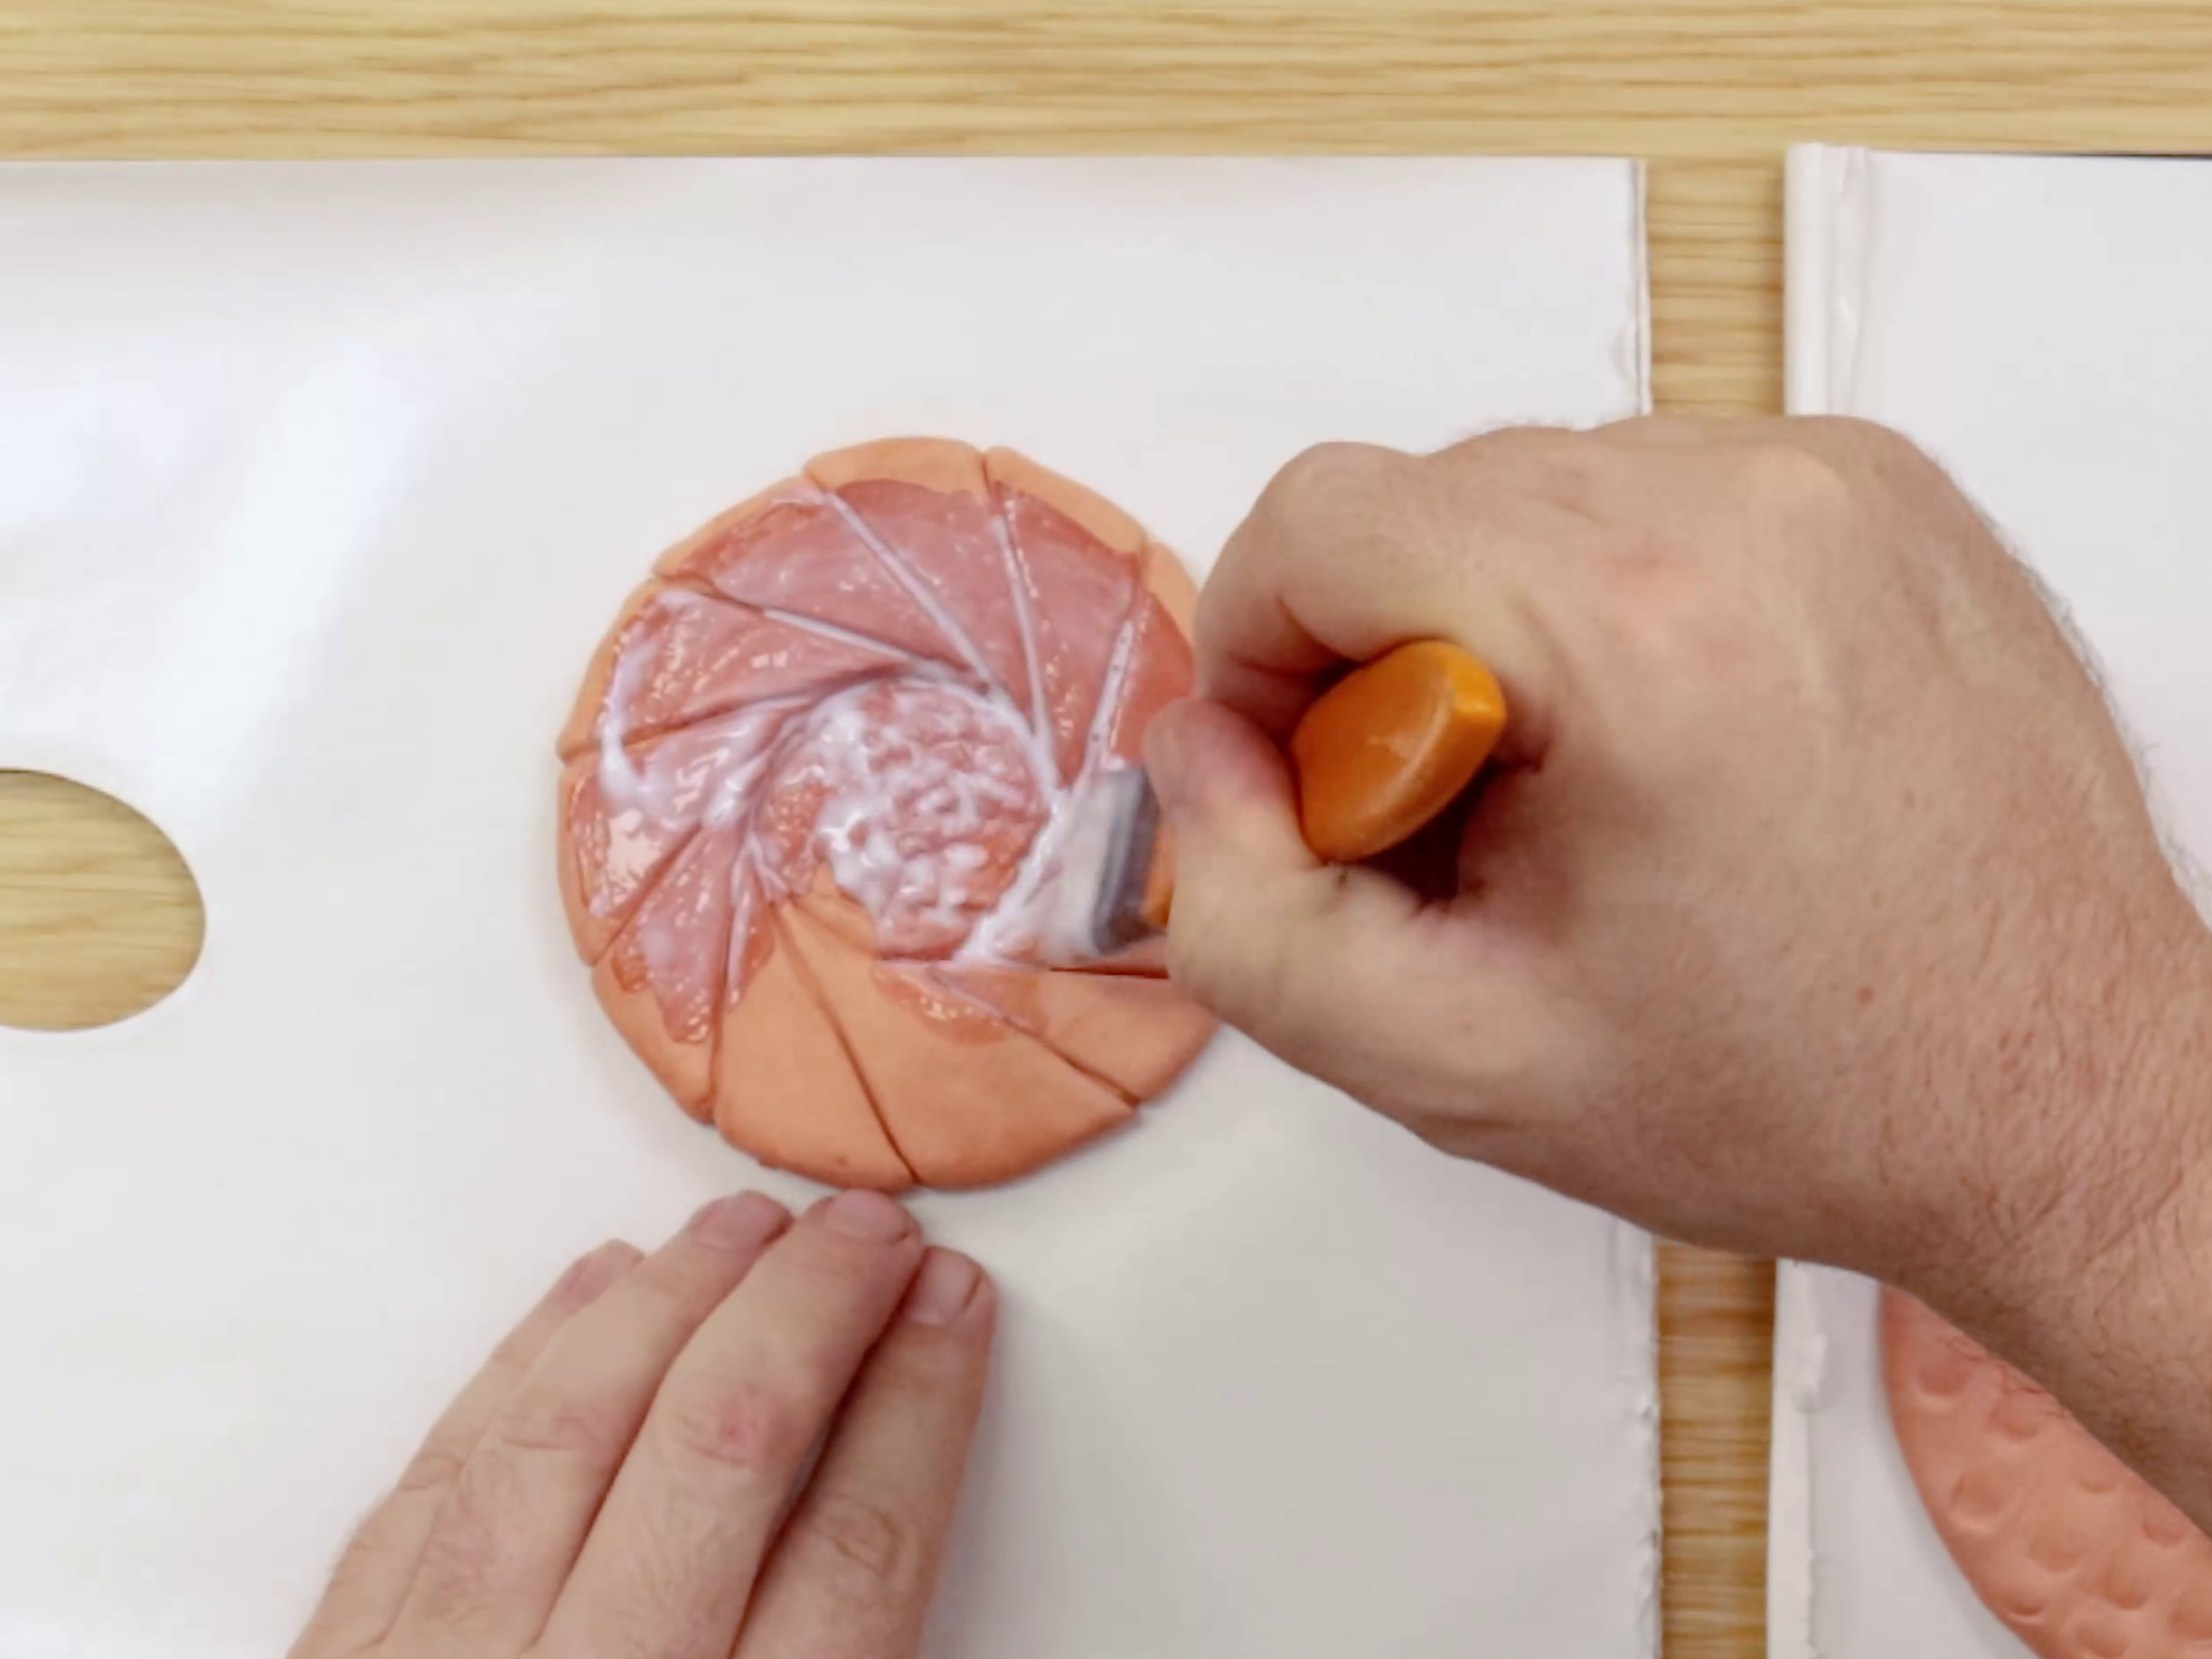
- Leave the coasters to dry for 24 hours to 3 days, depending on thickness and humidity
- Mix equal parts PVA glue and water to make a thin sealer
- Brush the mixture over the coasters – this will soak in and seal the clay surface
6. Acrylic cookie painting
- Mix a dark umber base tone using white, lemon yellow, orange, scarlet, and black
- Create a lighter biscuit tone by adding more yellow, orange, and white
- Brush the darker tone into the crevices of the choc chip and jam drop biscuits
- Once touch-dry, dry-brush the lighter tone over the top to highlight texture
- For the jam drop, mix scarlet red with a little medium green to make a crimson tone and apply to the centre of the biscuit
- Then layer pure scarlet over the jam for extra dimension
- For the chocolate digestive, combine scarlet, lemon yellow, phthalo blue, medium green, and black until rich and dark, painting over the whole biscuit
- For the sprinkle cookie icing, mix scarlet and white, then paint over the biscuit top
- Mix small amounts of white, yellow, orange, green, and blue with white for pastel sprinkles colours, and paint on the small dots
- Leave to dry completely before use
Enjoy your new biscuit coasters with a cuppa and a sweet treat. You can even try out the chocolate chip cookie recipe on our website and share your bakes with us! 🍪
- Air Hardening Modelling Clay 500g
- Easy Clean Palette
- Palette knife
- Paintbrush
- Roller, glass or wine bottle (for rolling clay)
- Acrylic Satin Intro Set
- Craft PVA Glue
- Pre-cut cork backing (2mm thick)
- Plastic cup (for glue mixture)
- Water
You may also like

Peacock drawing in watersoluble oil pastels


How to use ceramic paint on a thrifted plate


