


DIY pumpkin candle holder
1. Air dry clay pumpkin
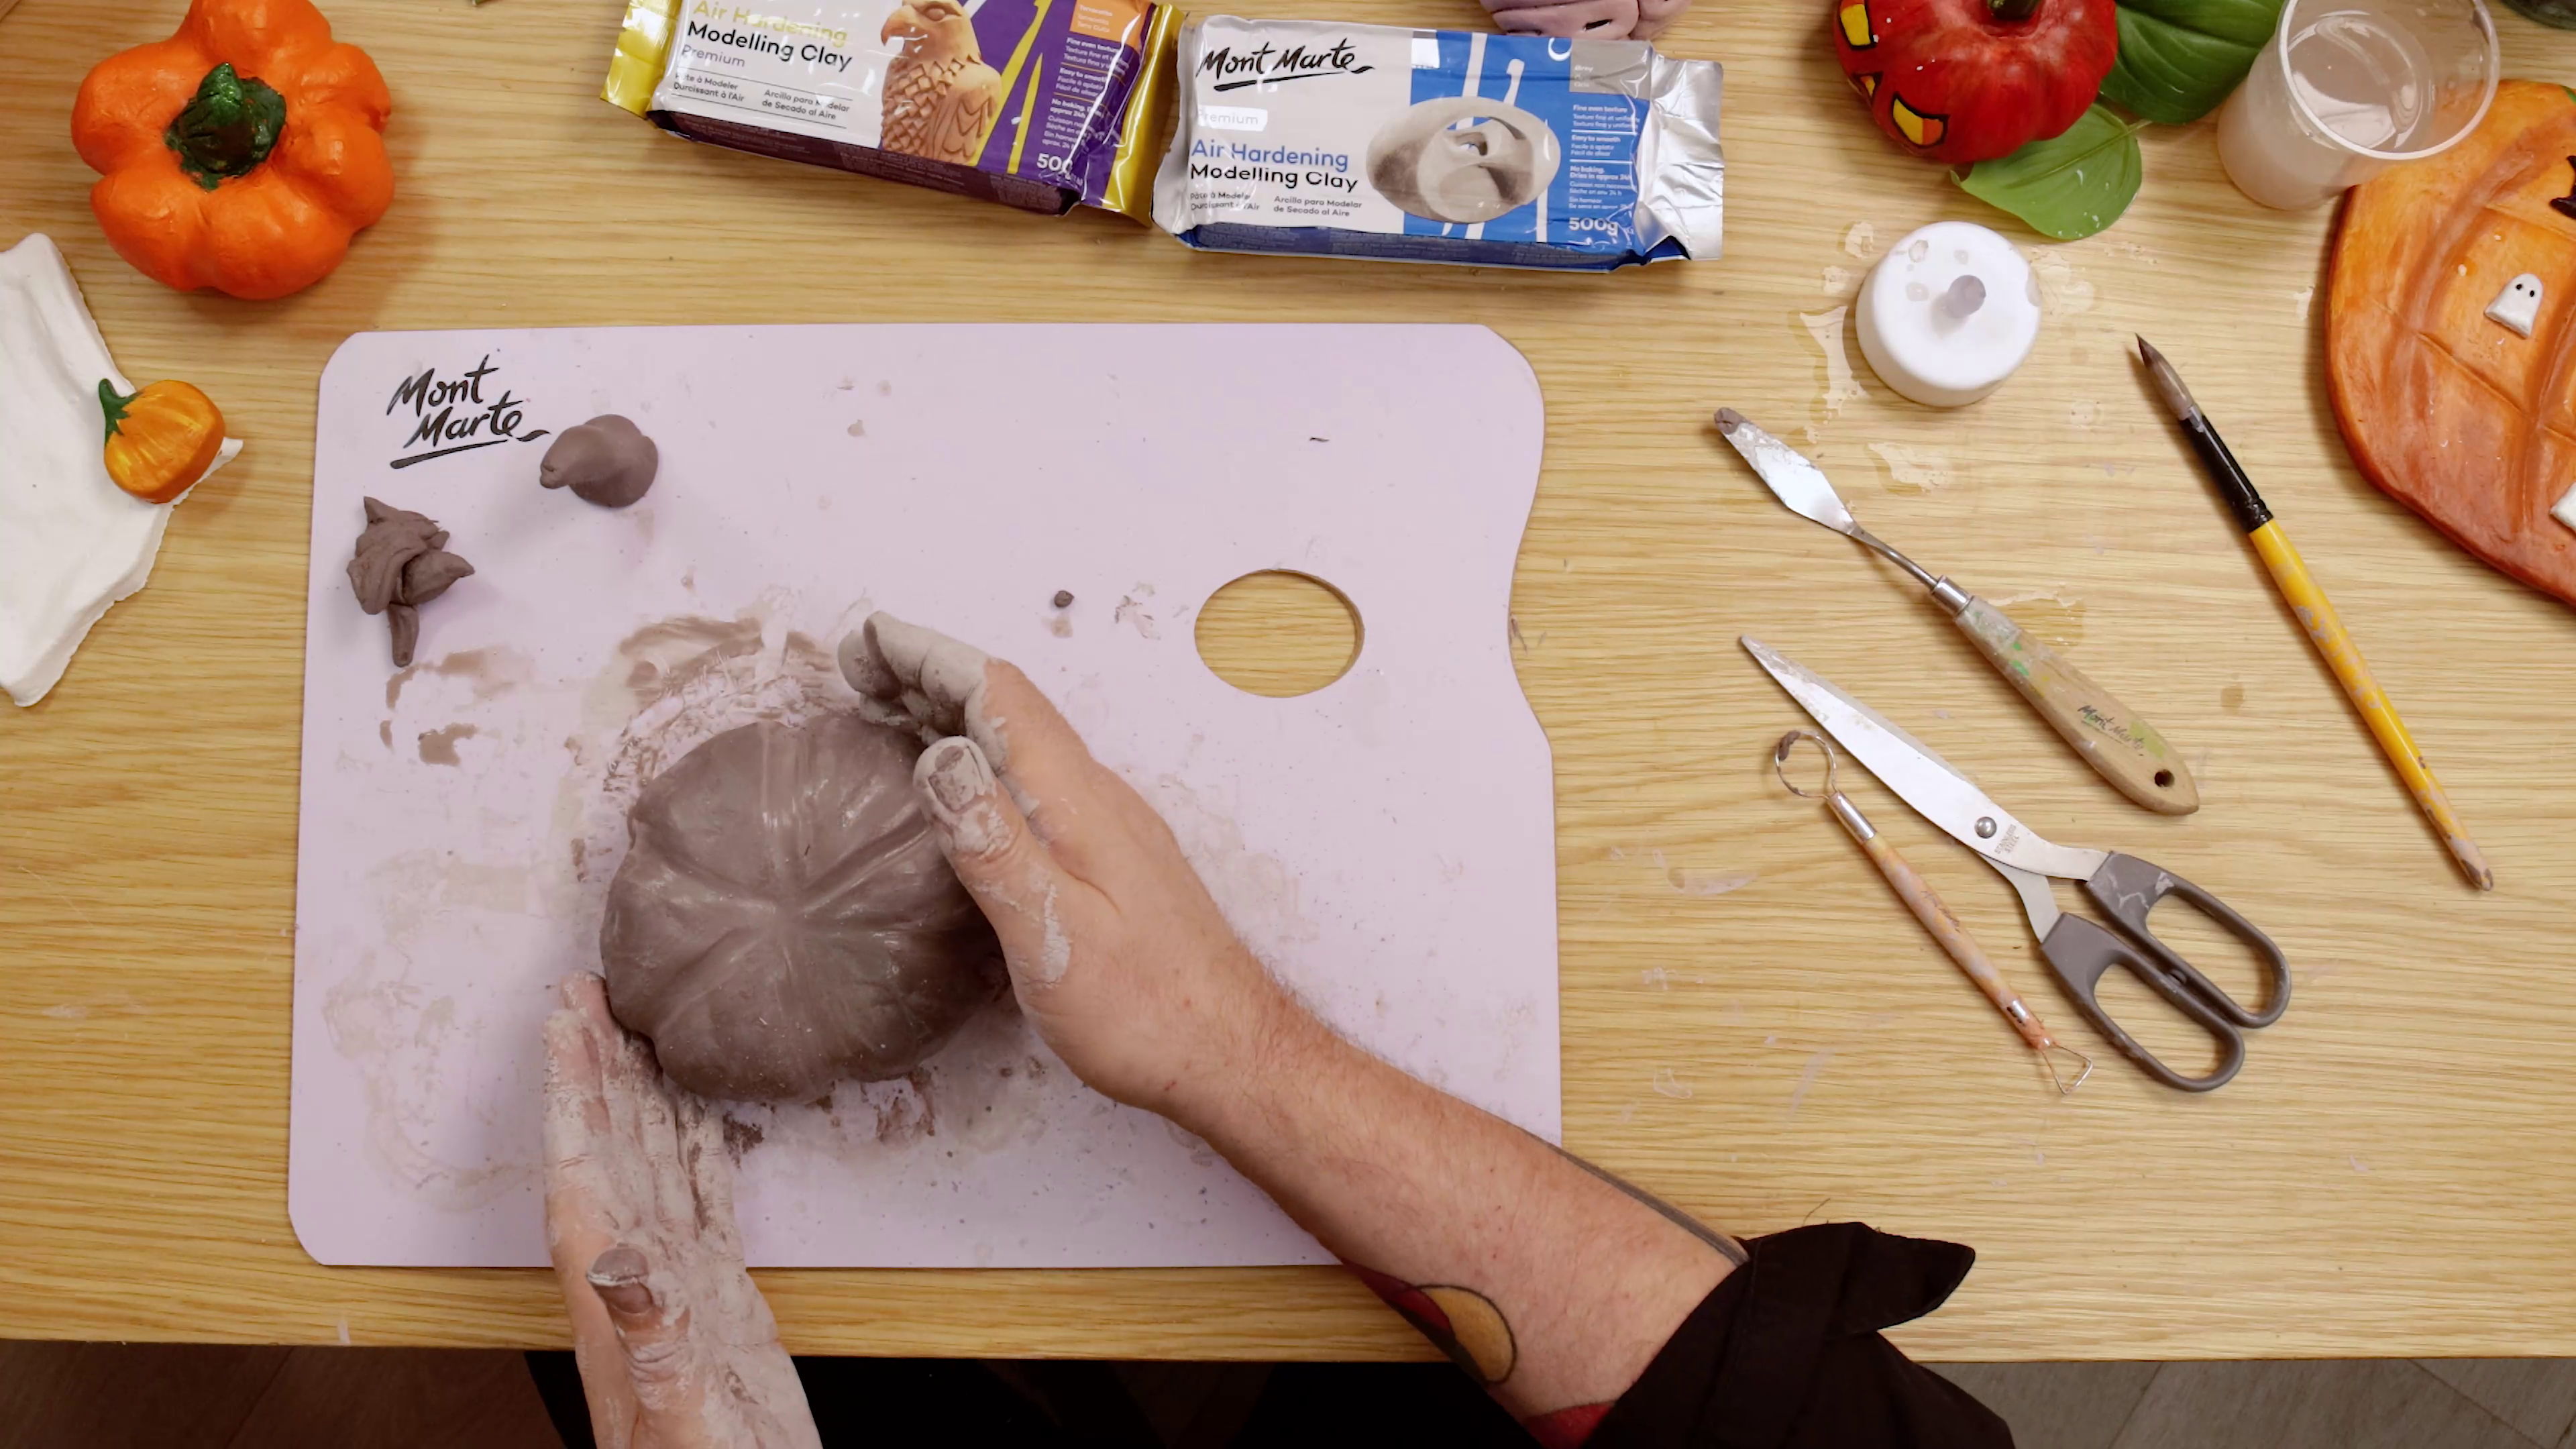 - Roll clay into a ball and press your thumb into the centre to start a pinch pot
- Pinch while turning the ball to form a bowl roughly a couple of centimetres thick
- Shape the outside into a rough pumpkin shape
- Wet your fingers and create vertical grooves gently for the pumpkin ridges
- Optional: Cut small V-shapes at the base, then rejoin and smooth for a more rounded shape
- Add additional support by placing a compact foil ball inside – this stops the clay sagging!
2. Air dry clay jack-o'-lantern
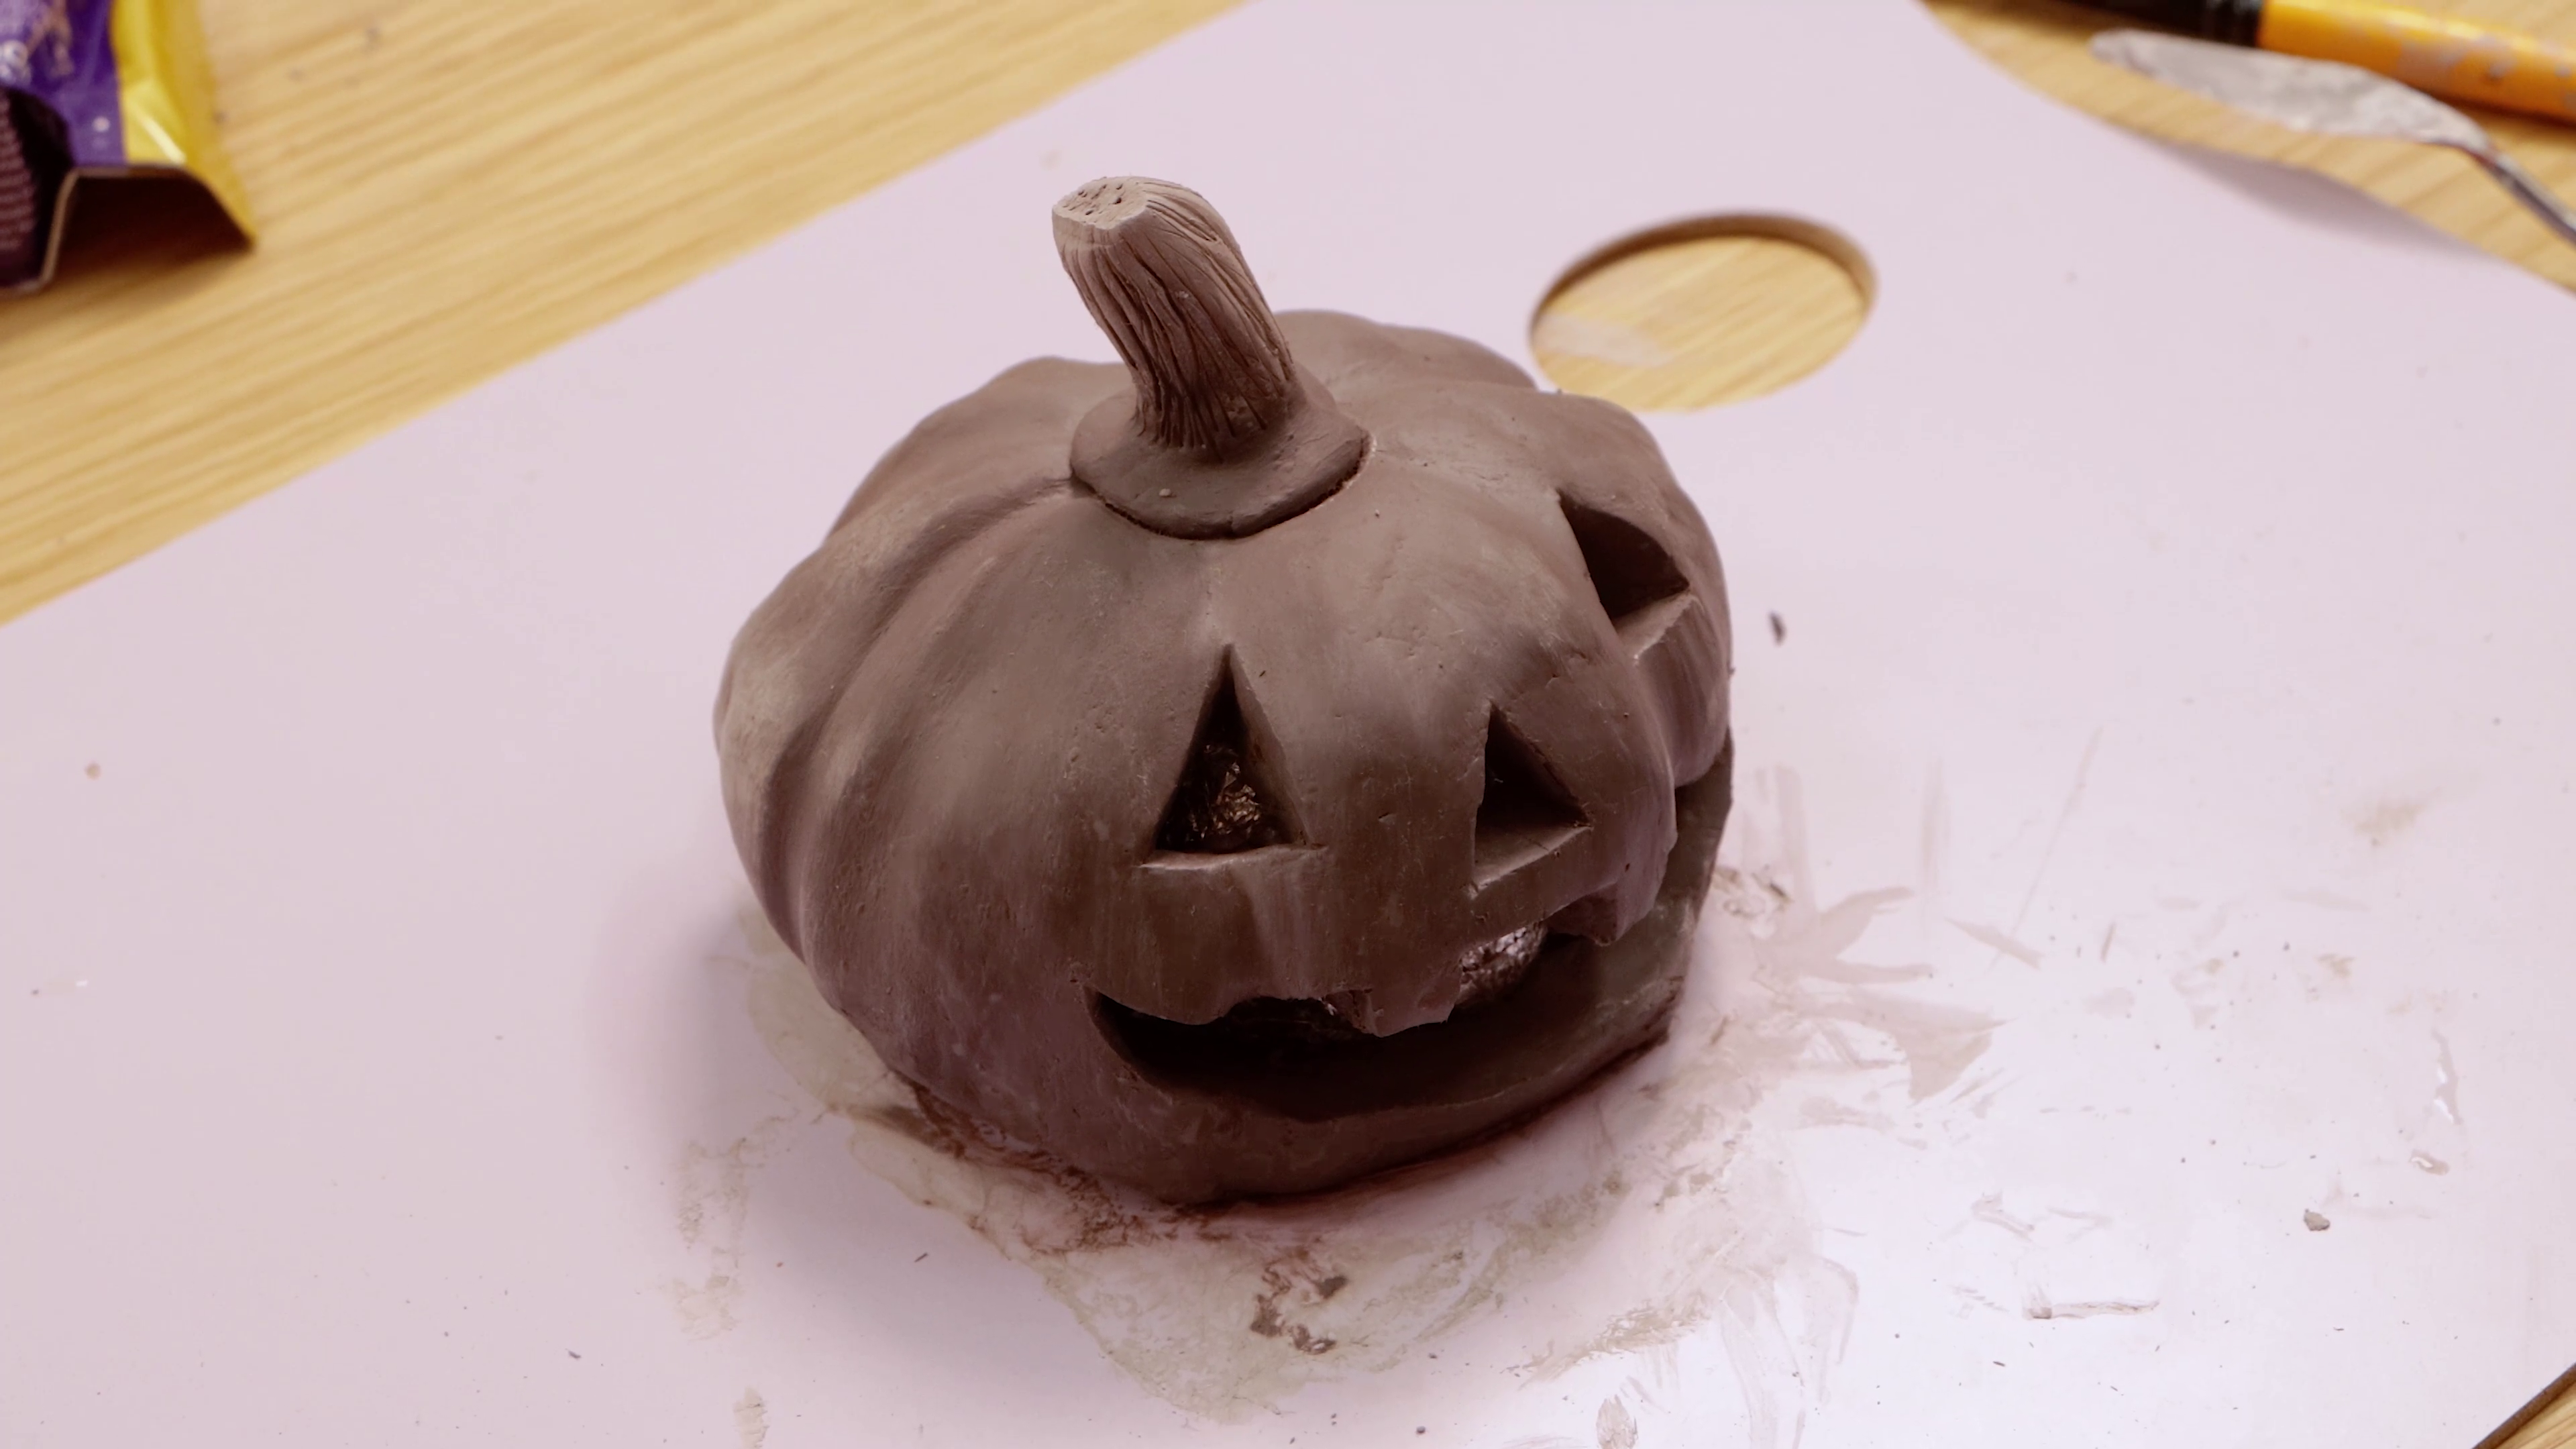
- Make a small clay stem, flatten the base and position it on top of your pumpkin
- Score the base of the stem and the top of the pumpkin and press together firmly
- Let the pumpkin firm up to the leather-hard stage (partially dry but still carvable)
- Carefully carve eyes and a mouth with a hobby or utility knife
- Go spooky, goofy, cheerful, or whatever you like – just take your time and carve safely
3. Acrylic paint on pumpkin
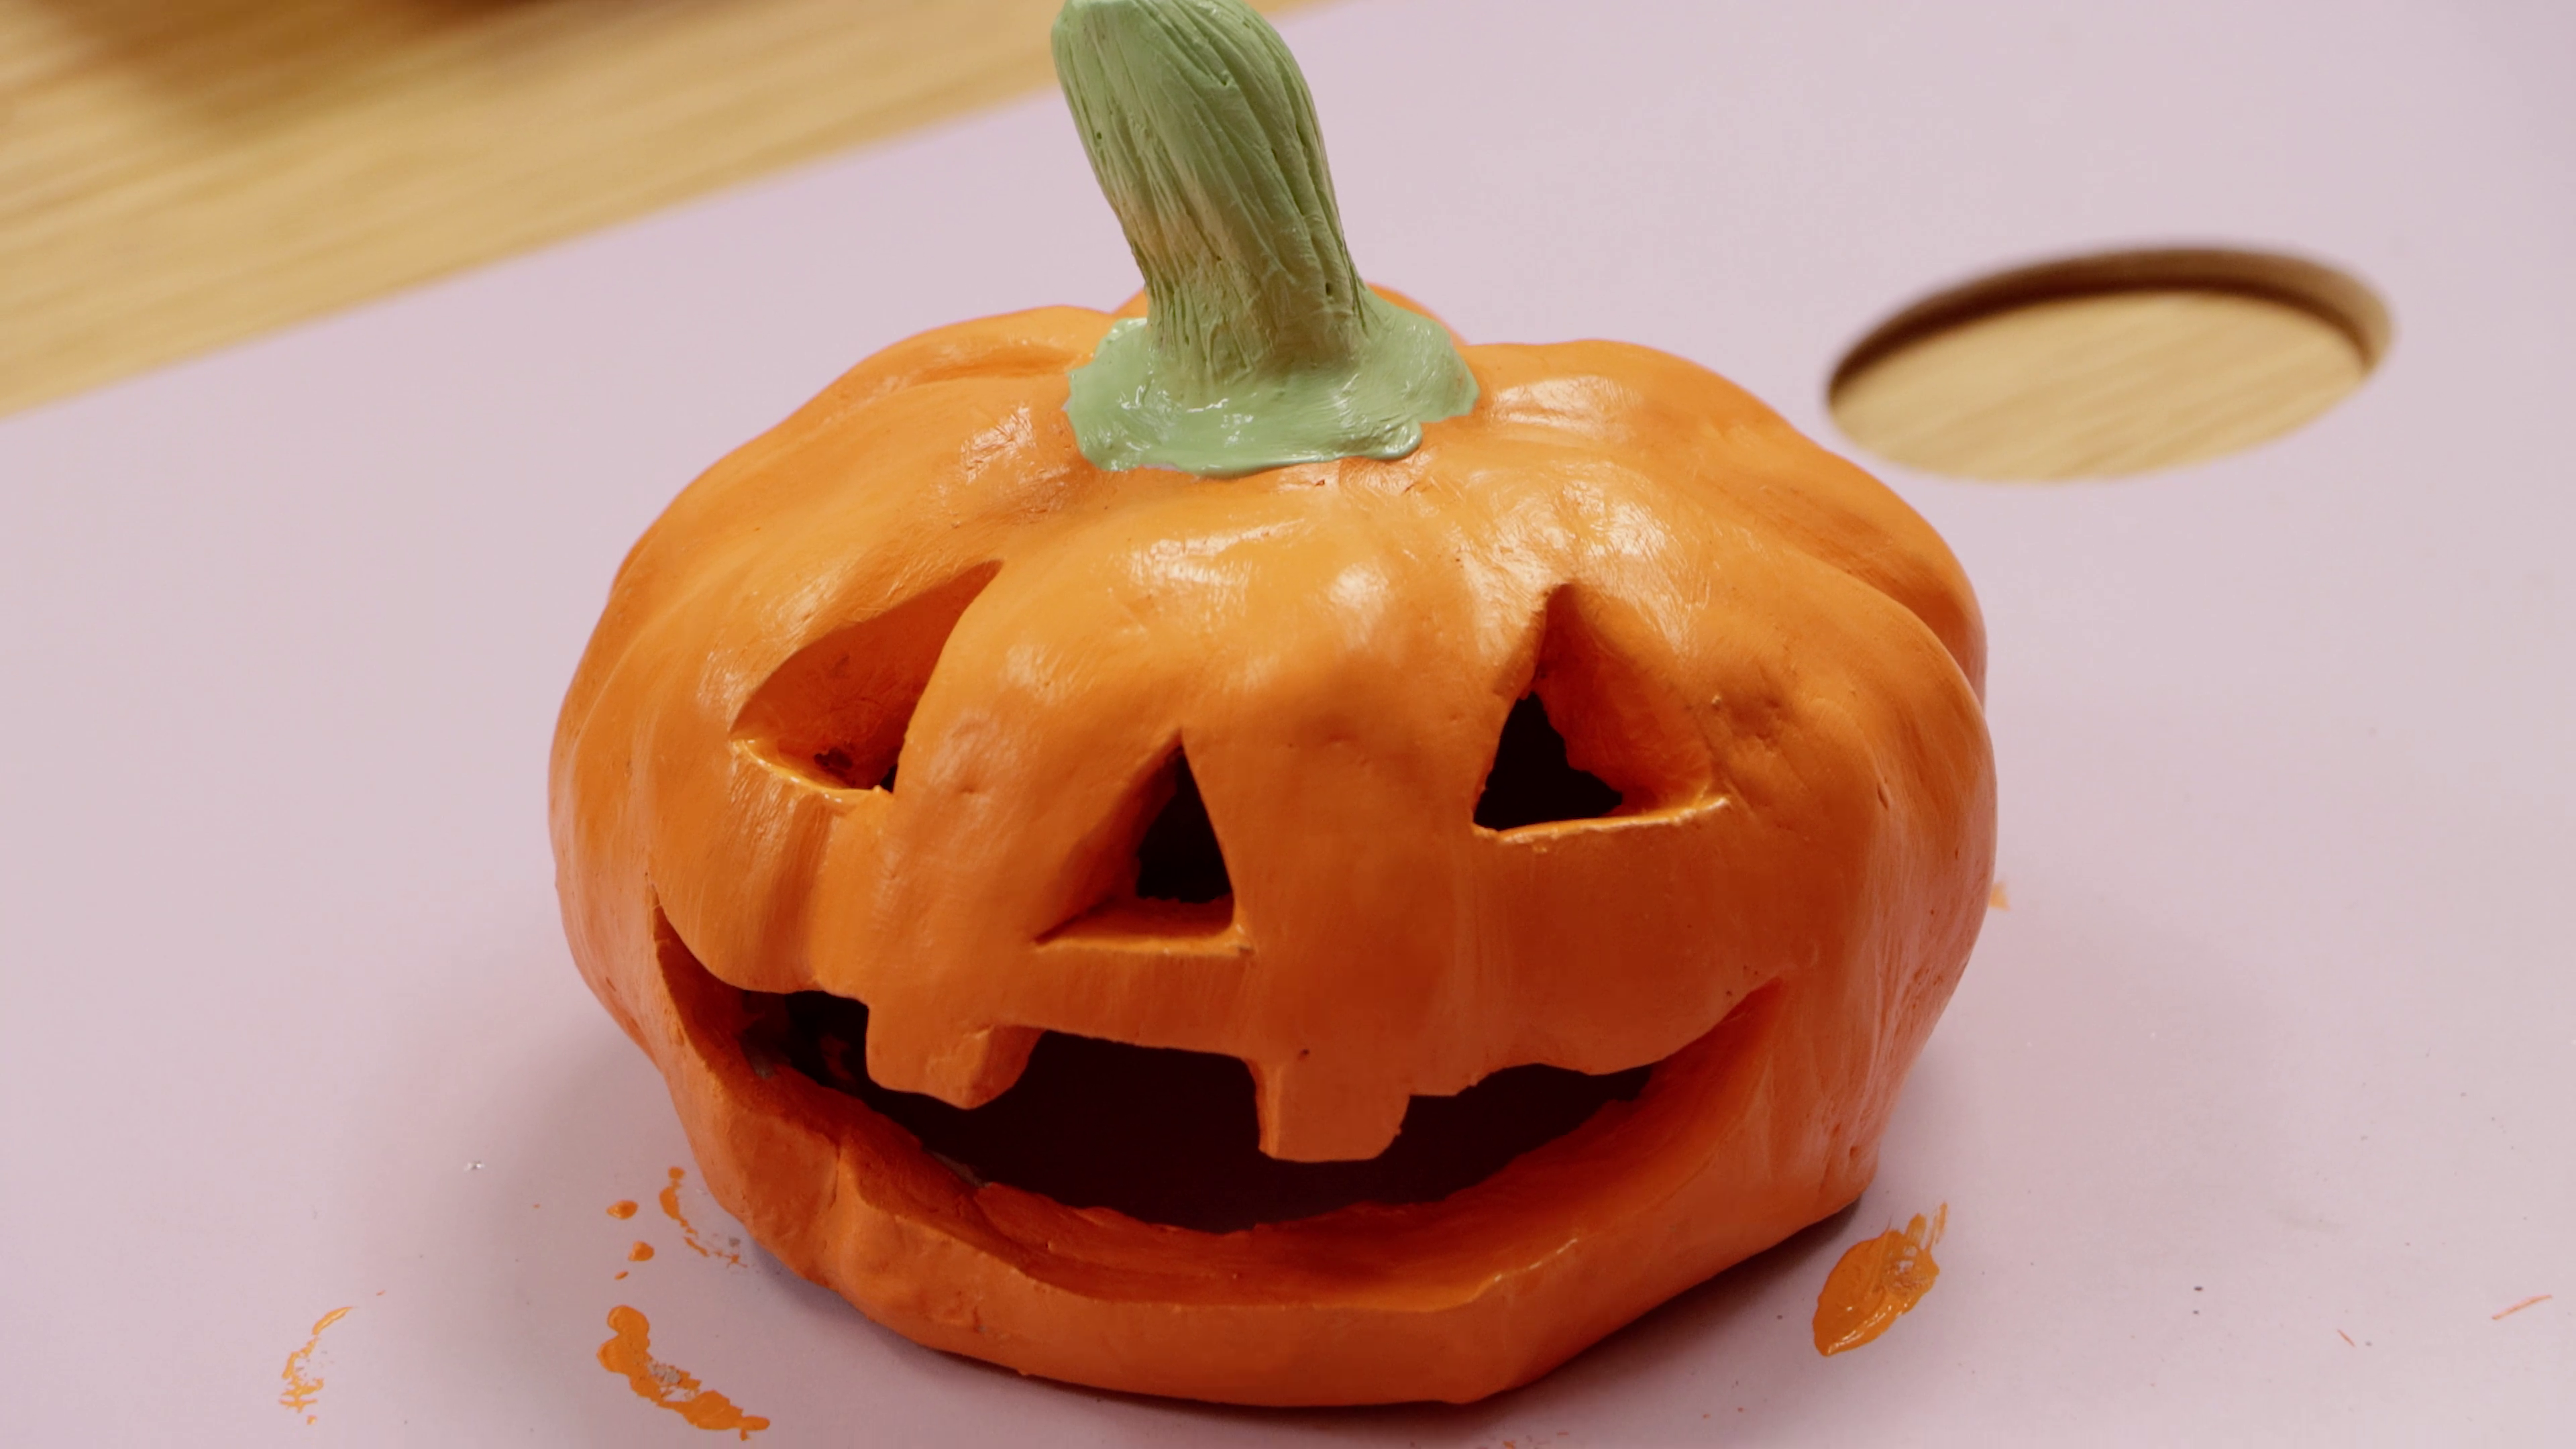 - Allow the pumpkin to dry completely (it will lighten in colour and feel lighter once dry)
- Paint the pumpkin whatever colour speaks to you (we went with classic orange!)
- Add small details like stem colour and soft highlights, then let the paint dry fully
- Place a battery tealight inside and enjoy the glow
Super simple and reusable for many Halloweens to come! Happy spooky season, everyone 🦇🎃
- Air Hardening Modelling Clay – Grey
- Modelling tools (hobby knife, palette knife) or a butter knife and toothpick
- A couple of paintbrushes
- Acrylic paints: Orange, Sap Green, Titanium White
- Small ball of aluminium foil (support while drying)
- Battery tealight
Safety: Take care with sharp tools and keep little hands clear – maybe kids can draw the face while an adult carves the pumpkin!
You may also like

Peacock drawing in watersoluble oil pastels


How to use ceramic paint on a thrifted plate


