


Make a sea shell air dry clay watercolour palette
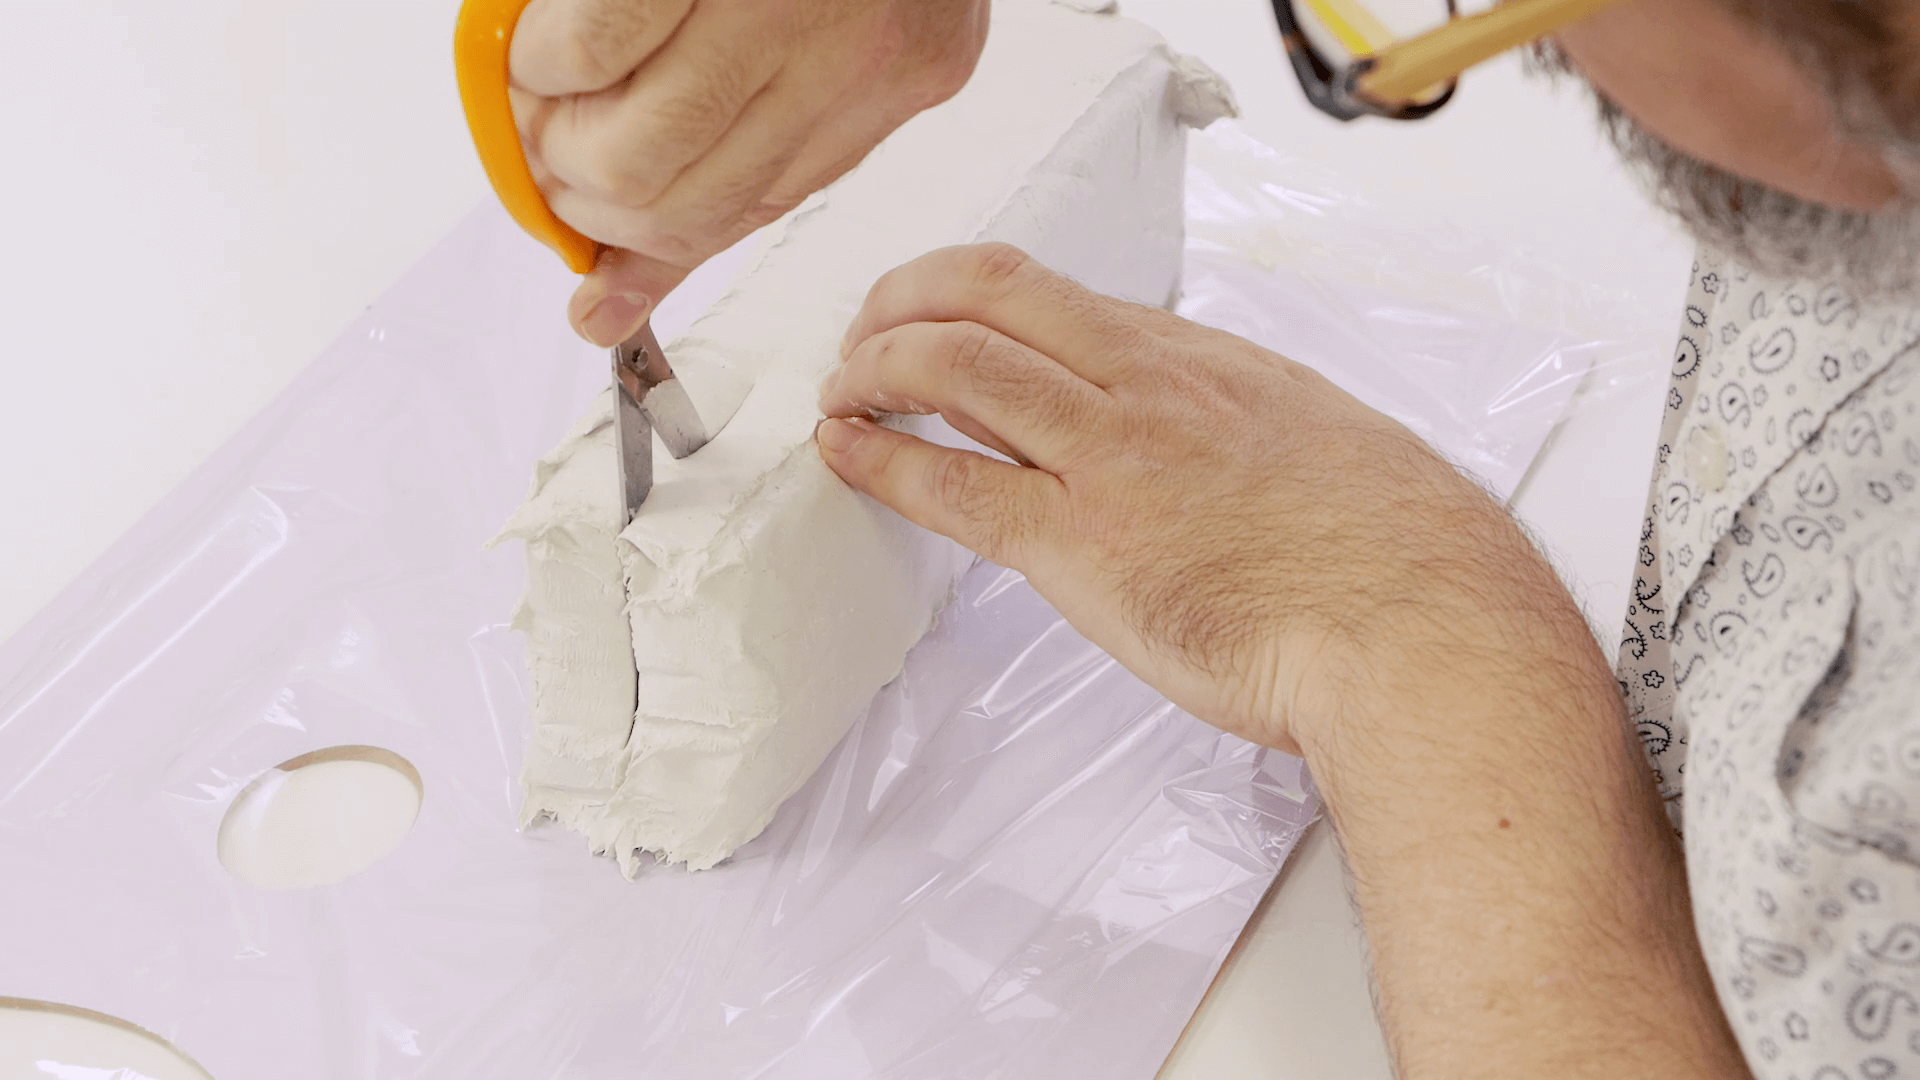
Start by rolling out some cling wrap on your workspace. Place the clay block on its side and use the scissors to cut it in half. Try not to cut right down to the base, instead leave a gap of about 2cm from the base.
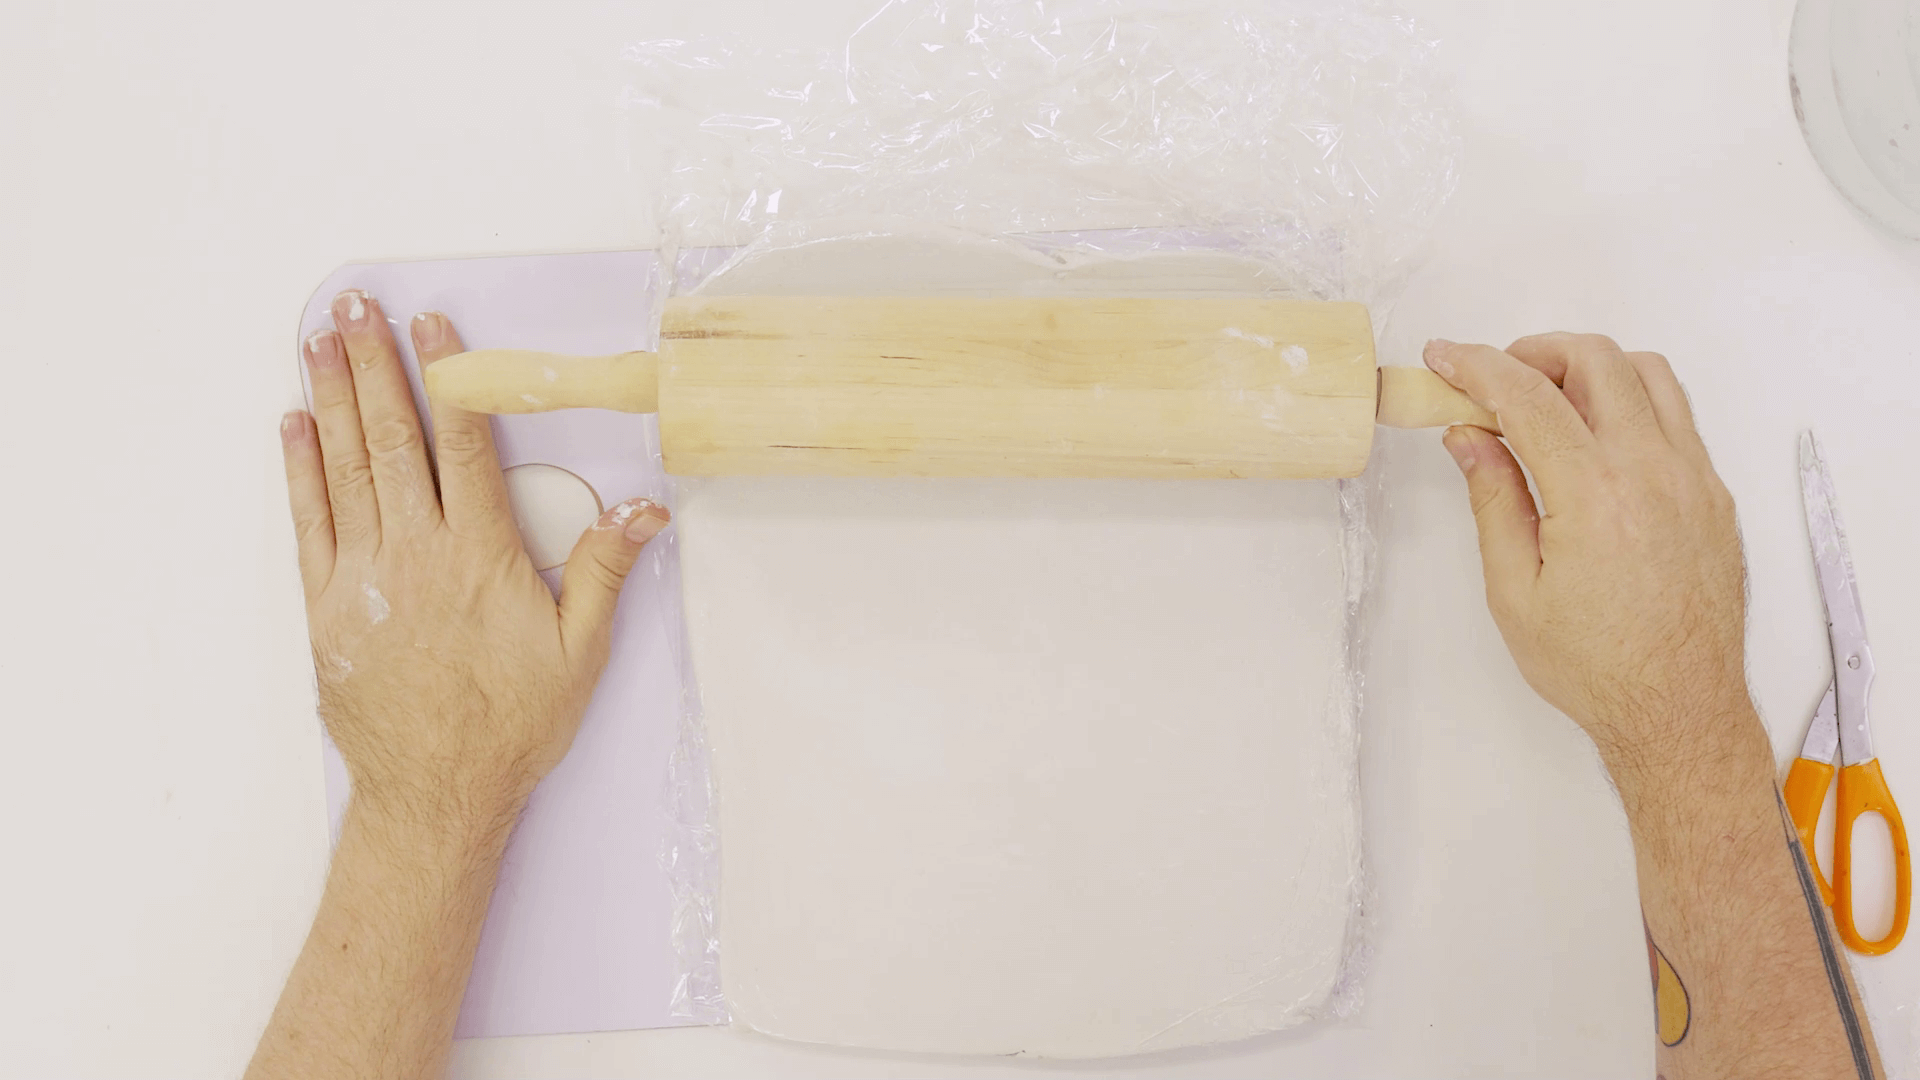
Lay the two halves on the cling wrap and use some water to smooth the surface. Lay more cling wrap over the top of the clay and use the rolling pin to flatten the clay until it’s smooth.
Flip the clay over, move the cling film to the side and use your fingers the blend and join the two halves of clay. Cover the clay again with the cling wrap and roll it flat to a thickness of 20 – 25 mm.
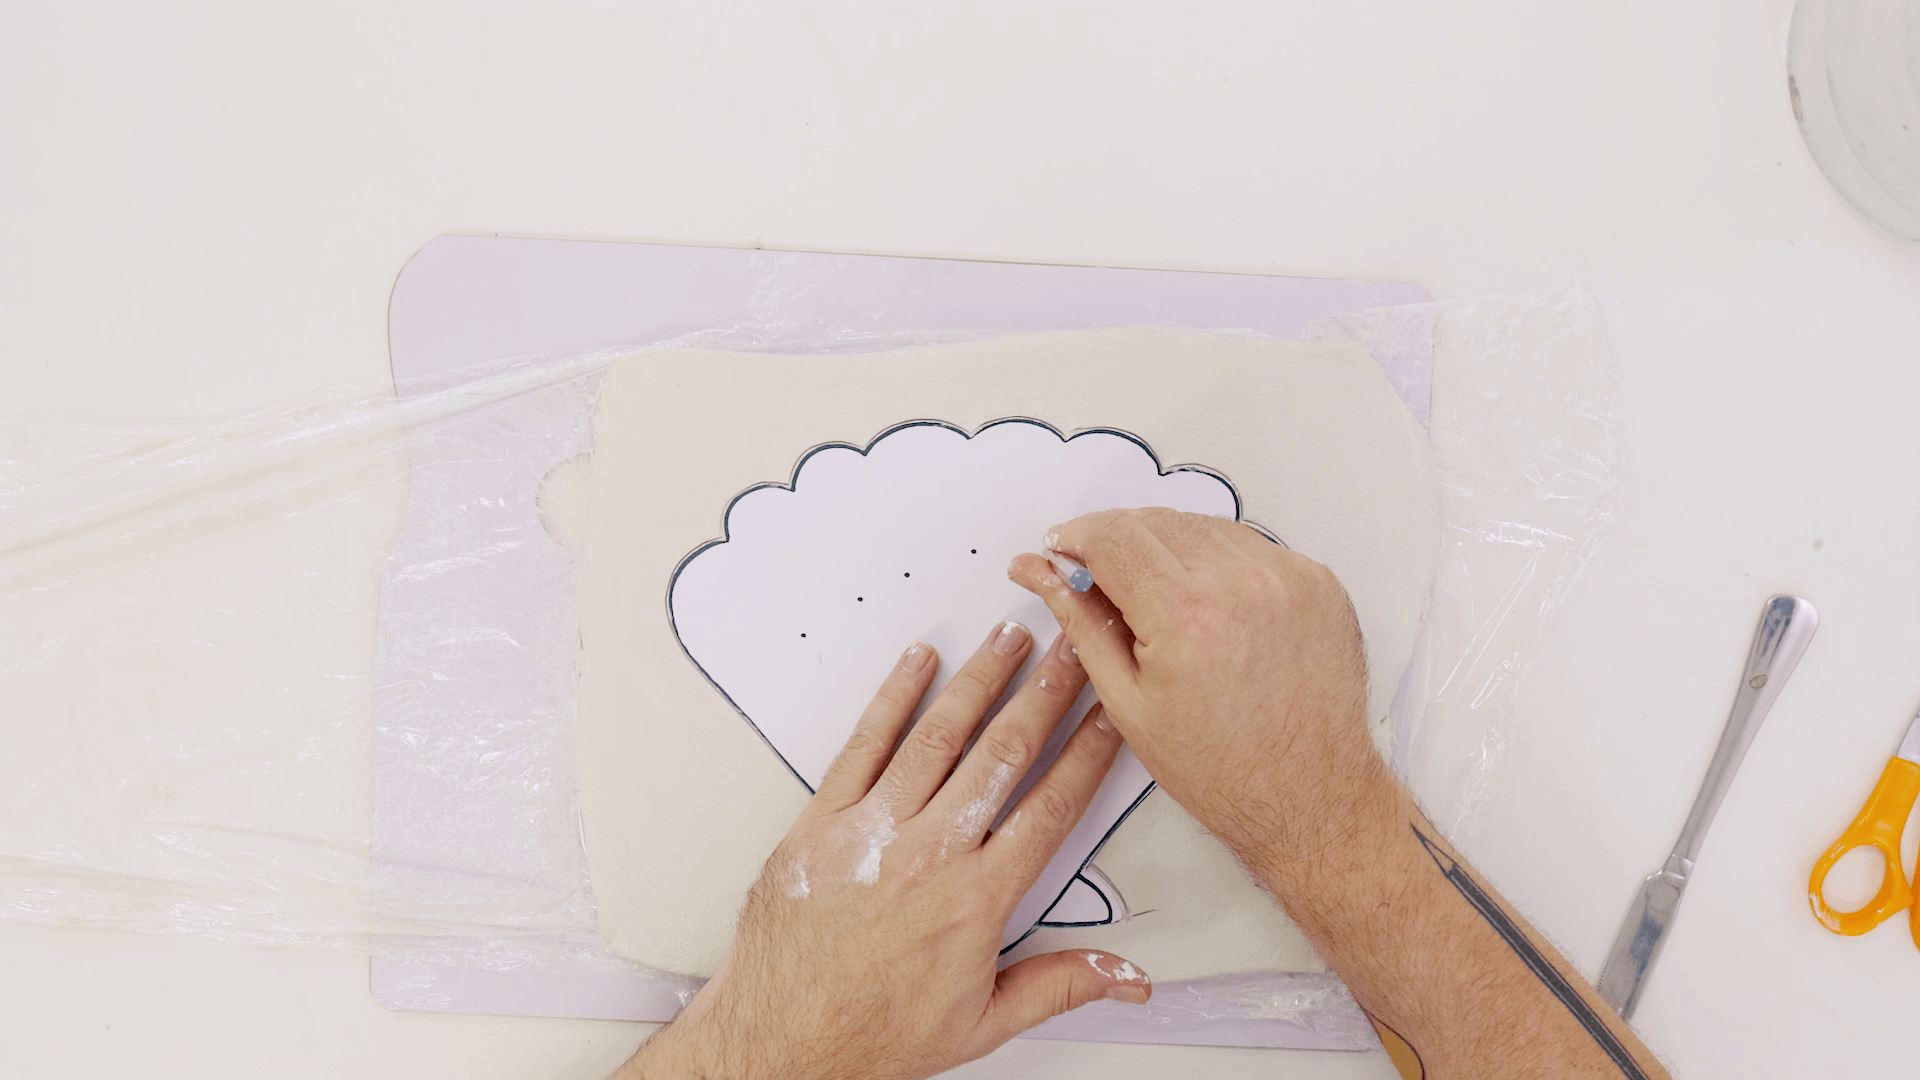
Then, profile cut the shell outline which you can find on the project webpage. Peel back the cling wrap and lay the outline on the damp clay. Use the tip of the butter knife to transfer the outline onto the clay.
The series of dots on the outline mark where the walls of the palette will be. You can use the pencil to transfer the dots onto the clay.
Remove the outline and use the edge of the knife to cut out the shell shape from the clay. Remove the waste clay and store it in an airtight container to use again.
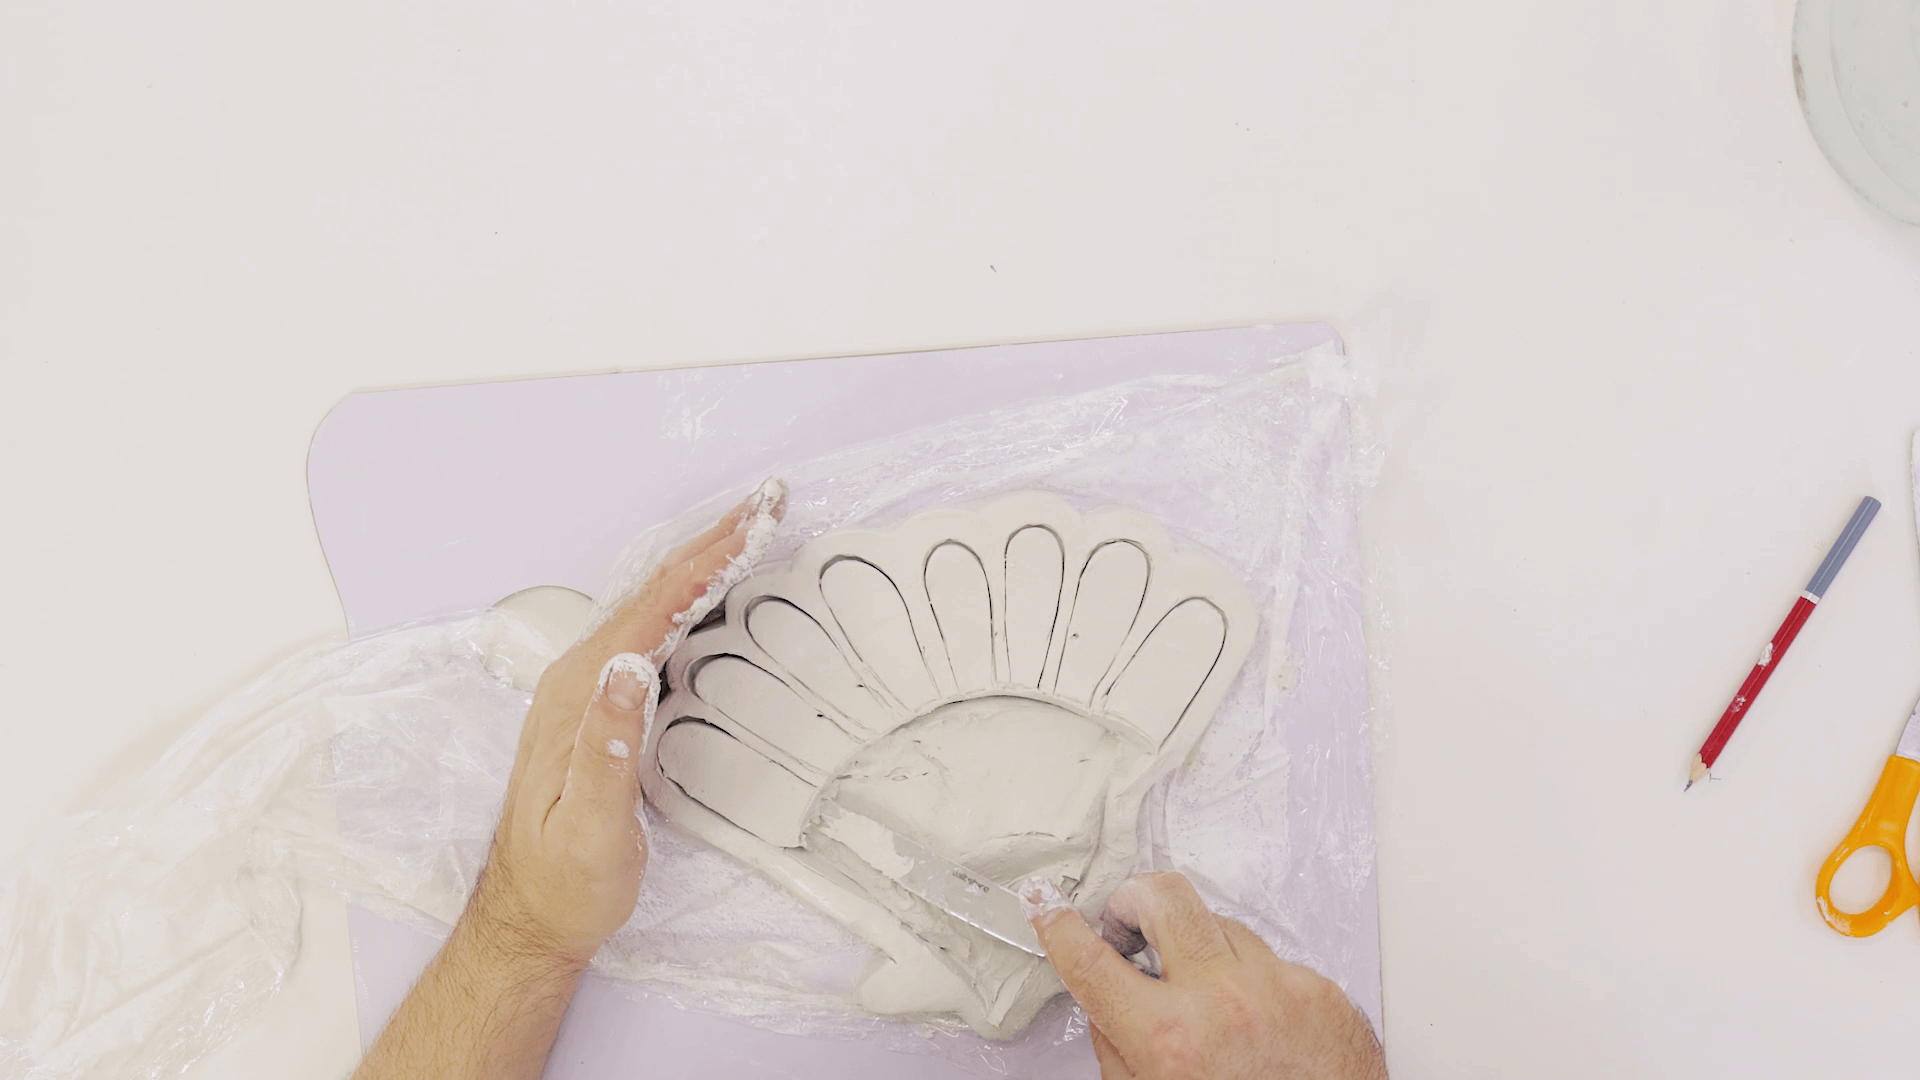
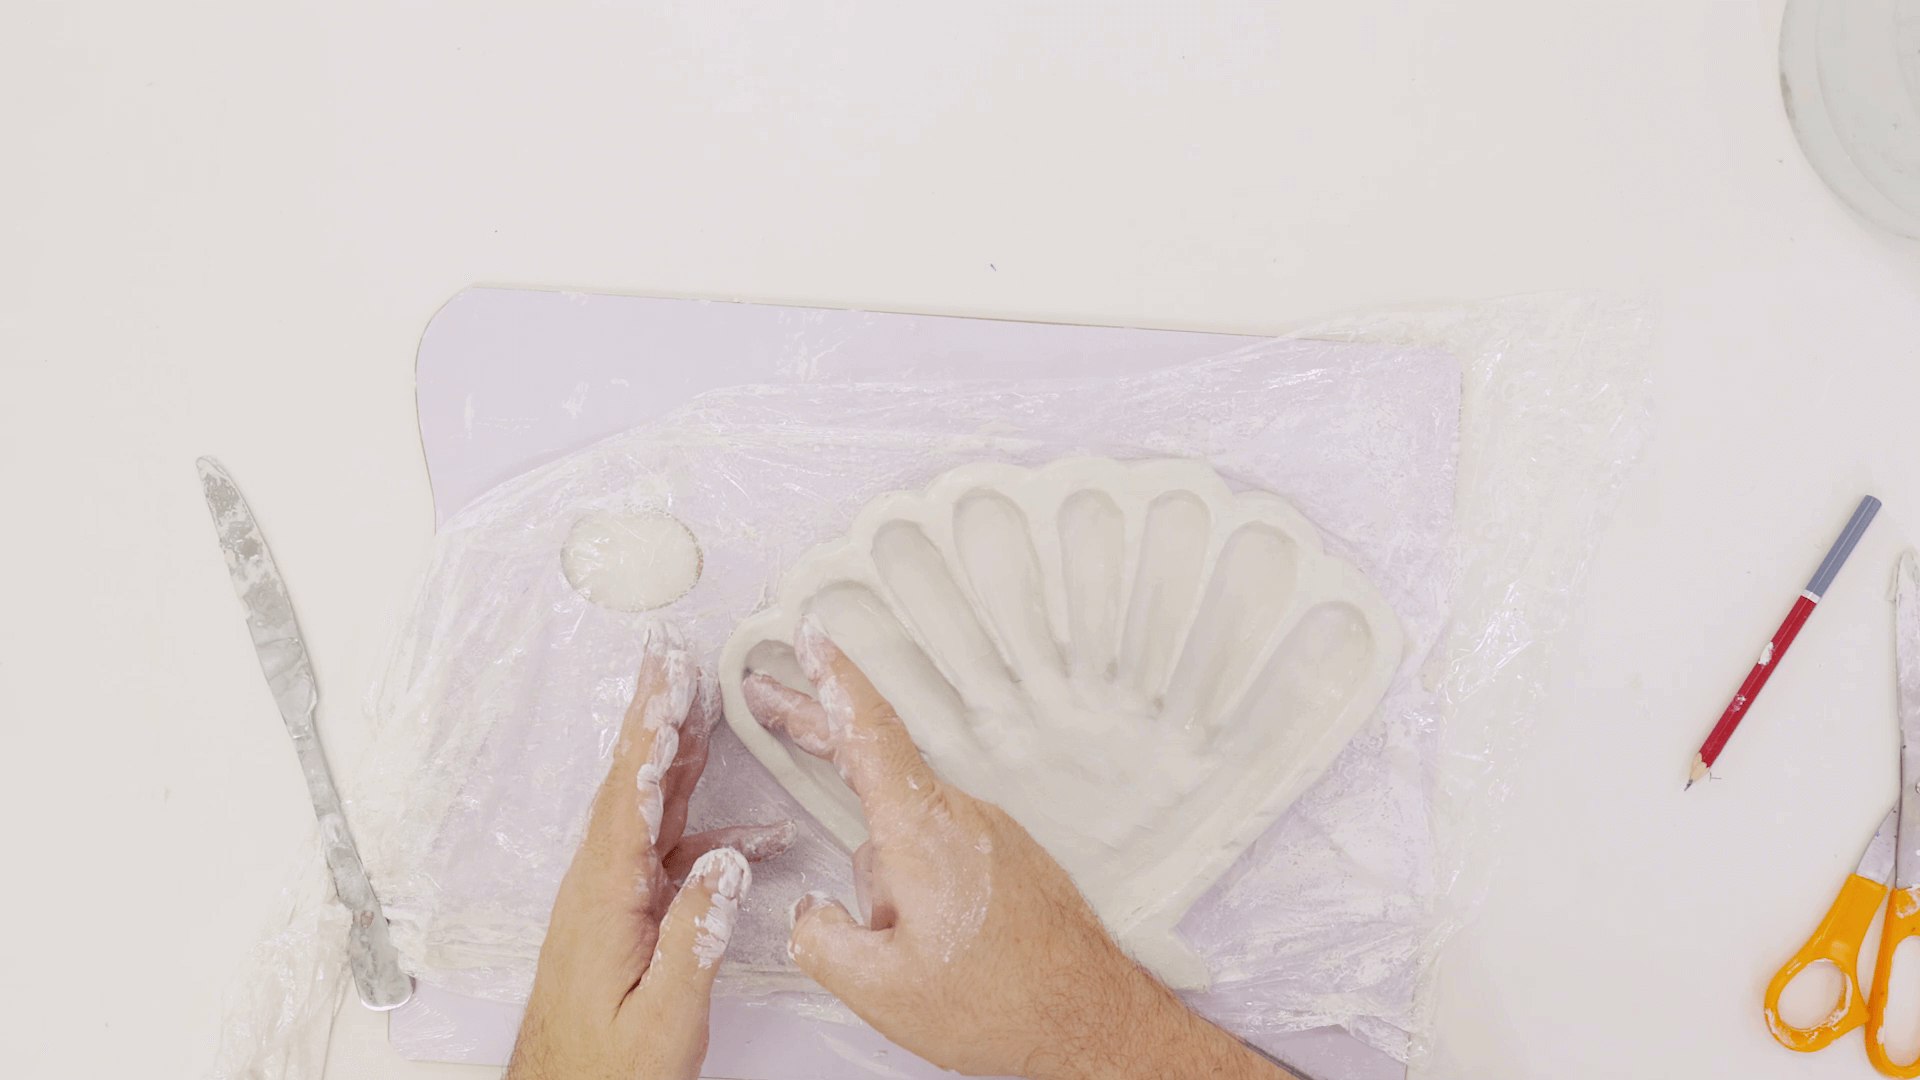
Use the edge of the butter knife to smooth off the side of the palette. The butter knife can then be used to vertical cut the edge of where the internal walls will be in the palette. Aim to cut to a depth of about 15mm. Try to keep the wall thickness about 1 cm.

Once the vertical cuts have been made, use the knife on its side to remove the clay from the inside of each well. Don’t worry if the clay looks rough at this point because you can smooth it off in the next stage.
Use your fingers to smooth off and level out the bottom of each well in the palette. If there are any areas where there has been too much clay removed, you can add bits of clay and blend them in.
The corners can be rounded off with your fingertip.
If the walls between the wells are thin, again, you can add more clay to thicken them and smooth them off.
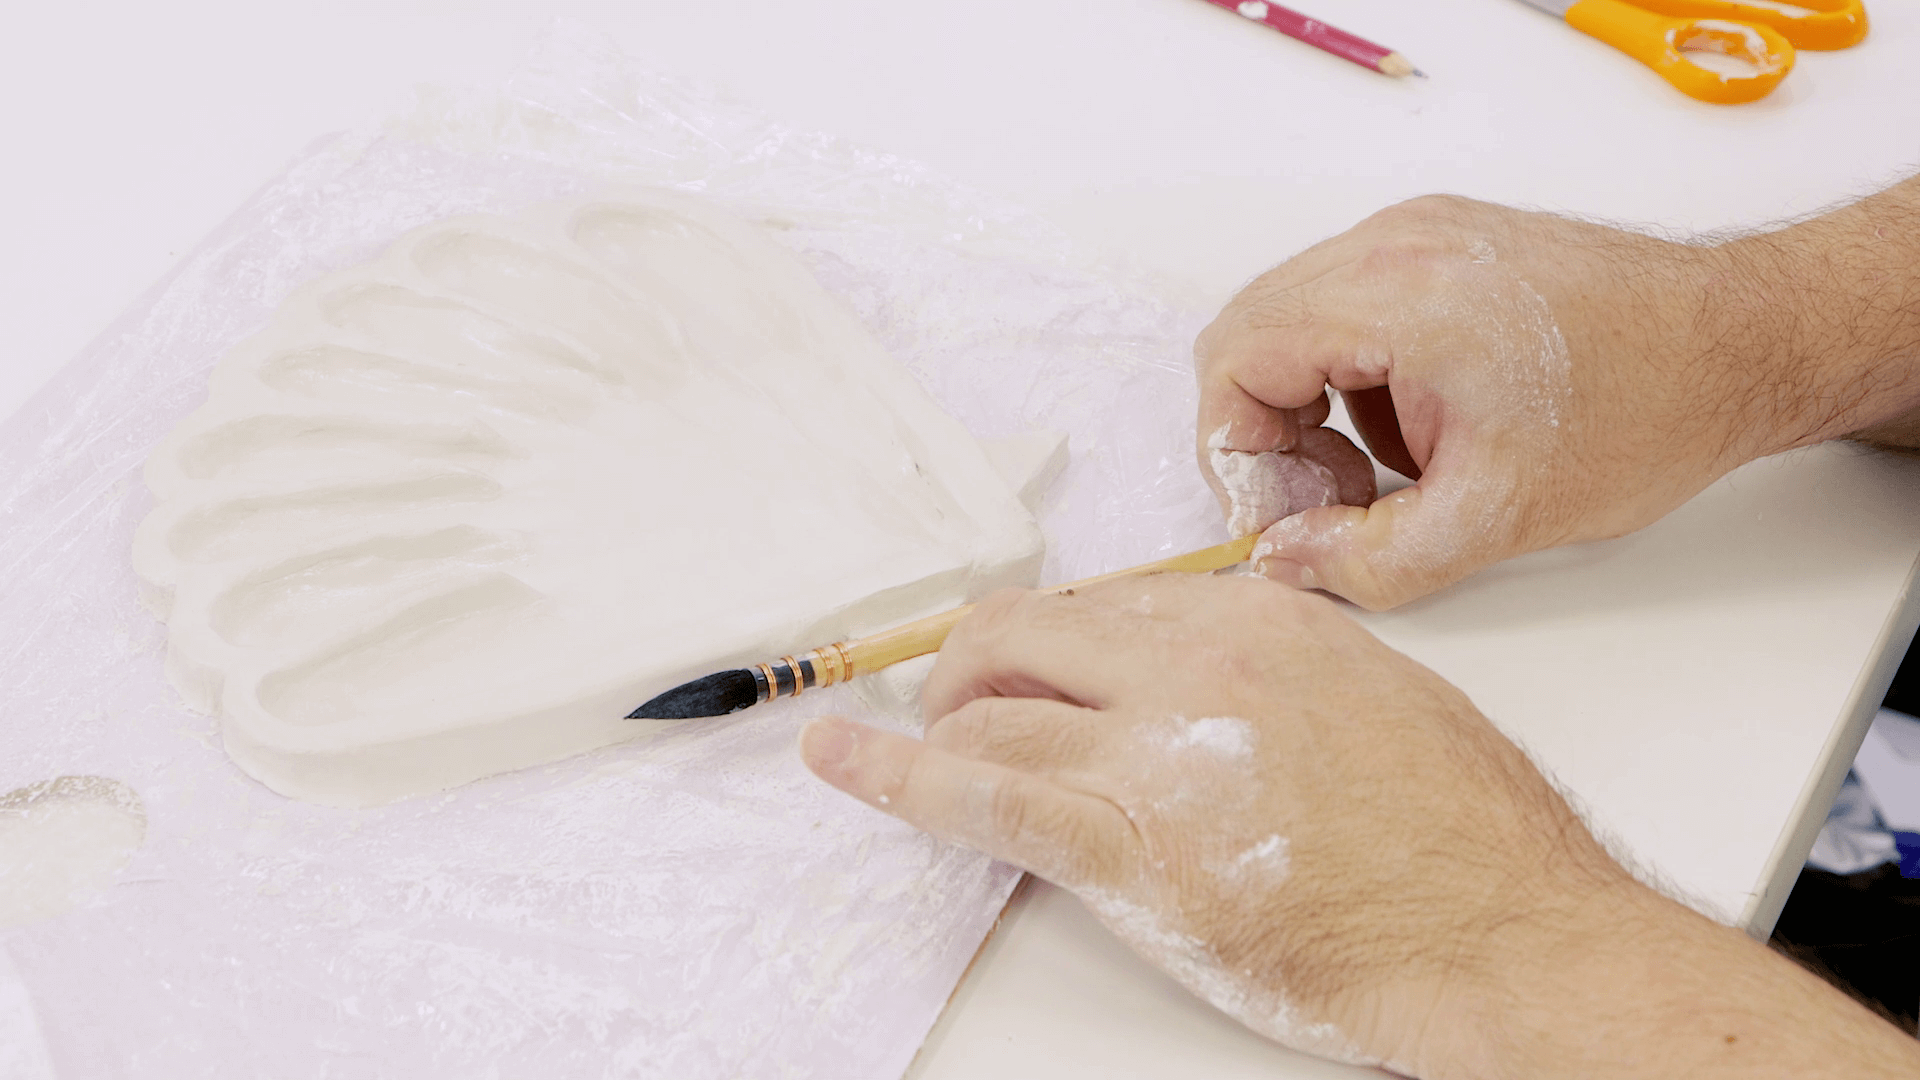
At the bottom of the shell, there are two shapes that can be halved in size. Use the butter knife to create to firstly make a vertical cut, followed by a horizontal cut. Remove the waste clay and smooth the shapes.
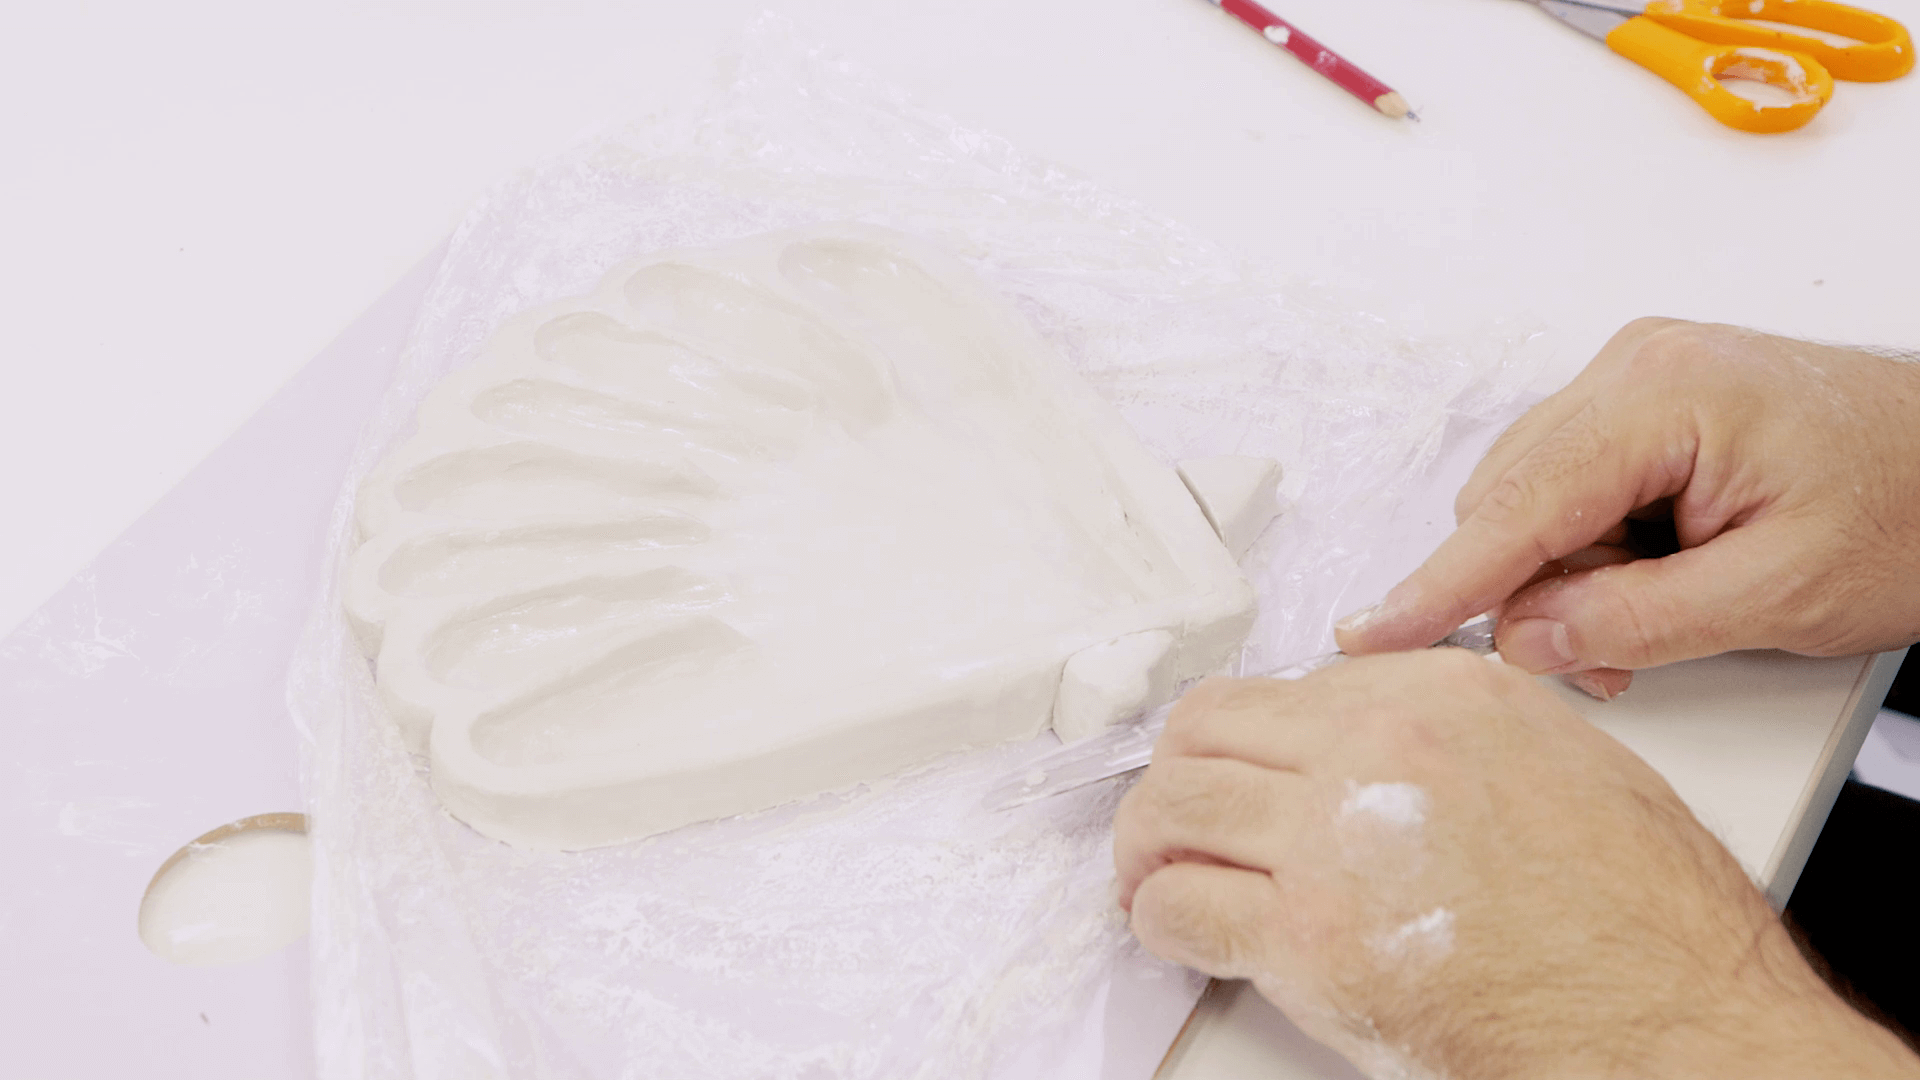
Then, press the handle of a paint brush into the two shapes. These can be used as a brush rest once the palette is finished!
Leave the palette dry thoroughly before moving on to the next step.
Once dry, pour a thin layer of the Gloss Clay Varnish directly into the palette and use the soft paint brush to even it out across the palette. Allow the top to dry before painting underneath the palette.
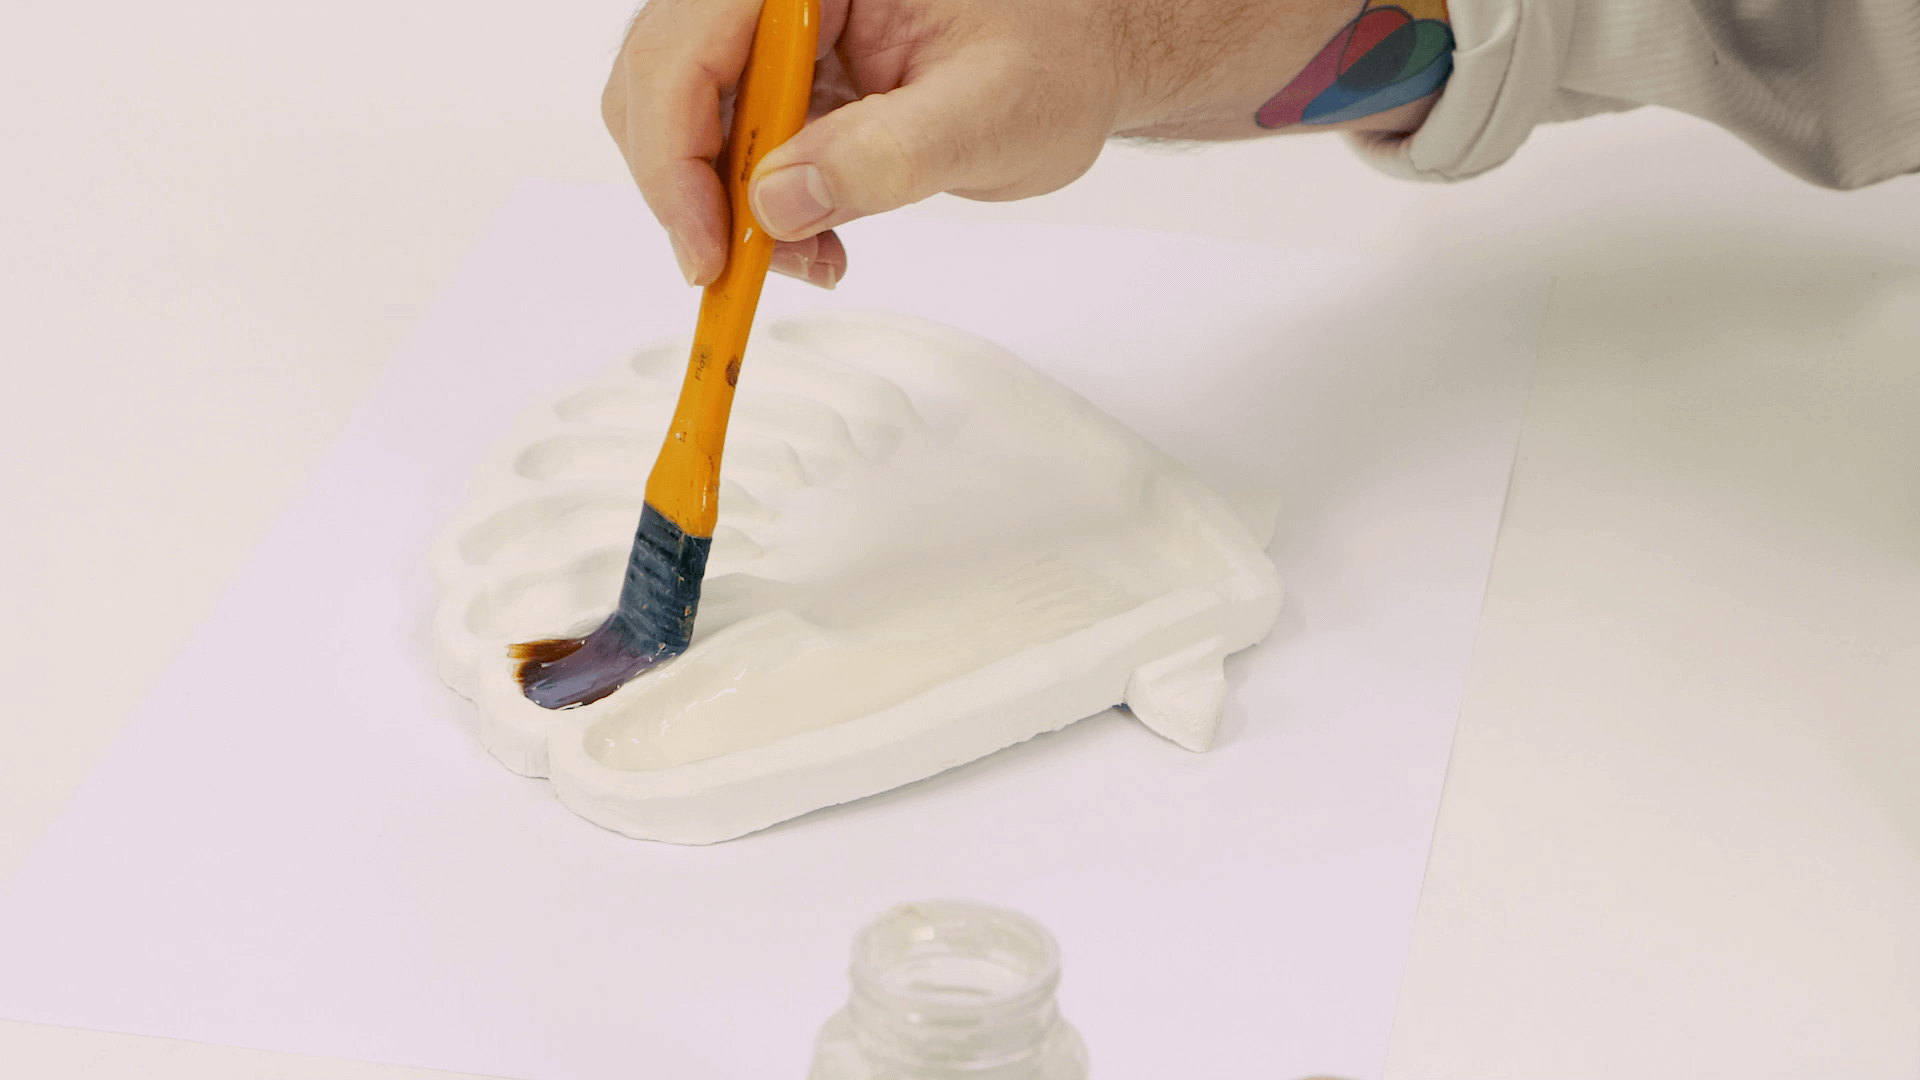
Allow both sides to dry before applying the second coat of varnish over the entire palette.
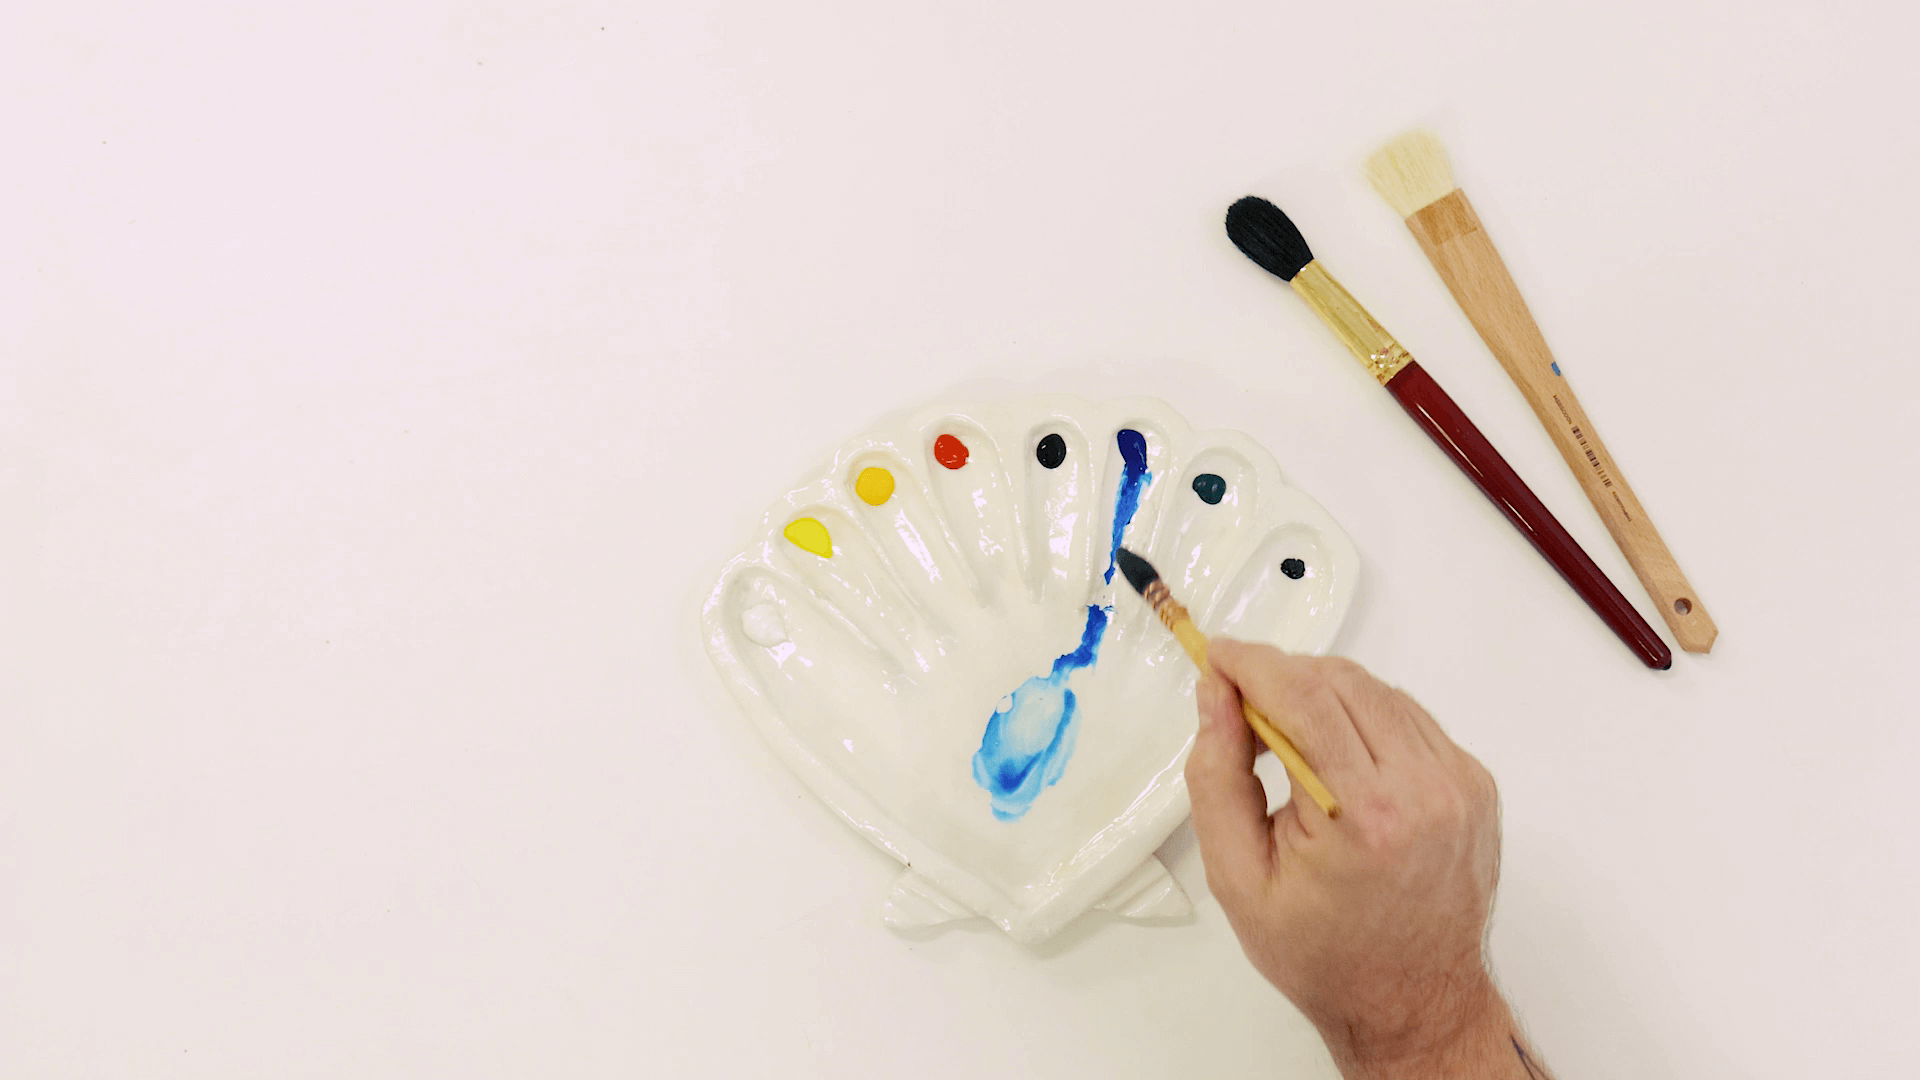
Once the second coat is dry, you’re ready to fill your palette with watercolours and dive right in!
Materials:
- MMSP0007 Air Hardening Modelling Clay Premium 2kg – White
- MMSP2001 Gloss Clay Varnish Signature 120ml
- MPB0054 Artist Acrylic Brush Premium Taklon Flat Wide 25mm
Extra materials:
- Butter knife
- Scissors
- Rolling pin
- Cling wrap
- A pencil
You may also like


How to use ceramic paint on a thrifted plate


