Whether you’re just starting out or you've been an artist for years, this article has something for everyone. We’ve gathered 22 of our top acrylic painting tips to help make your life easier and take your paintings to the next level. From preparing your canvas, to choosing your brushes and making the most of your paints, you’ll find plenty of handy hints below.
1. Prepare your canvas with gesso

All our canvases come primed and ready to paint, but if you’re using a raw canvas you can prepare it by applying a coat of gesso using a wide brush. This helps seal the canvas so that your acrylic paints don’t sink into the fabric and lose their vibrancy. Gesso can also be used to prepare a range of surfaces for acrylic painting including wooden painting boards, cardboard and paper.
2. Lightly sketch up your artwork with a graphite pencil

Artists will often plan out their composition on a canvas using a graphite pencil. We’d recommend using HB graphite because it will be lighter and not show through as much in the final painting. It’s important to press lightly so that it won’t show through the paint or cause a dent in your canvas. Use light, gentle strokes to sketch in your image or add guidelines before you start painting.
If you make a mistake, don’t worry! You can rub it out lightly using an electric eraser, a soft vinyl eraser or a damp cloth with some dishwashing liquid and water on it. Once you’ve sketched up your outline, you can paint a thin coat of Zinc White over the drawing to make your pencil marks lighter so that they won’t show through the finished artwork and to seal seal the drawing so that it doesn’t rub off as you’re painting.
3. Our top tips for transferring an image onto canvas

There are a couple of different ways you can transfer an image onto canvas including drawing it freehand, using a projector, measuring it up with a grid or tracing. If you need a few pointers, we’ve put together an article about transferring images to canvas that gives you tips for each of these methods so that you can start your painting, pronto!
4. Use taklon brushes

When you’re using acrylic paints, we’d recommend using taklon brushes (synthetic). The reason for this is that they’re great for most acrylic techniques and are durable. In general, they’re also soft enough to prevent brush marks which gives your artwork a nice smooth finish. If you’re not sure which brushes to choose, we’ve included an essential list in the next point to get you started.
5. Basic styles of brushes to start with

If you’re new to acrylic painting, you might be wondering which style of brushes you should start with. With so many available, that’s completely understandable! Below is a checklist of basic brushes that will allow you to create common techniques and strokes.
Flat brush:
As the name suggests, this brush has a straight edge across the top of the bristles. It’s great for blocking out areas with colour and the clean line of the bristles also makes it ideal for painting in close around objects while maintaining a smooth, crisp edge.
Round brush:
The rounded shape of this brush means that you can create thin or thick lines depending on how much pressure you apply. It’s also a good choice for applying spots or using a technique called scumbling where you apply a very thin coat of paint with a dry brush over an existing layer of paint.
Filbert brush:
This brush style is similar to a flat brush but the bristles are cut in a curved shape. This means that it doesn’t have hard edges or corners making it ideal for painting portraits and soft elements such as clouds and flower petals.
Sponge roller:
While this isn’t a brush, we thought it was worth including because it’s a great addition to your toolbox. You can use it to lay down large consistent areas of colour. This makes them perfect for tinting your canvas at the beginning of your project.
6. Use abstract expression brushes for wide strokes

While we’re on the topic of which paint brushes to use, you might like to throw an abstract expression brush into the mix. These are great for creating large, expressive strokes and covering areas with blocks of colour. We have a range of sizes available including 25mm, 50mm and 75mm.
7. Tint your canvas

Next on our list of acrylic painting tips is tinting your canvas. Tinting is where you apply a thin coat of paint to your canvas at the beginning of the painting process. This helps to make sure the stark white of the canvas is covered up in the finished painting. It also adds more interest by allowing you to create textures and effects, such as scumbling, with the tint showing through. When the canvas is bare underneath, these techniques tend to look a bit unfinished.
If you’re not sure which colours to use for your tint, we’d recommend neutral tones such as a warm grey (a mix of Black, Titanium White and Yellow Ochre) or Yellow Ochre mixed with a touch of Sienna. These will give your colours a deeper and more authentic tone, whereas when you paint over a bare white canvas it can cause your colours to become lighter.
8. Add impasto techniques with a palette knife

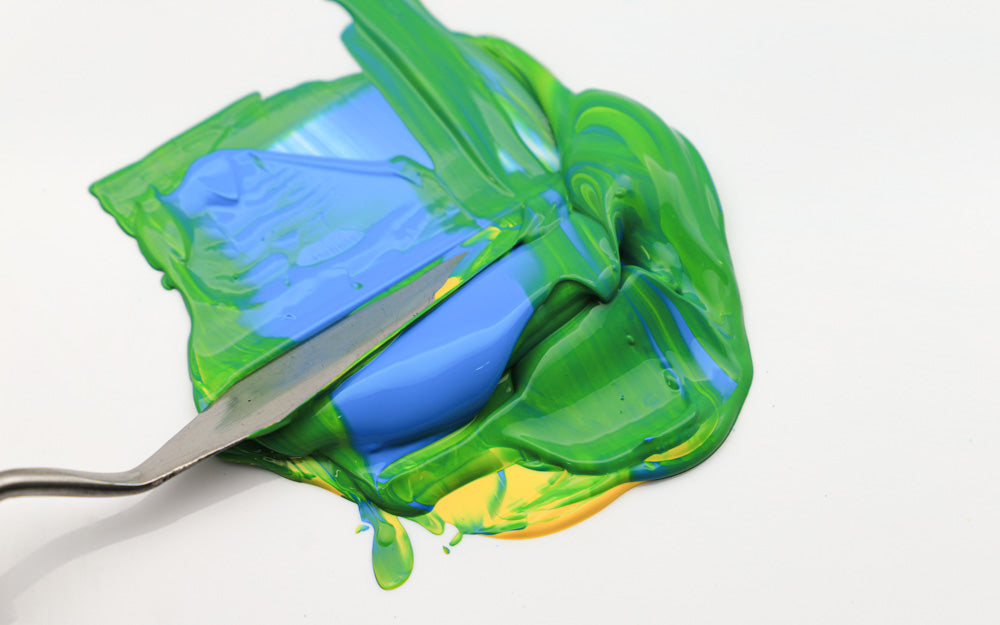
Impasto is a technique where paint is laid onto the surface in thick layers. If you’d like to achieve this effect with acrylic paint, a heavy-bodied acrylic such as our Dimension range and a palette knife will do the trick. Alternatively, you can also mix some impasto paste into regular acrylics such as our Acrylic Colour or Satin Acrylics to make them thicker. Try using different amounts of paint and pressure to create a range of effects. Don’t be shy – play around on paper, a canvas pad or canvas panel before you create your final artwork. This will help you to discover new ideas and can actually be a lot of fun.
9. Practice mixing colours

When you’re new to painting, figuring out how to mix colours can be daunting. Creating a swatch is a great way to practice colour mixing and keep track of what happens when you mix certain colours together. Make a note next to each swatch that tells you which colours you mixed together and even how much of each was used. You can create your swatches on a canvas pad or sketchbook and use it as a reference for future artworks. This is particularly handy if you need to mix up the same colour for a painting that will take multiple sessions to create.
10. Use a colour wheel to help you mix colours

A colour wheel is great to have on hand when you’re mixing colours because it gives you a preview of what happens when you mix two colours together. A lot of them also teach you the difference between primary colours, secondary colours, tertiary colours, hue, value and intensity.
11. Keep your paints fresh with cling wrap

This acrylic painting tip is simple, but can save you a lot of paint over time. If you’re painting over multiple sessions, you can keep your paint palette fresh by wrapping it in cling wrap. Give your paints a spritz of water before you do to help stop them from drying out.
12. Don’t be afraid to use a lot of paint

You might be tempted to use thin layers of paint to make your supply last longer, but sometimes you need to lay it on thick to achieve the effects, vibrance or coverage you’re going for. This can also save you needing to add more layers later to build up thin areas.
13. Create a consistent finish with varnish

Did you know that not all acrylic paints have the same finish? For example, our Satin Acrylics dry to a semi-matte finish while our Dimension Acrylics have a gloss finish. Varnishing acrylic paintings isn’t a must, but if you can notice the different finishes in your painting, you might like to use a water-based varnish to make it consistent. These generally come in a high-gloss, gloss, satin and matte versions and can be found at your local hardware store. Varnishing your painting will also add an extra layer of protection against moisture and dust.
People often ask us whether they can use our gloss and matte mediums to create a consistent finish on their paintings. The answer to this is yes, but it dries very quickly which can ruin the finish on your painting. The reason for this is that if you don’t spread it on your artwork fast enough and the brush runs back over drying layers, it can create a rough texture. So you’ll need to use a wide taklon brush, like our 75mm Artist Taklon Brush, and work quickly down your canvas in wide strokes. Due to the rapid drying time, using our gloss and matte mediums as a finishing layer is more suitable for small artworks because you can spread it onto the canvas faster.
14. Work quickly

Acrylic paint is fast-drying which means you’ll need to work quickly (especially if you want to create effects like smooth transitions and blending). If you’d like to slow things down a bit, you can use an Acrylic Retarder to extend the drying time and give you a little more time to work.
15. Increase or decrease gloss with acrylic mediums

Did you know that you can mix a gloss or matte medium with your acrylic paints to change their finish? Simply mix it into the paints you’re using to either increase or decrease how glossy they’ll appear when they dry.
16. Mist your paints with a spray bottle to stop them from drying

A trick we like to use is to spray our acrylic paint palette with a mist of water to help slow down the drying process. We’d suggest using a regular spray bottle to spritz your palette every 10 mins as you go. Once acrylic paints have dried they can’t be reactivated, so make sure you keep the spritz of water coming if you’re painting for a longer period of time. This acrylic painting tip is a great one to keep up your sleeve if you want to make life that little bit easier.
17. Blend by spritzing the canvas

A spray bottle will also come in handy for blending. Since acrylic paints dry so quickly, a spritz of water on your artwork can help create smooth blends. Make sure you have the nozzle set to the misting setting so that you don’t end up with water drips down your painting.
18. Step back from your painting

Sometimes when you’re working up close to an artwork for long periods of time you can miss an area that doesn’t look quite right. Regularly stepping back from your work will give you a fresh perspective and can help you see if anything in your composition isn’t looking quite right. Some artists also like to put their painting upside-down to see it from a different view and check whether any shapes or other elements need some work.
19. Wash your brushes and tools before the paint dries on them

Once acrylic paint dries, it’s hard to clean it off your painting tools. To make life easier for yourself and keep your tools in good condition, rinse or wipe your brushes and palette knives as you go to help prevent any damage. Trust us, you’ll thank yourself later!
20. Keep a couple of water jars nearby

A great way to make sure you don’t ruin your brushes with dried acrylic paint is to keep a couple of water jars nearby. Using more than one jar will mean that you don’t have to change your water as often, especially if you rinse similar colours in the same jar. It’s important not to leave your brushes sitting in water for too long because this can damage the glue that holds the bristles in which can lead to brush shedding.
21. Remember that acrylic paints dry darker

A lot of acrylic paints dry darker than they look when they’re wet. To avoid any unwelcome surprises, we recommend creating colour swatches so that you can see what each paint looks like when it dries. This will also give you an idea of their gloss or matte level if you’re unsure.
22. Fix mistakes

Everyone makes mistakes and that’s okay! If you notice something you want to change while the paint is still wet, you can scrape off excess paint with a palette knife to remove any texture before painting over it. If your paint has dried, you may be able to smooth the surface by sanding it with a very fine sandpaper before gently wiping the area with a damp cloth to remove any dust. Next you can paint gesso over the area to take it back to a lighter colour, let it dry and paint back over it.
Keep these acrylic painting tips in mind for your next creative session to overcome common challenges, improve your skills and make the most of your art gear! If you need some inspo to get the creativity flowing, our 18 acrylic painting ideas article is a great place to start.
Want to show us your latest work? Tag us on Facebook or Instagram using #montmarteart so we can see what you’re creating!


