


Whether coloured pencils are your tools of trade or you haven’t picked them up for years, sharpen your skills with these 15 coloured pencil techniques.
1. Burnishing
Burnishing coloured pencils, sounds a little intimidating, but fear not! This technique is achieved by layering and layering until there’s no sign of paper underneath and a sheen is created from the pencil wax. Burnishing will happen in your final layer and once your colouring has been burnished, it will be difficult to add anymore colour to them. To achieve the burnishing technique, firstly, build up your layers, working light to dark. Then on your last layer, push the pencil against the paper with a firm grip and apply a lot of pressure, this will push the colour deep into the tooth of the paper and your colours will be locked into place. If you’re not seeing results from applying strong, steady pressure, you can use a paper stump or a blending tool to help burnish coloured pencils and save your hand from fatigue.
2. Impressing
Impressing is a bit like the Sgraffito technique used in acrylic and oil painting. But when it comes to coloured pencils, this technique is a little different because the etching is created before applying the colour. Try using a paper clip, bobby pin, thumbnail, a white coloured pencil, a stylus or even an empty ball point pen. (If you’re using a sharp tool like a thumbnail, apply light pressure so you don’t puncture the paper). Lightly scrape your design into the paper, then grab a coloured pencil and shade over your etching with the side of the pencil. You can create fine lines for leaves using this coloured pencil technique or use impressing to sign your completed artworks.
3. Pressure shading
As the name suggests, pressure shading is a coloured pencil technique where varying levels of pressure are applied to create lighter or heavier tones. Holding your pencil with a light pressure will produce a light shade and a heavier hand will produce darker shades. This technique is great for blending or creating gradients, simply by using a lighter hand when it comes to your coloured pencil shading.
4. Underpainting
Like acrylic or oil painting, underpainting can be used when colouring in too. Use a base colour like one that you will use for your final layer or grab a complimentary colour of the next colour you’re looking to use - if you’re wanting to colour with red, try underpainting with green, or if you’re wanting to try blue, underpaint with red. You will want to use a light pressure so you can build your layers over this and then begin adding in your shadows. This will not only help you build layers to burnish, but also help guide the direction of your lights and shadows too.
5. Hatching
Hatching is an easy technique where rough parallel lines are drawn closely together to form a shade or texture. Lines can be close together or far apart depending on the effect you’re wanting to create. It’s best to use a hard pencil with a sharp point for this technique, to create crisp fine lines. This is great for hair or shadows and tones depending on the colours used and how close together or far apart the lines are.
6. Crosshatching
Like hatching, crosshatching is a similar technique, but instead of drawing in one direction, crosshatching crisscrosses lines over one another in a vertical, horizontal and diagonal direction. This particular coloured pencil technique is great for creating shadows and textures. It can also add depth and weight to objects, depending on the layers created and how far the gaps within the lines are.
7. Directional lines
Directional lines create a texture using lines, similar to hatching, but these lines are more irregular and random. Directional lines are more curved and vary in size and density. You can add another colour on top of your directional line to create a rounder effect. Directional lines make for great grass, hair and flames because of their contour and volume.
8. Scumbling
Unlike painting, scumbling is a coloured pencil technique that looks similar to doodling. Scumbling is a fun way to create textures and create abstract shadows to your works. Depending on the size of the lines, scumbling can add energy and texture. Apply tiny squiggles on top of one another, in a circular motion to fill a space. Try a figure-eight or a few coils for a random scumble and experiment using different lines and squiggles then try different sizes and pressures.
9. Circling
Like scumbling, circling has a similar effect but instead, this technique is less random and made up more of rounded scribbles in a tight pattern. To show tones, increase the thickness and density of the scribbles and try different sizes and pressure for a unique effect.
10. Stippling
Stippling is a coloured pencil technique for creating light and dark areas using dots. Shadows can be created by drawing a number of dots close together (like Pointillism) and lighter areas will have fewer dots further apart to show the white of the paper. You can also try using two colours in the same area for a nice mix of hues.
11. Frottage
French for ‘rubbing,’ frottage is a technique where paper is laid on top of a textured surface, then using the edge of a soft pencil, coloured in to reveal the textured surface beneath. Frottage was developed by the Surrealist artist Max Ernst, after he discovered a particular wooden floor with an interesting texture. Frottage can create interesting textures and details or even be used like Max Ernst did for experimenting and inventing new ideas.
12. Powder dusting
This technique creates small, soft blends of colour and it can be used in landscapes and skies. Simply sharpen a soft pencil on top of the paper, then using the left-over pigments from sharpening, press them into the paper using either your finger or a clean, dry watercolour brush. Powder dusting is simple for quickly and easily covering a large area. Or sharpen a handful of colours onto the page to add dimension to your coloured pencil shading.
If you’re unsure what the difference between a hard and soft coloured pencil is, check out our guide to coloured pencils.
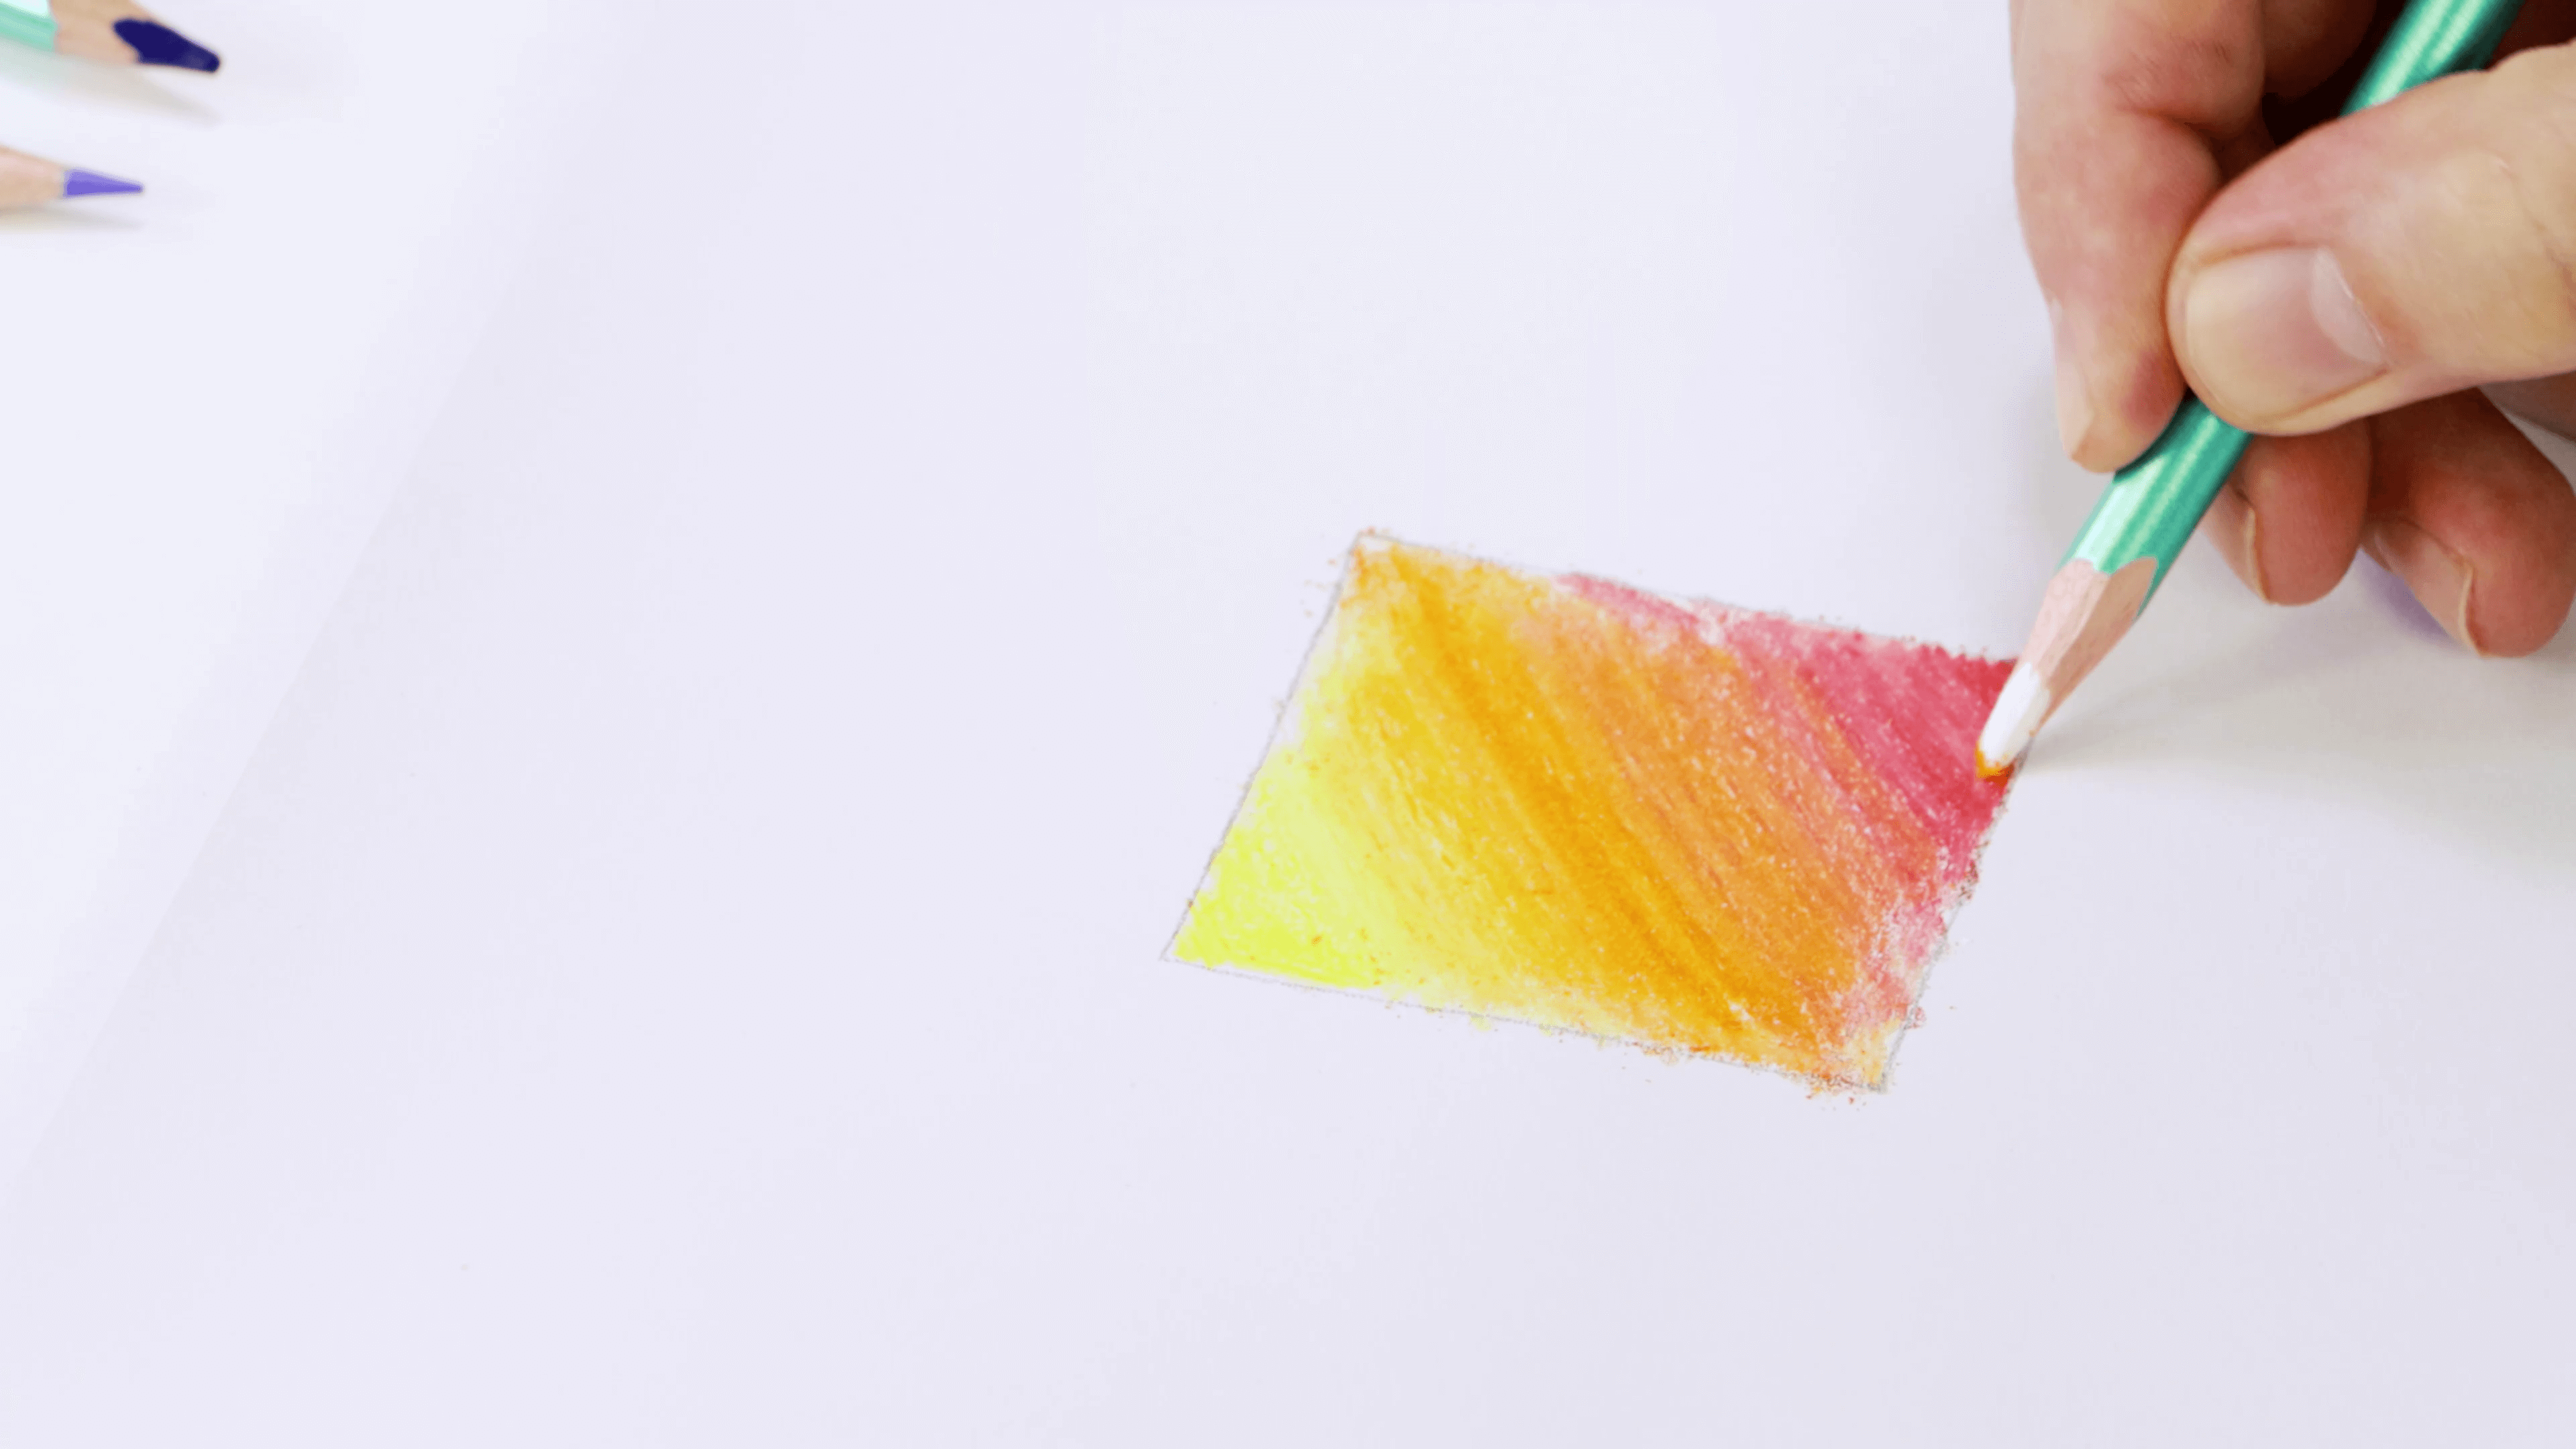
13. White pencil blending
Instead of burnishing, you can use a white coloured pencil to blend coloured pencils together and go back in to add accents and deepen your colours. This will lighten the colours and act like a glaze without reducing the pencil’s smoothness. Apply your colours as usual, then grab a white coloured pencil and colour over the top to blend your coloured pencils. The white will create a soft, hazy blend, then you can go back in to deepen colours and add highlights and accents.
14. Wet blending
You can try blending your coloured pencils by using a wet solvent to blend dry colours.
Apply rubbing alcohol or safflower oil, onto the page with a cotton bud stick and rub the solvent on top of your colours. The solvent will thin the binder that has been left behind by your coloured pencils and bleed into one another, appearing transparent. Because the colours will melt together, it’s a good idea to use colours that will compliment each other when they meet.
15. Optical blending
Unlike paint, you can’t mix coloured pencils to make new colours. However, you can blend coloured pencils together using the optical blending technique. Start by placing a primary colour, then layer a secondary colour, followed by a third. Where the colours overlap is where the secondary colours meet and you’ll then have an optical blend.
Looking for more? Check out our handy guide to coloured pencils.
Try a handful or all 15 of these coloured pencil techniques for yourself. #montmarteart or tag us @montmarteart on Instagram or Facebook, we’d love to see what you create.


