


Book edge painting with watercolour
1. Art preparation
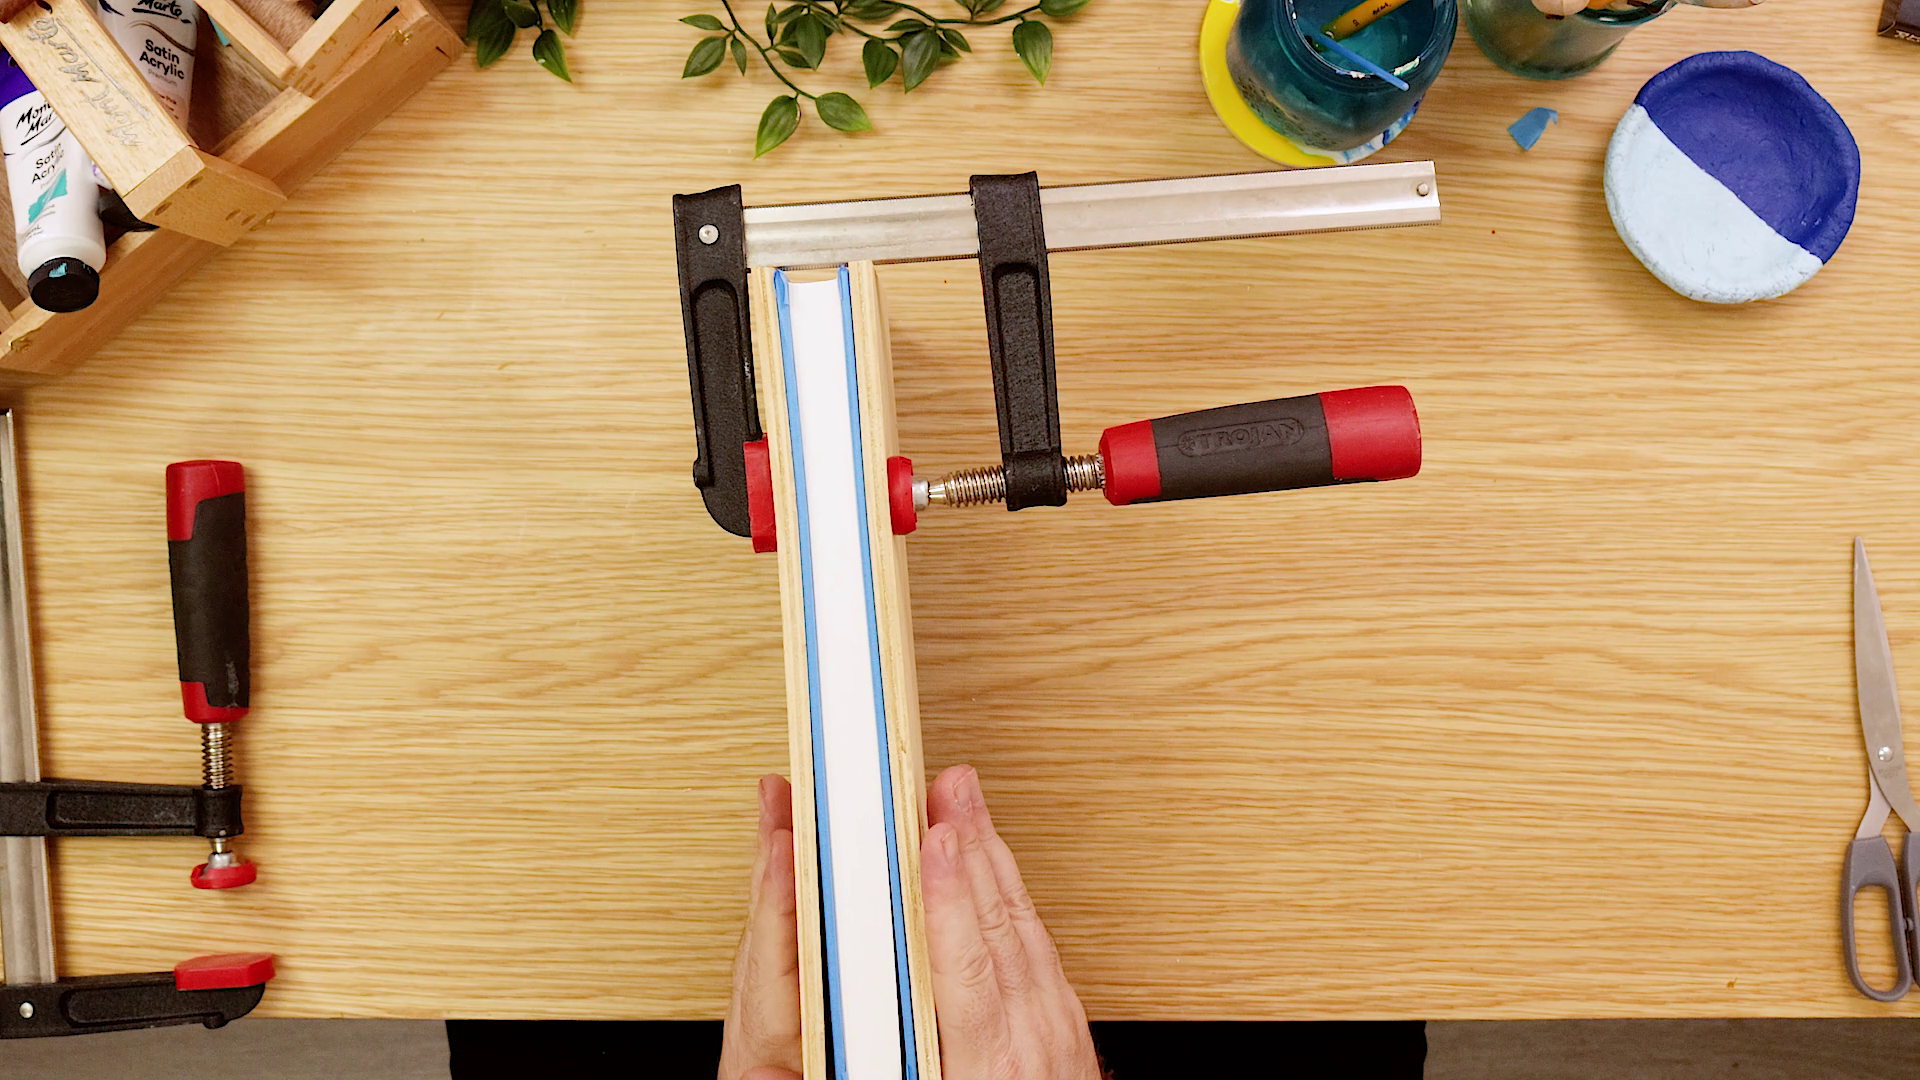
- Cut scrap timber slightly shorter than the height of your book (this makes painting easier)
- Tape along the three open edges of the book, wrapping half the tape onto the front and back covers
- If your book has a paper cover, press the tape onto fabric first to reduce stickiness so removal is easier
- Place timber on either side of the book to protect the covers
- Clamp everything together evenly, keeping clamps close to the edges
- Angle the book slightly so the top and sides are easy to reach
2. Base painting
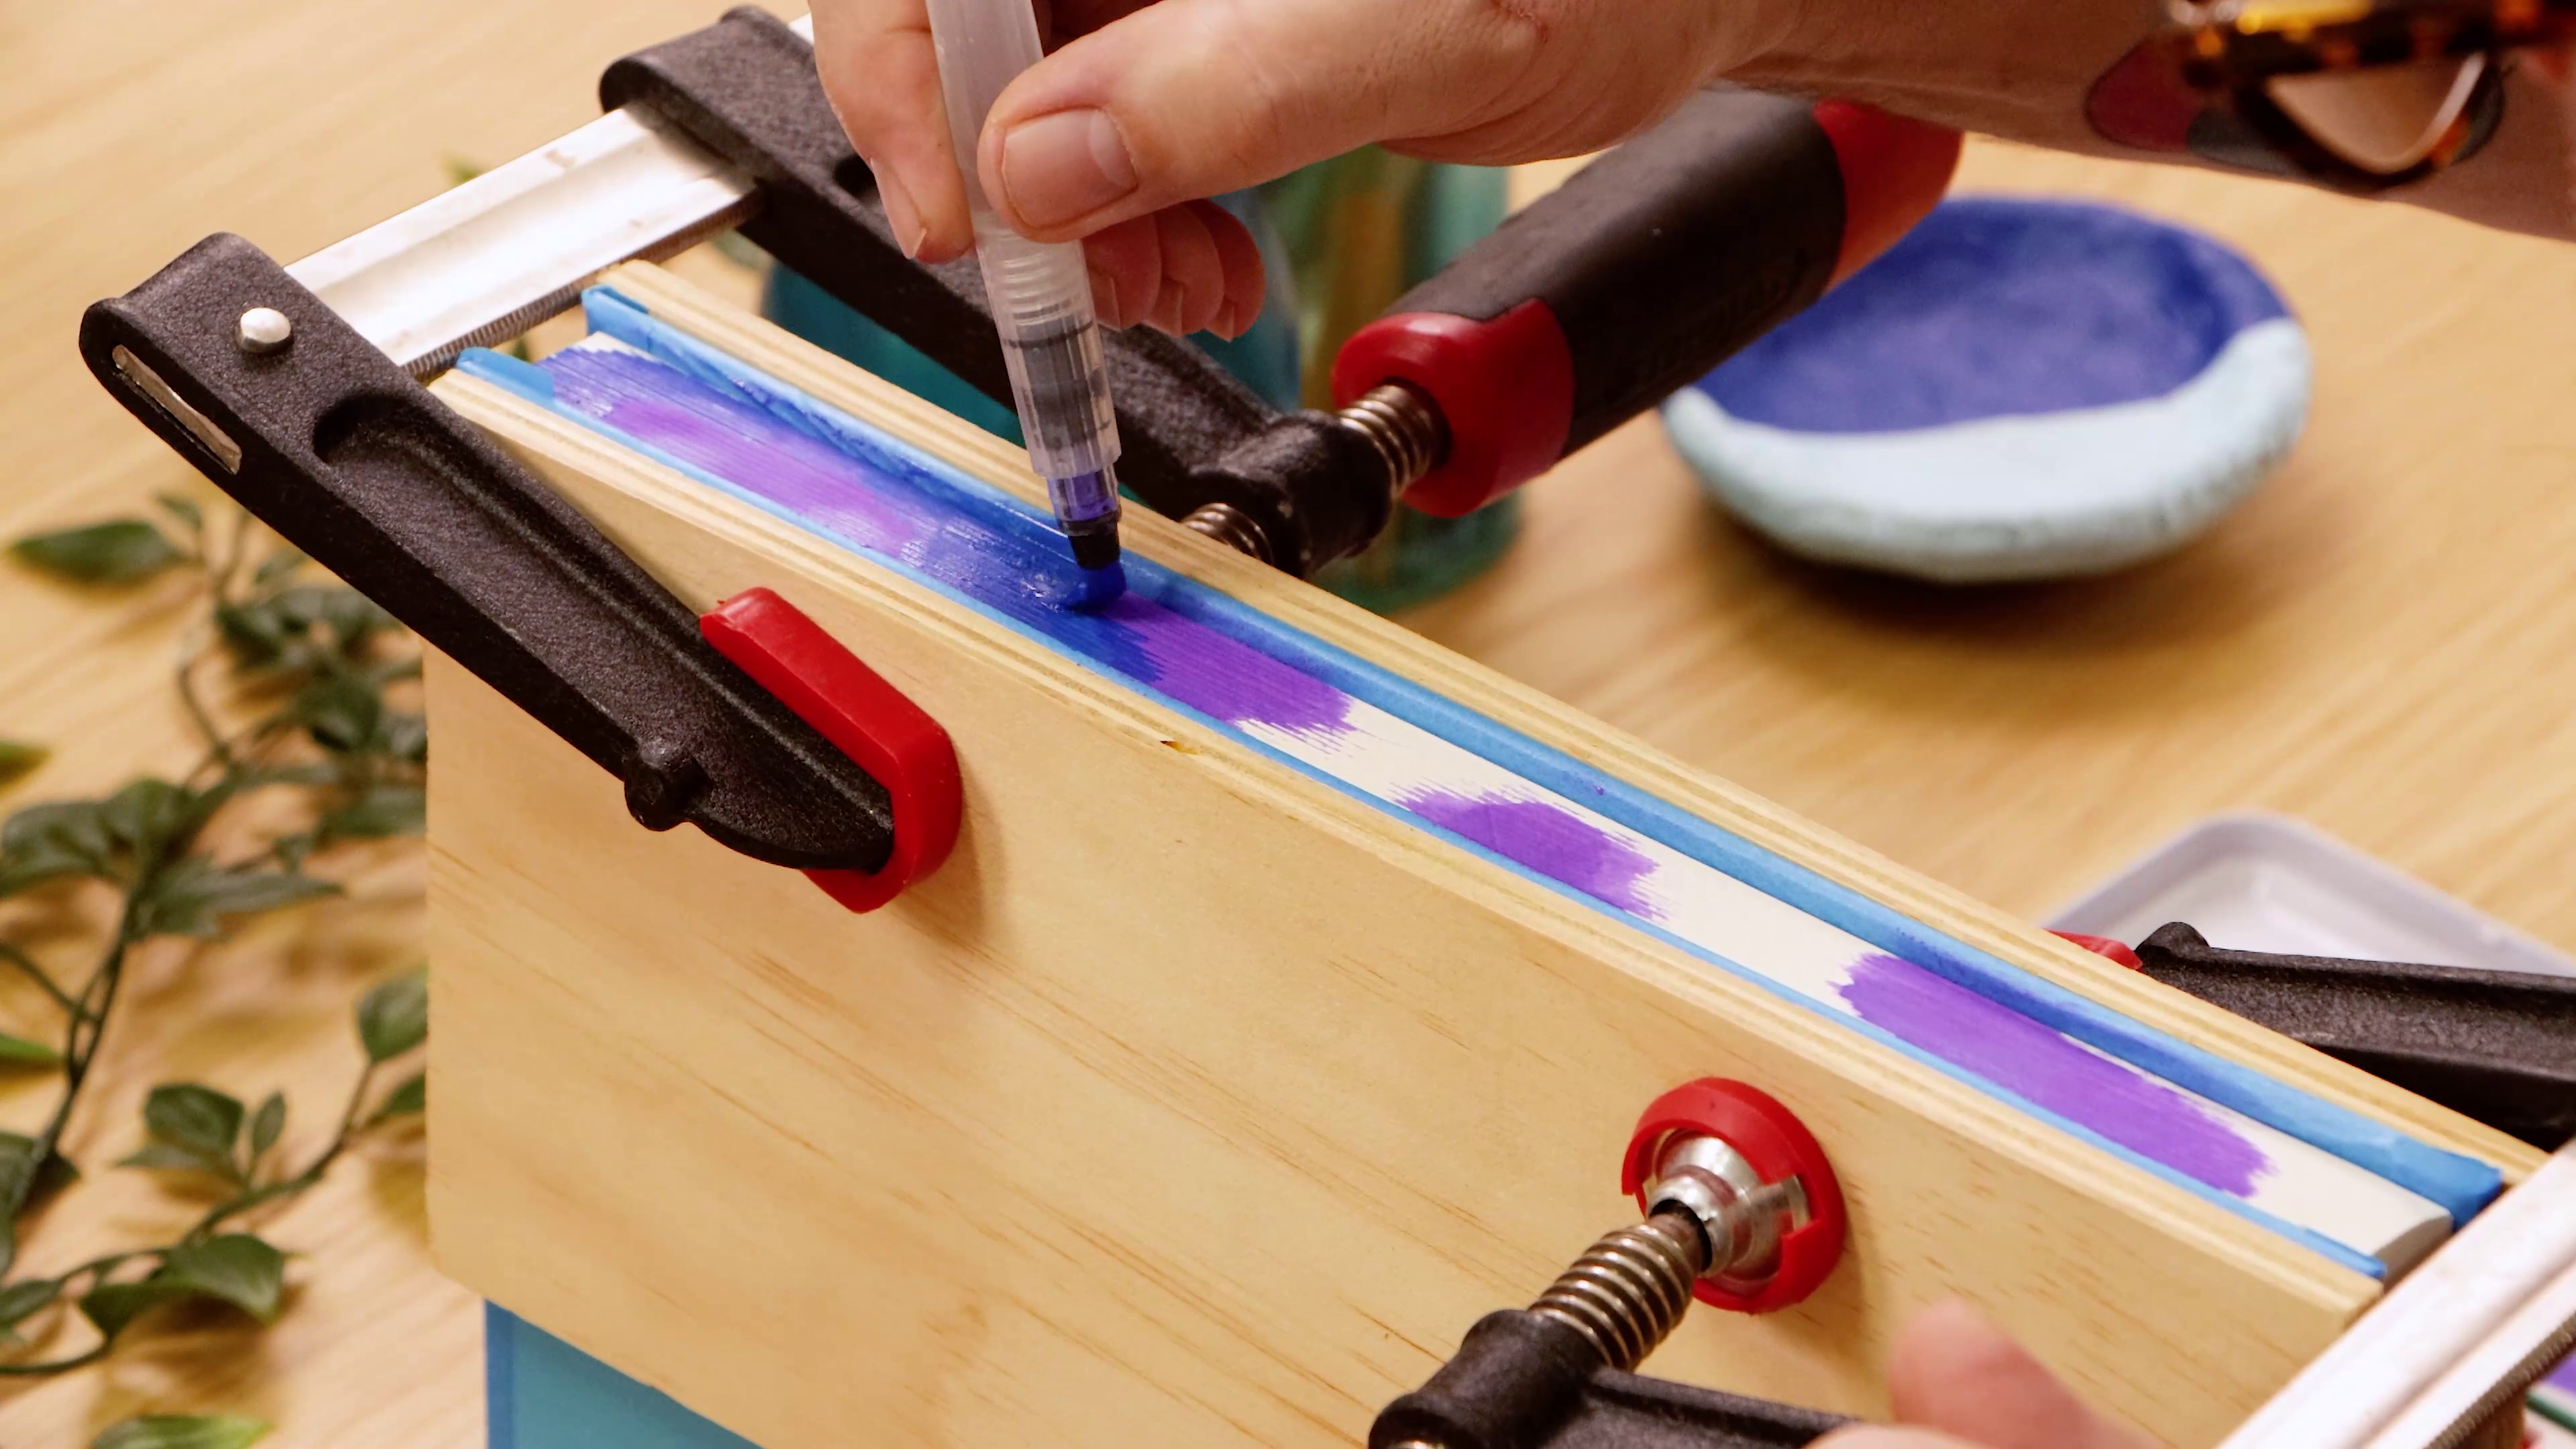
- Choose a colour palette that suits your book or personal style
- Apply your first watercolour in loose patches along the page edges
- Add a second colour around it and blend gently with a damp brush
- Keep layering and blending without overworking the paint
- Let the colours mix naturally for a more interesting finish
3. Watercolour blending
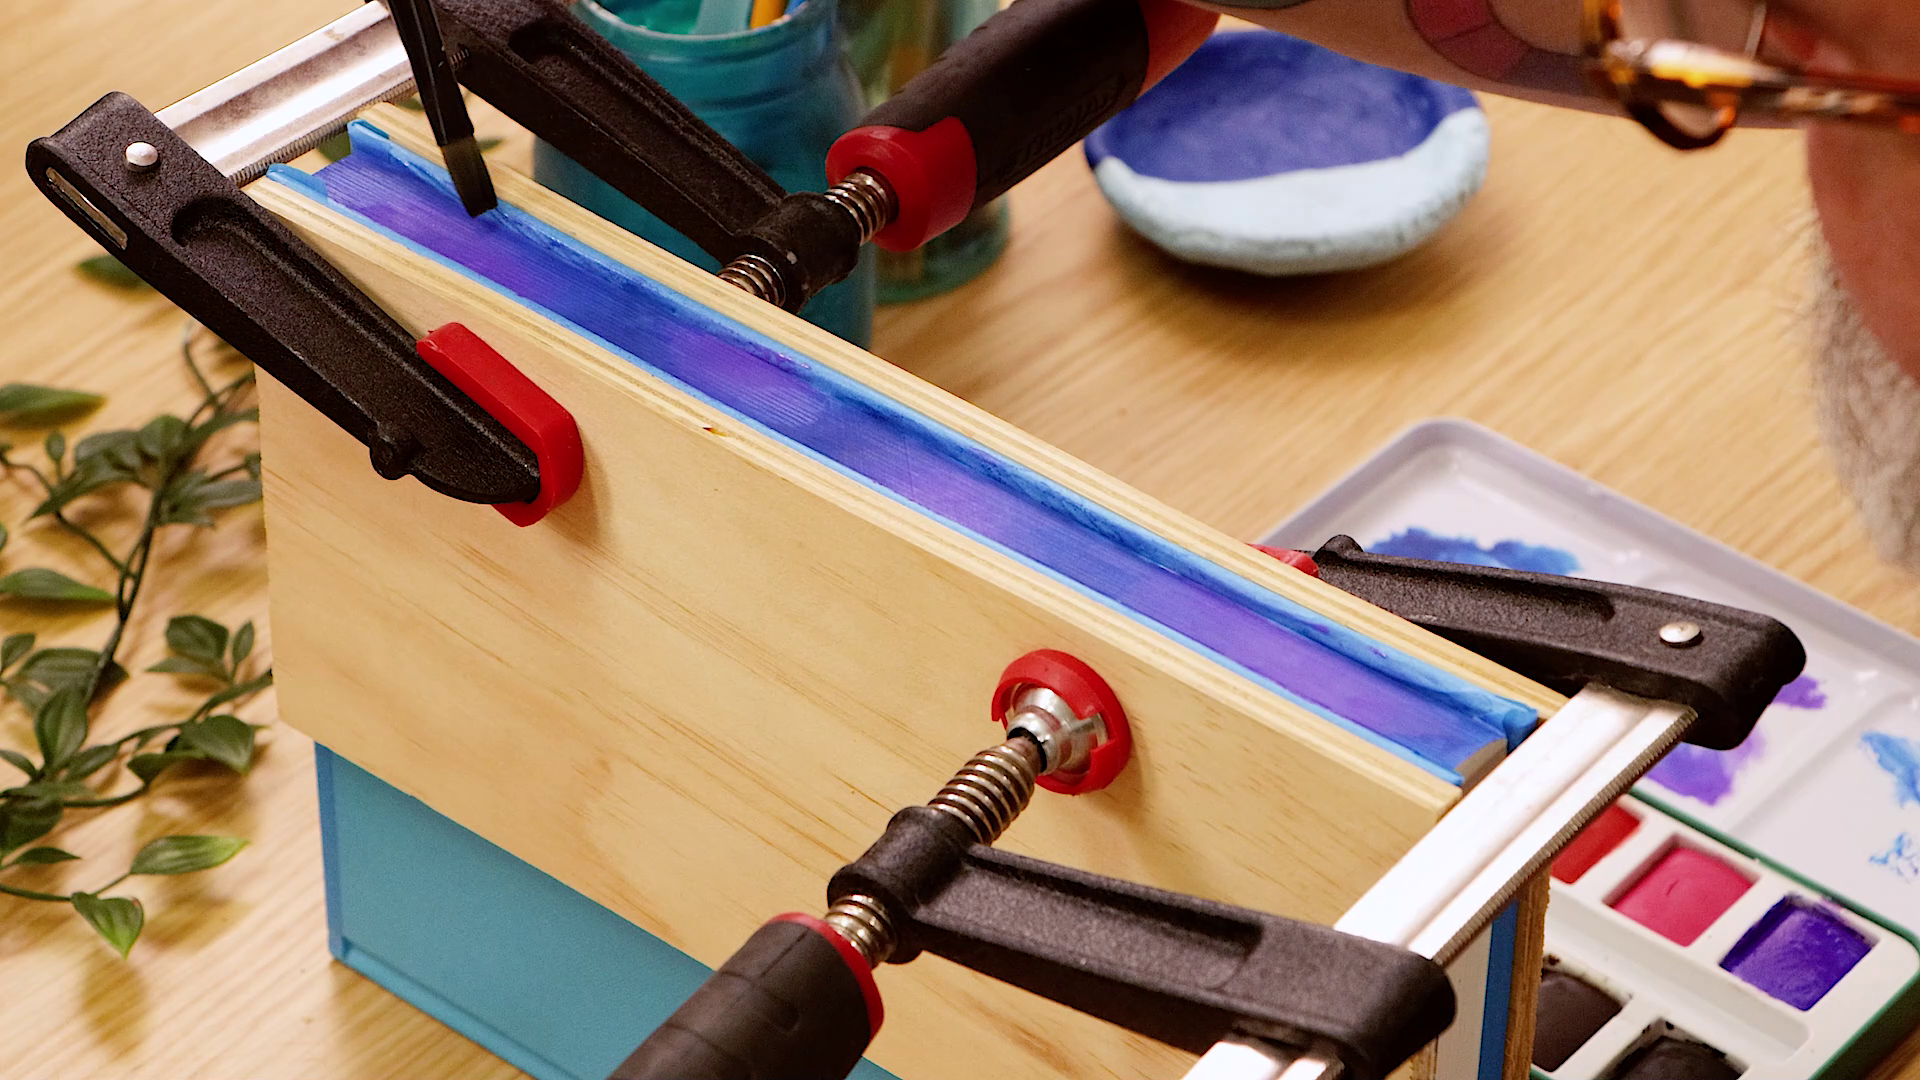
- Go back in with deeper tones to create contrast and depth
- Allow sections to dry slightly before adding more colour if needed
- Paint the top and bottom edges once the sides are touch dry
- Adjust colours as you go to suit your design
4. Watercolour stars

- Add small details using metallic watercolours, white acrylic paint, or fine brushes
- Try stars, dots, moons, symbols, patterns, or simple illustrations
- Use stickers or stencils if you prefer extra control
- Keep the design playful and personal – there are no rules!
5. Finishing up
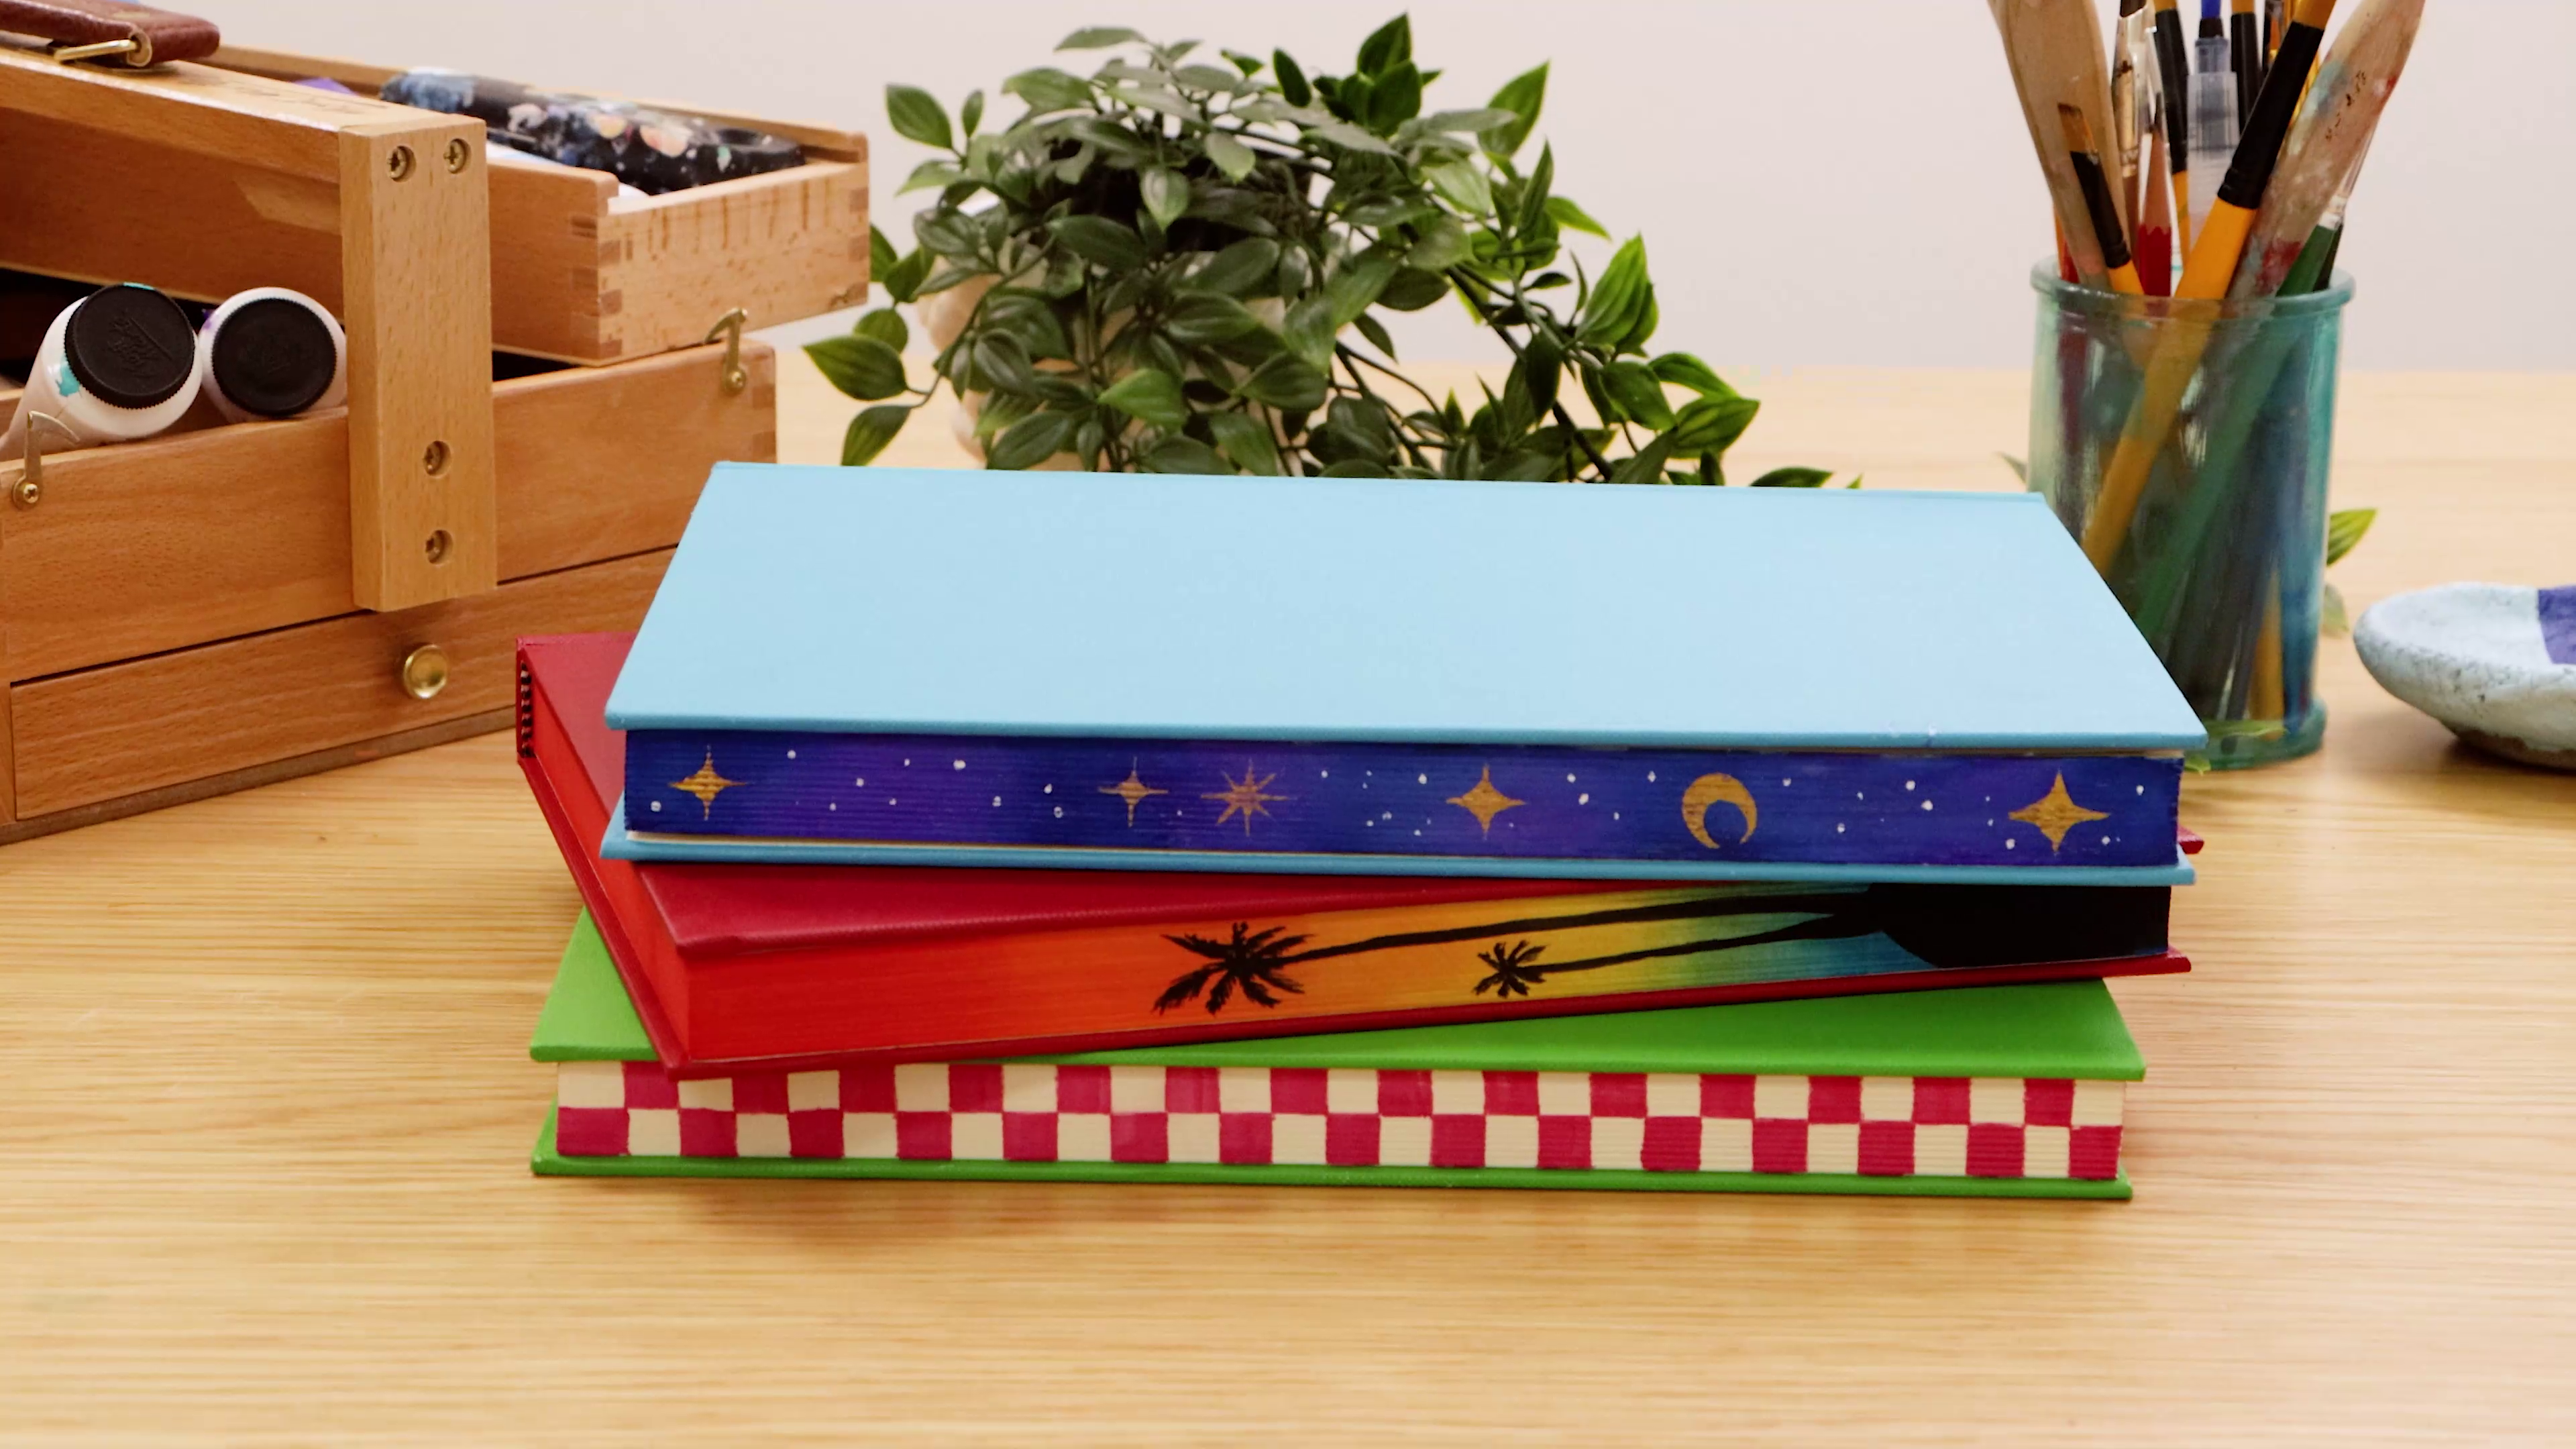
- Allow everything to dry completely before removing clamps
- Carefully peel away the tape
- Why not create themed edges for a book series?
- Try using gradients, checkerboards, florals, or sunset colours
All done 📚✅ Display your book on a shelf to make a statement or paint all your books for a coordinated bookcase display.
- Sketchbook, book, or journal
- Watercolours
- Small paintbrushes
- Scrap timber or plywood pieces
- F clamps (two or more, depending on book thickness)
- Painter’s tape
- Water
- Paper towels
You may also like


How to use ceramic paint on a thrifted plate


