


How to use ceramic paint on a thrifted plate
1. Dinosaur drawing
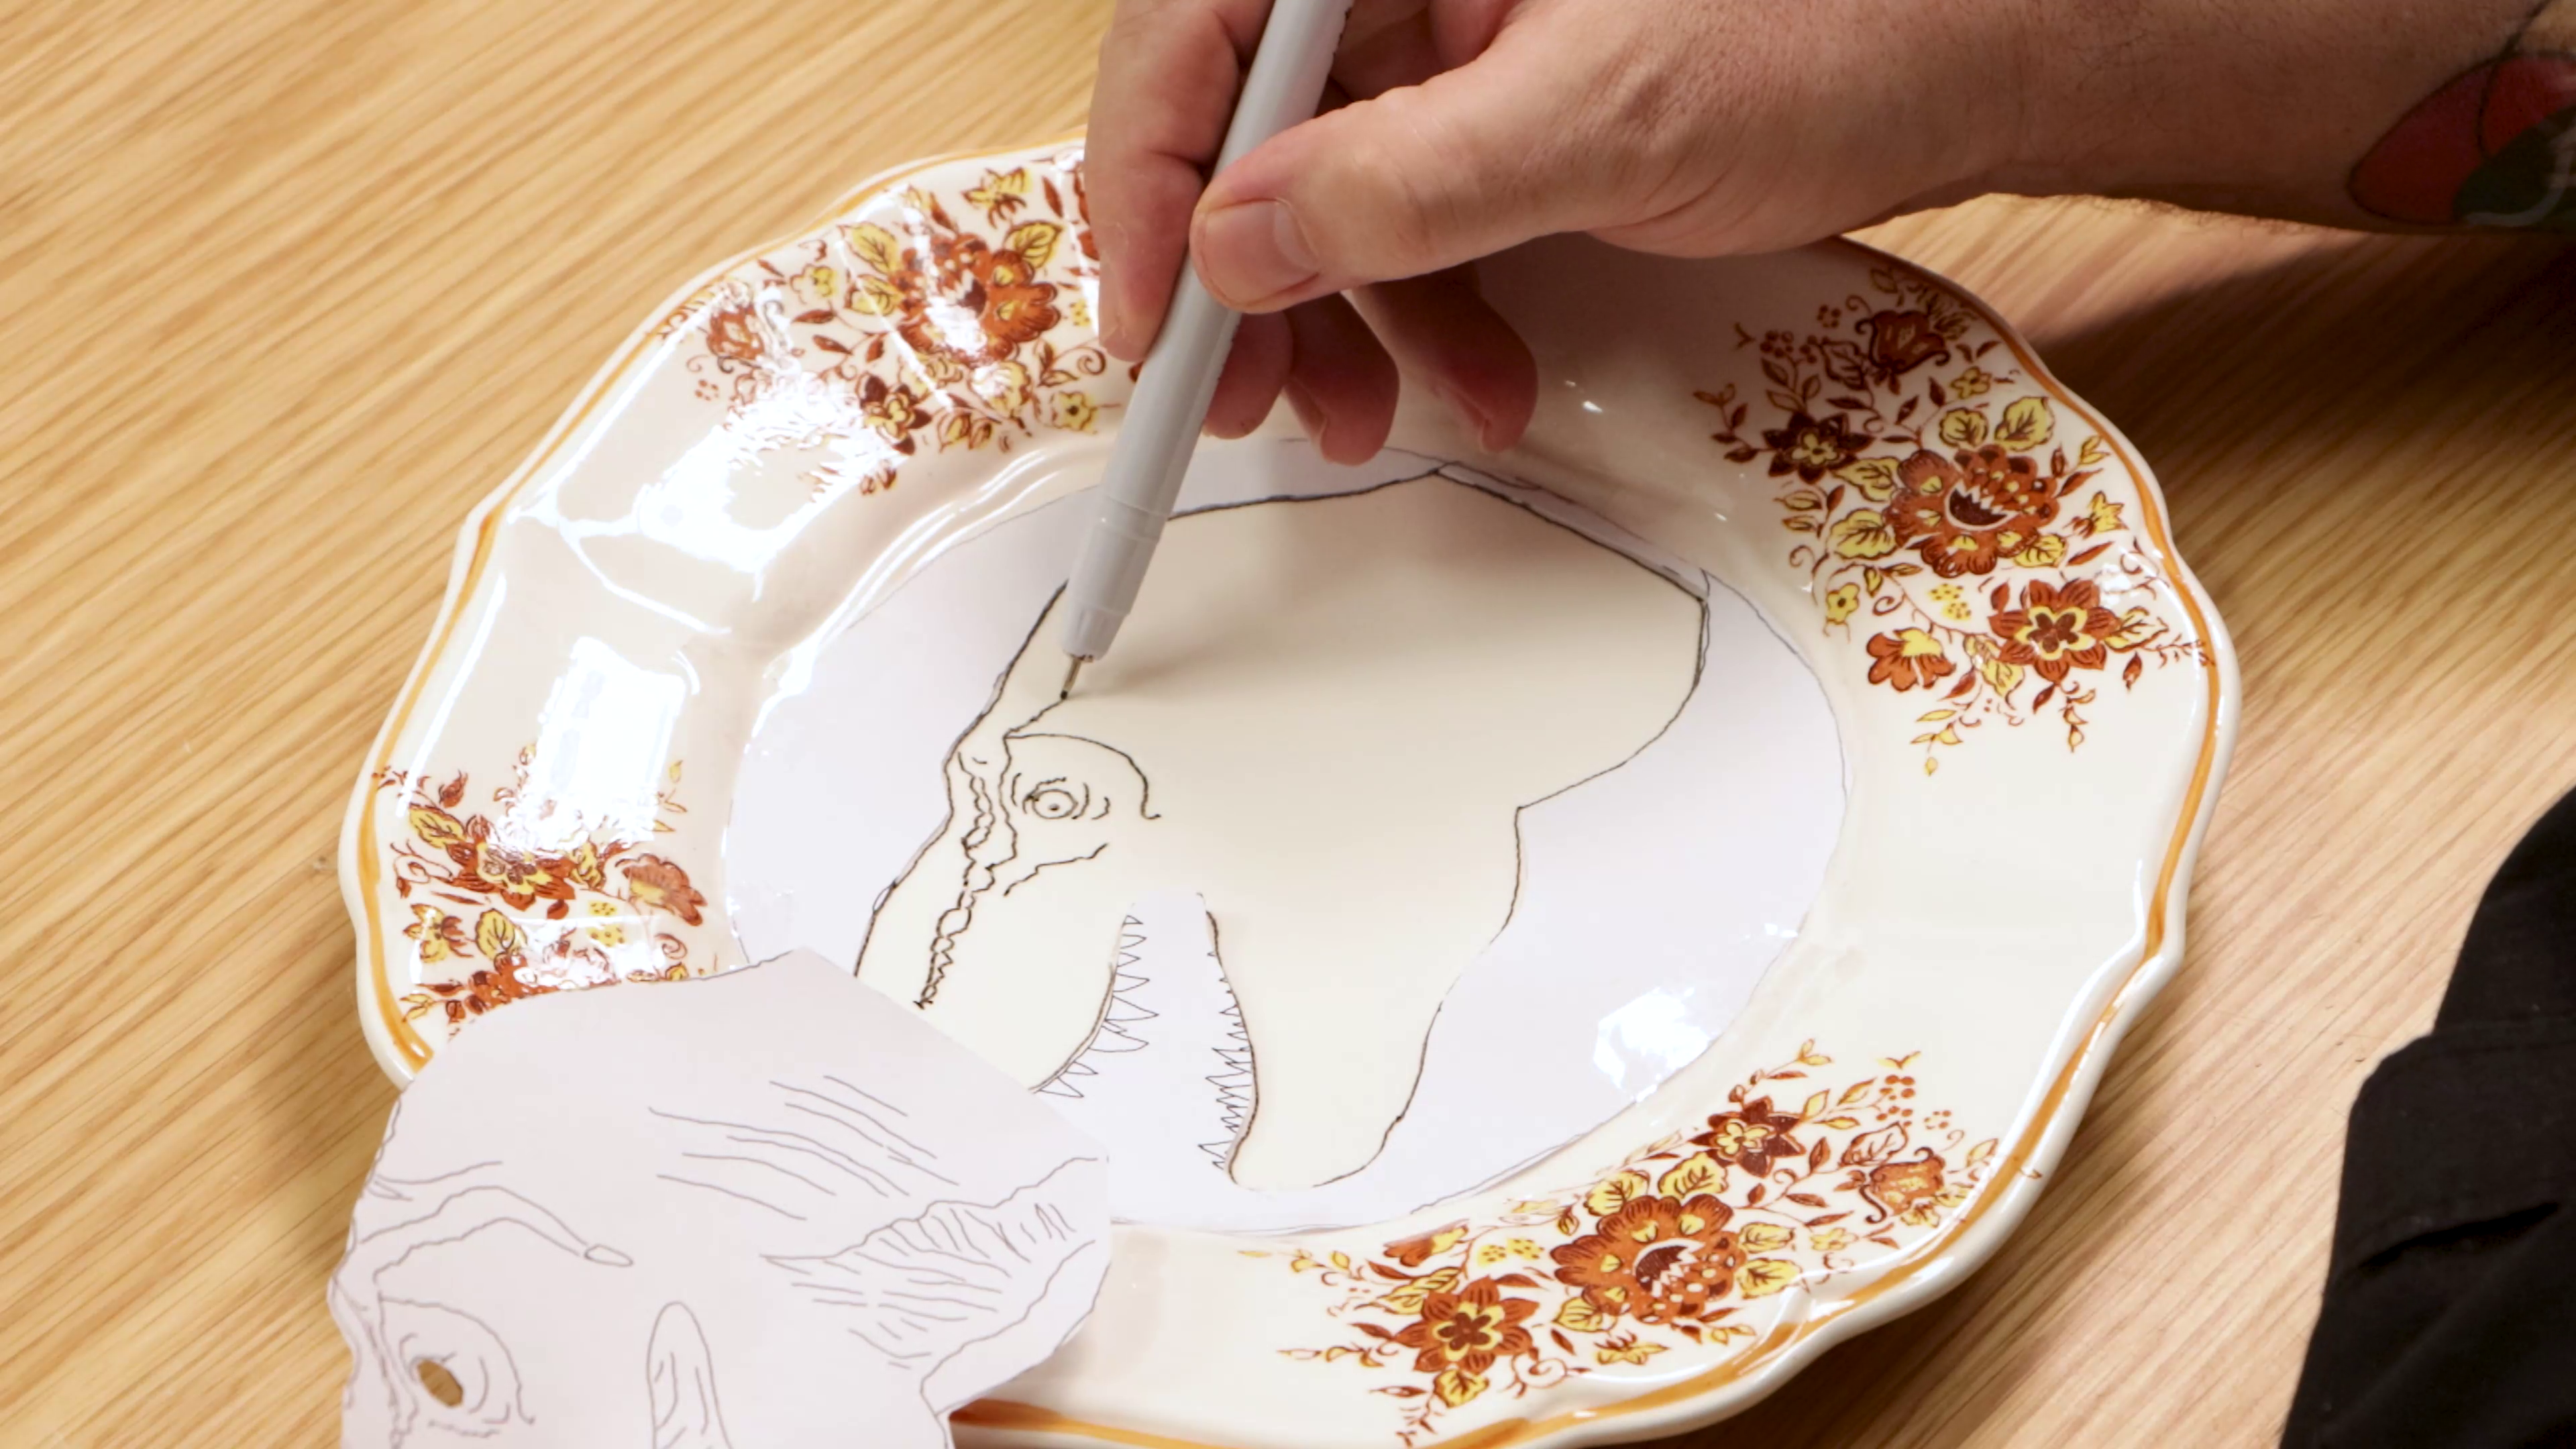
- Print the dinosaur outline or sketch your own design
- Cut out the inside of our outline to make transferring easier
- Tape the template onto the plate
- Trace around the inside of your template
- Freehand the eye and facial features like the teeth and wrinkles
- Remove unwanted lines using a clean damp brush while ink is wet
2. Painting tones
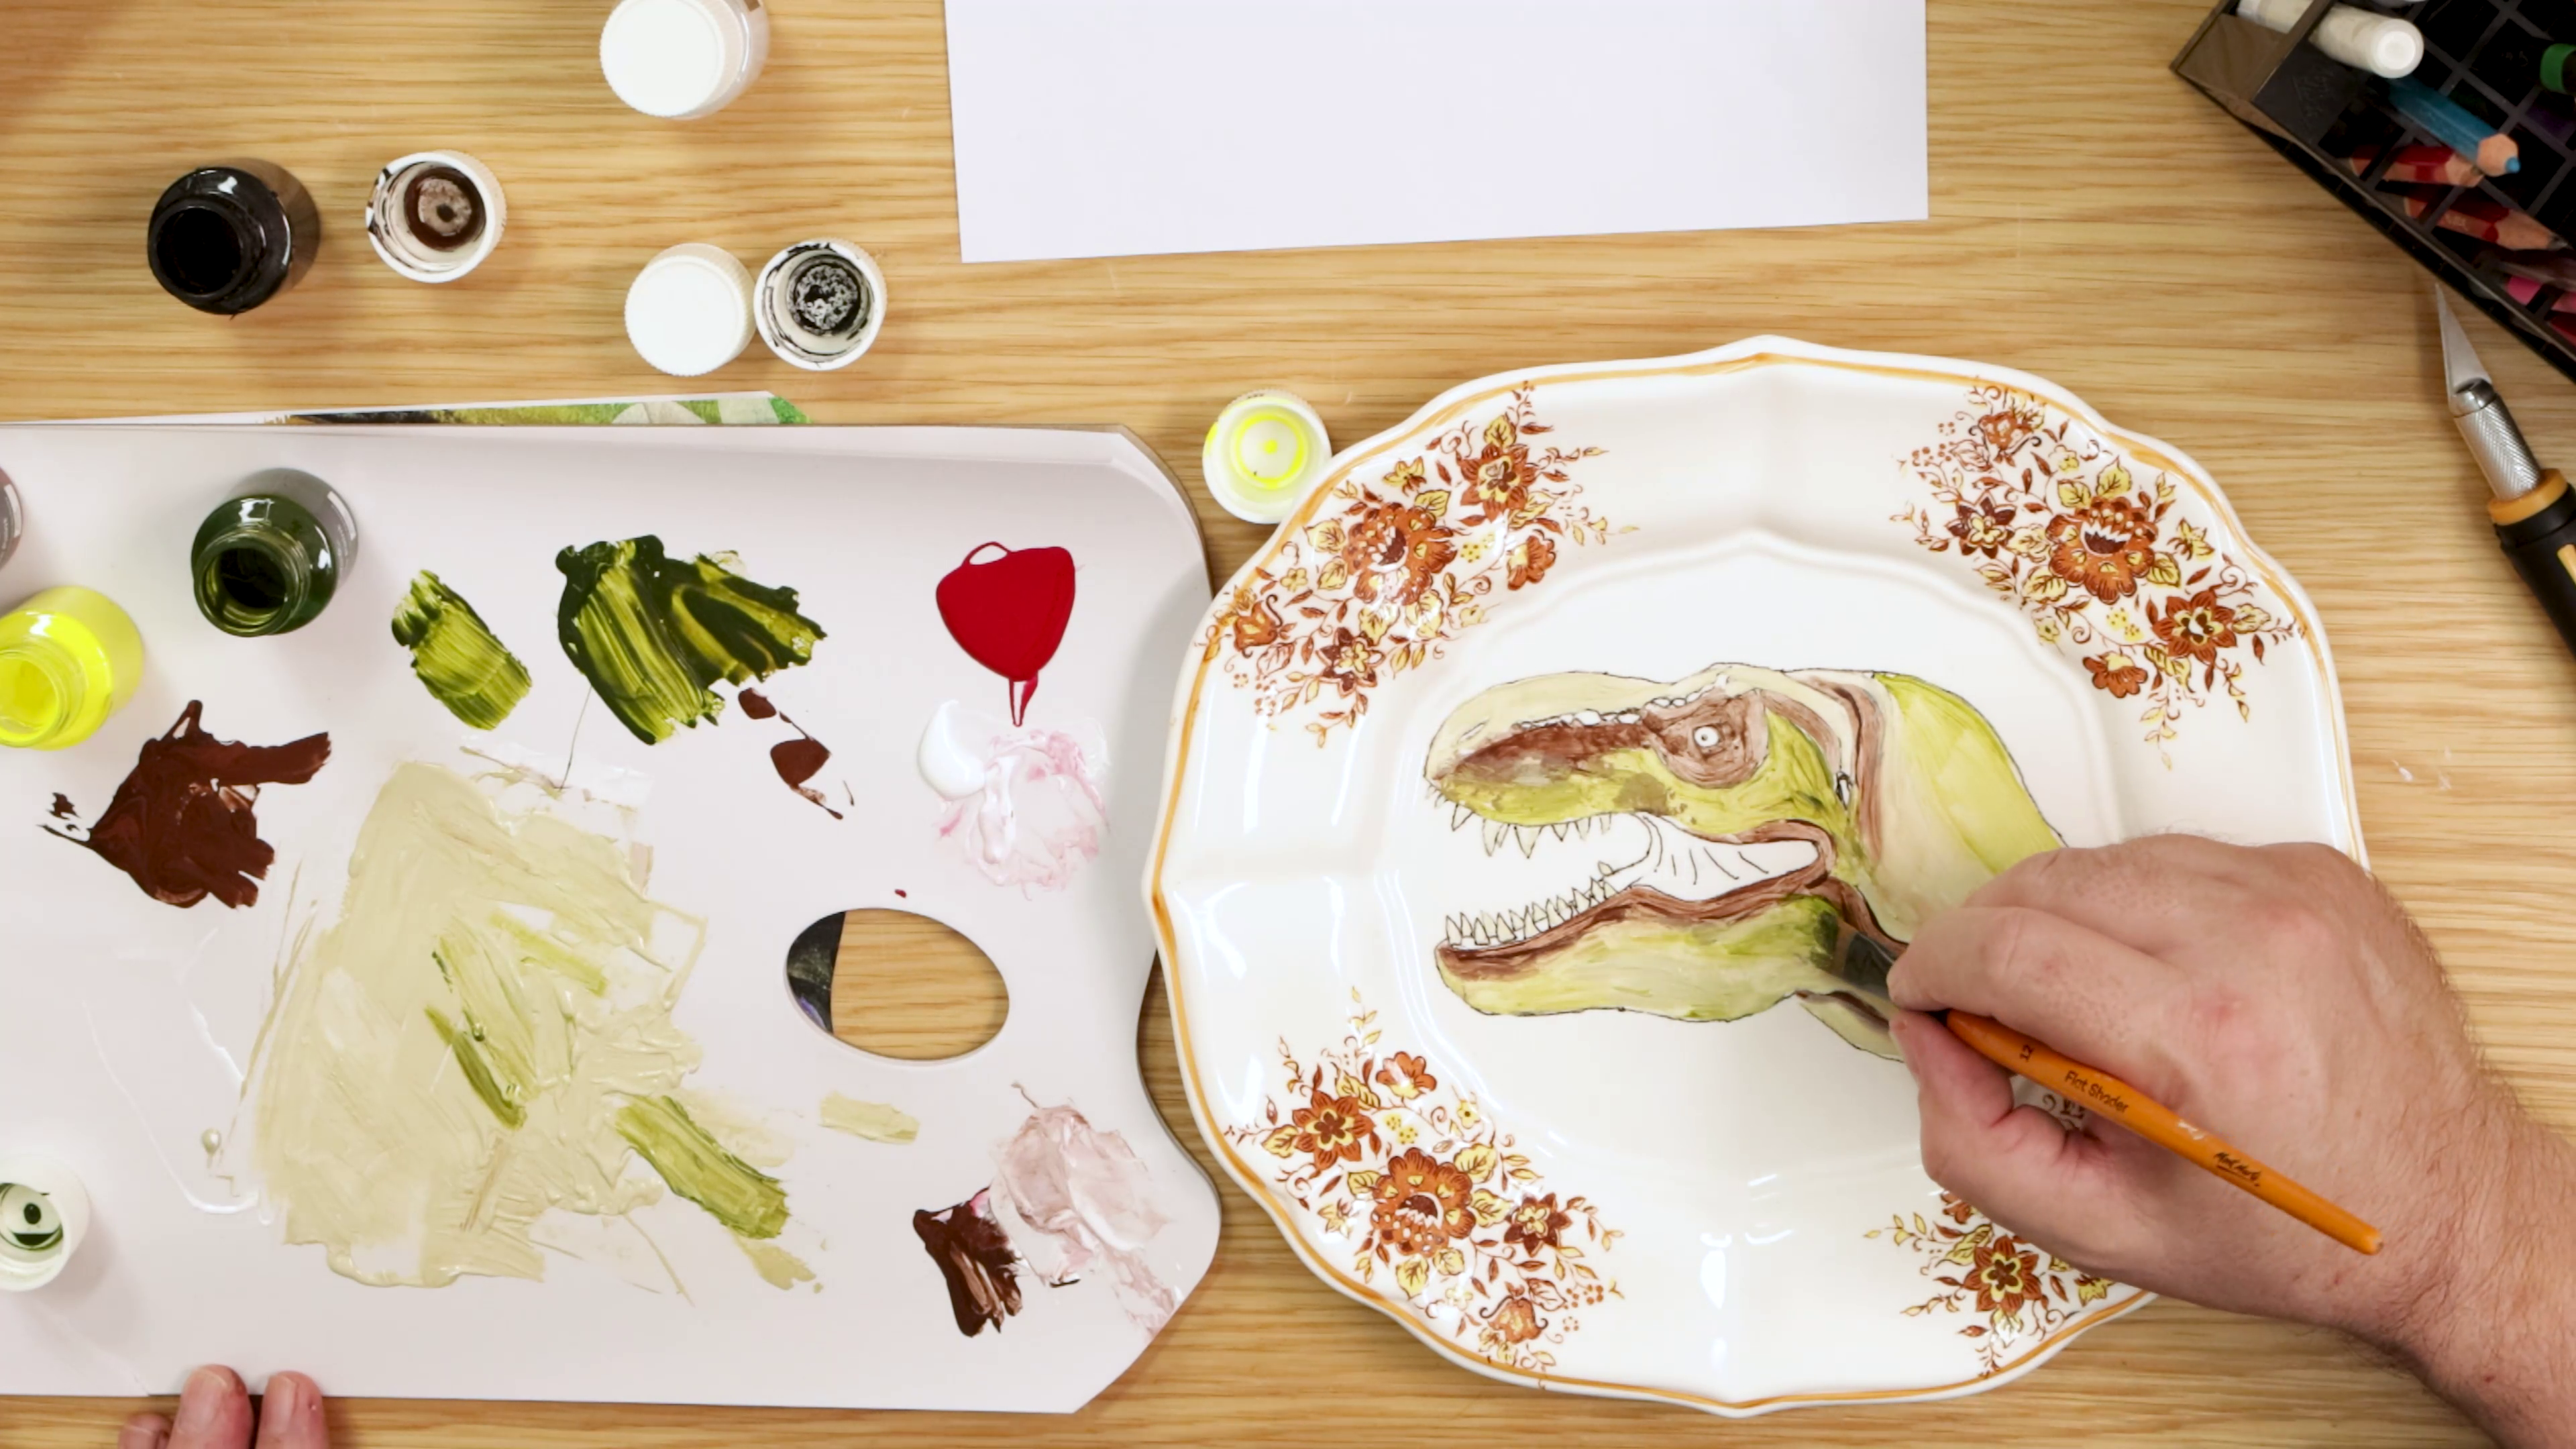
- Mix a slightly dirty cream colour for the teeth
- Work in small sections since ceramic paint dries quickly
- Block in the base colours using warm beige, khaki, and pale red tones
- Pay attention to the light and dark areas
- Focus on building a solid tonal foundation – colour and details will be layered on top!
3. Layering paint
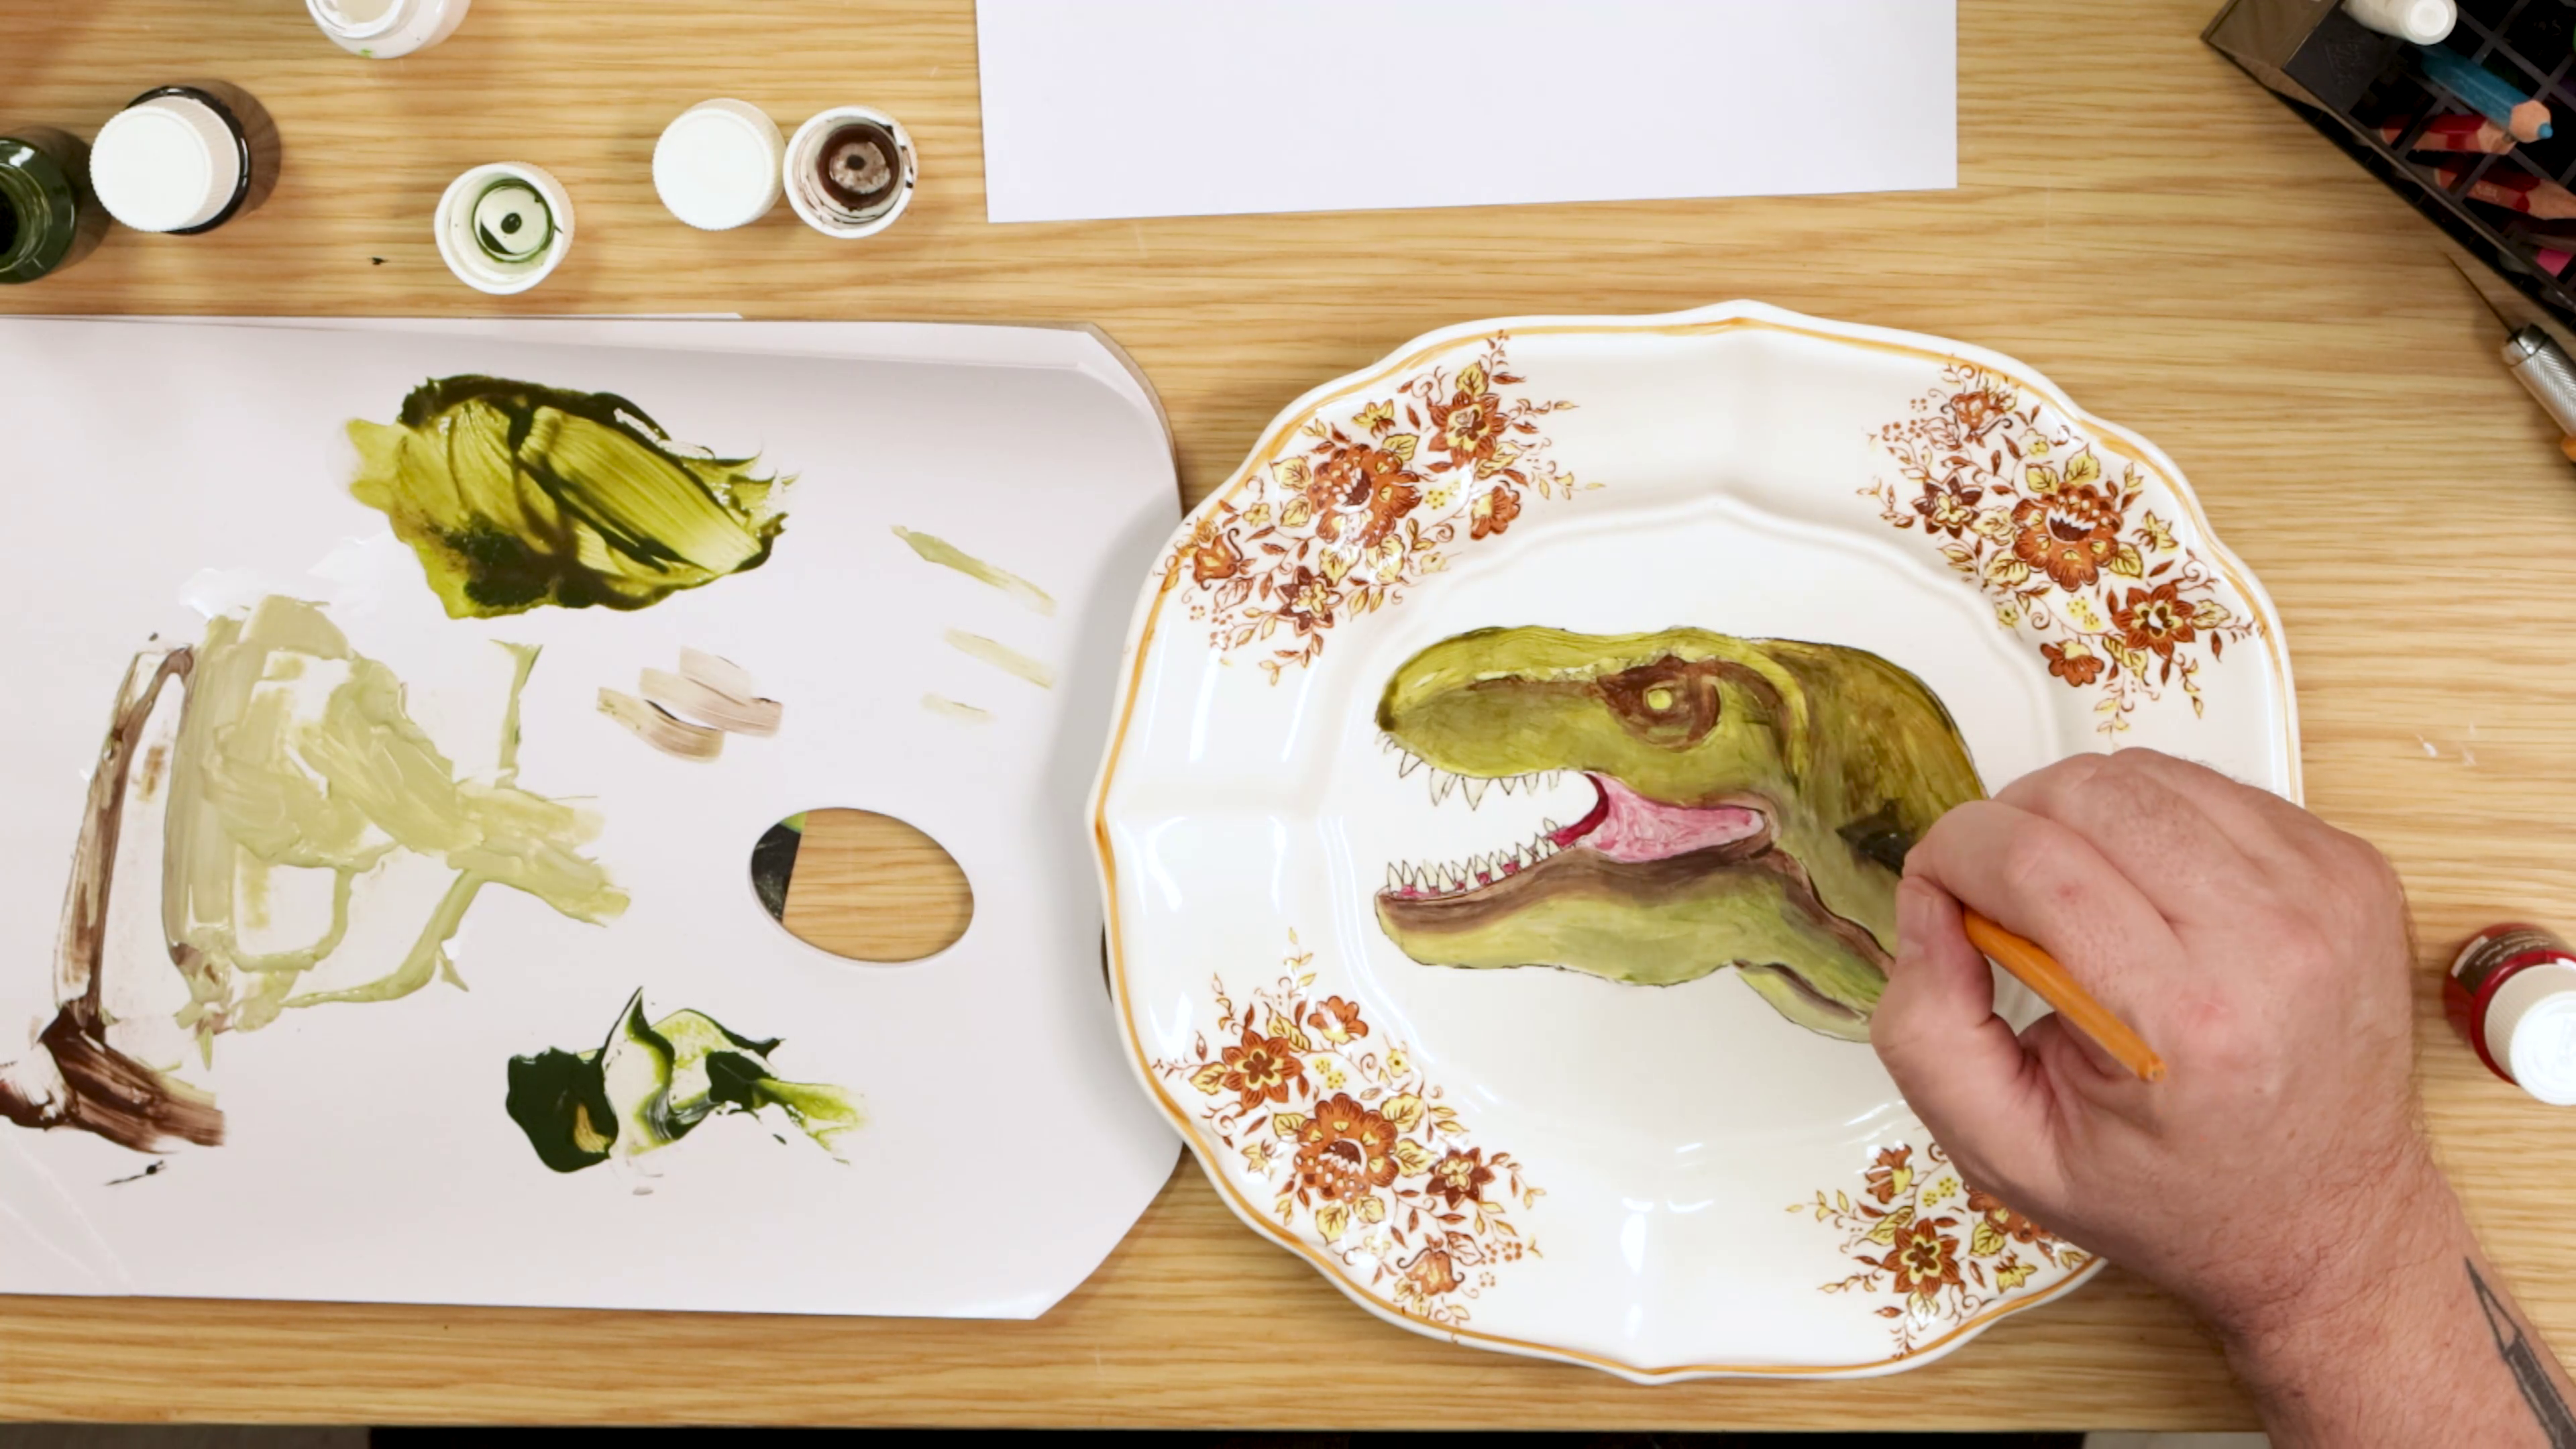
- Allow the first layer to dry before adding another layer to deepen the opacity
- Dry once more, then glaze over your dino with Sap Green mixed with ceramic medium
- Let the glaze visually blend with the colours underneath
4. Outlines, shadows, and highlights
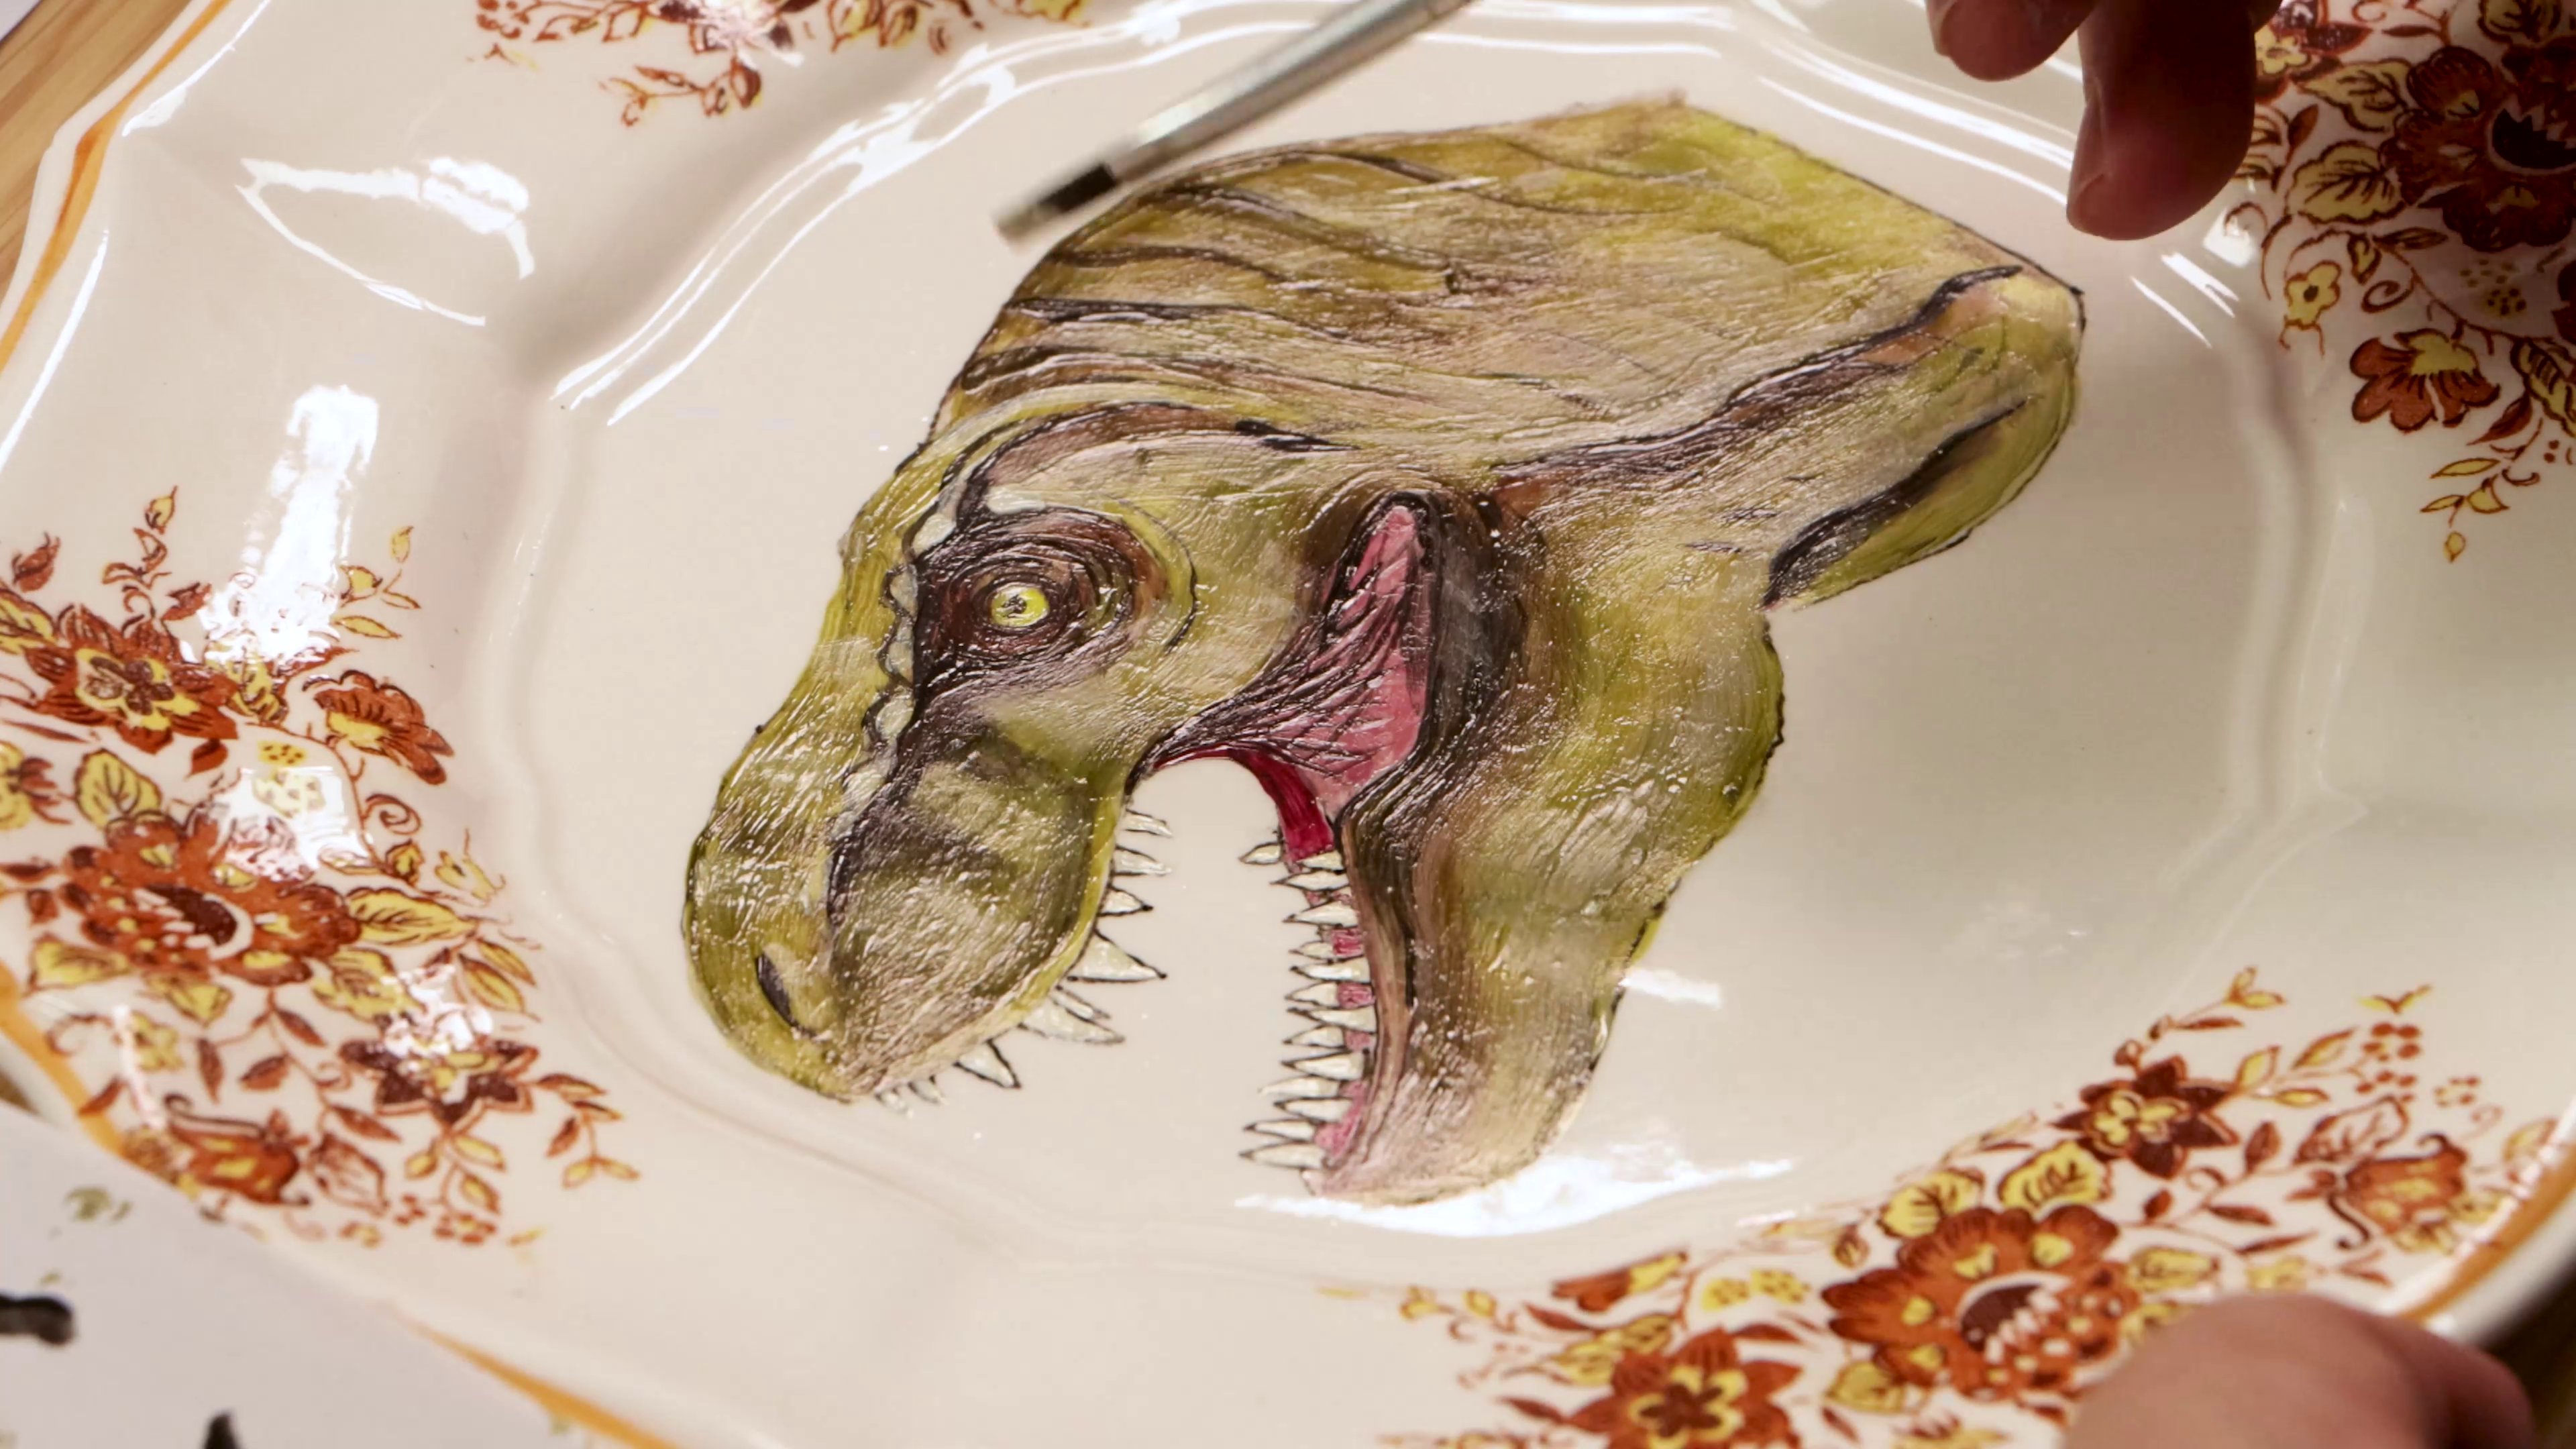
- Add outlines and details using black paint
- Build shadows around the eye and under the nose ridge
- Add highlights to define light areas like outside the eye socket
5. Painting dinosaur scales
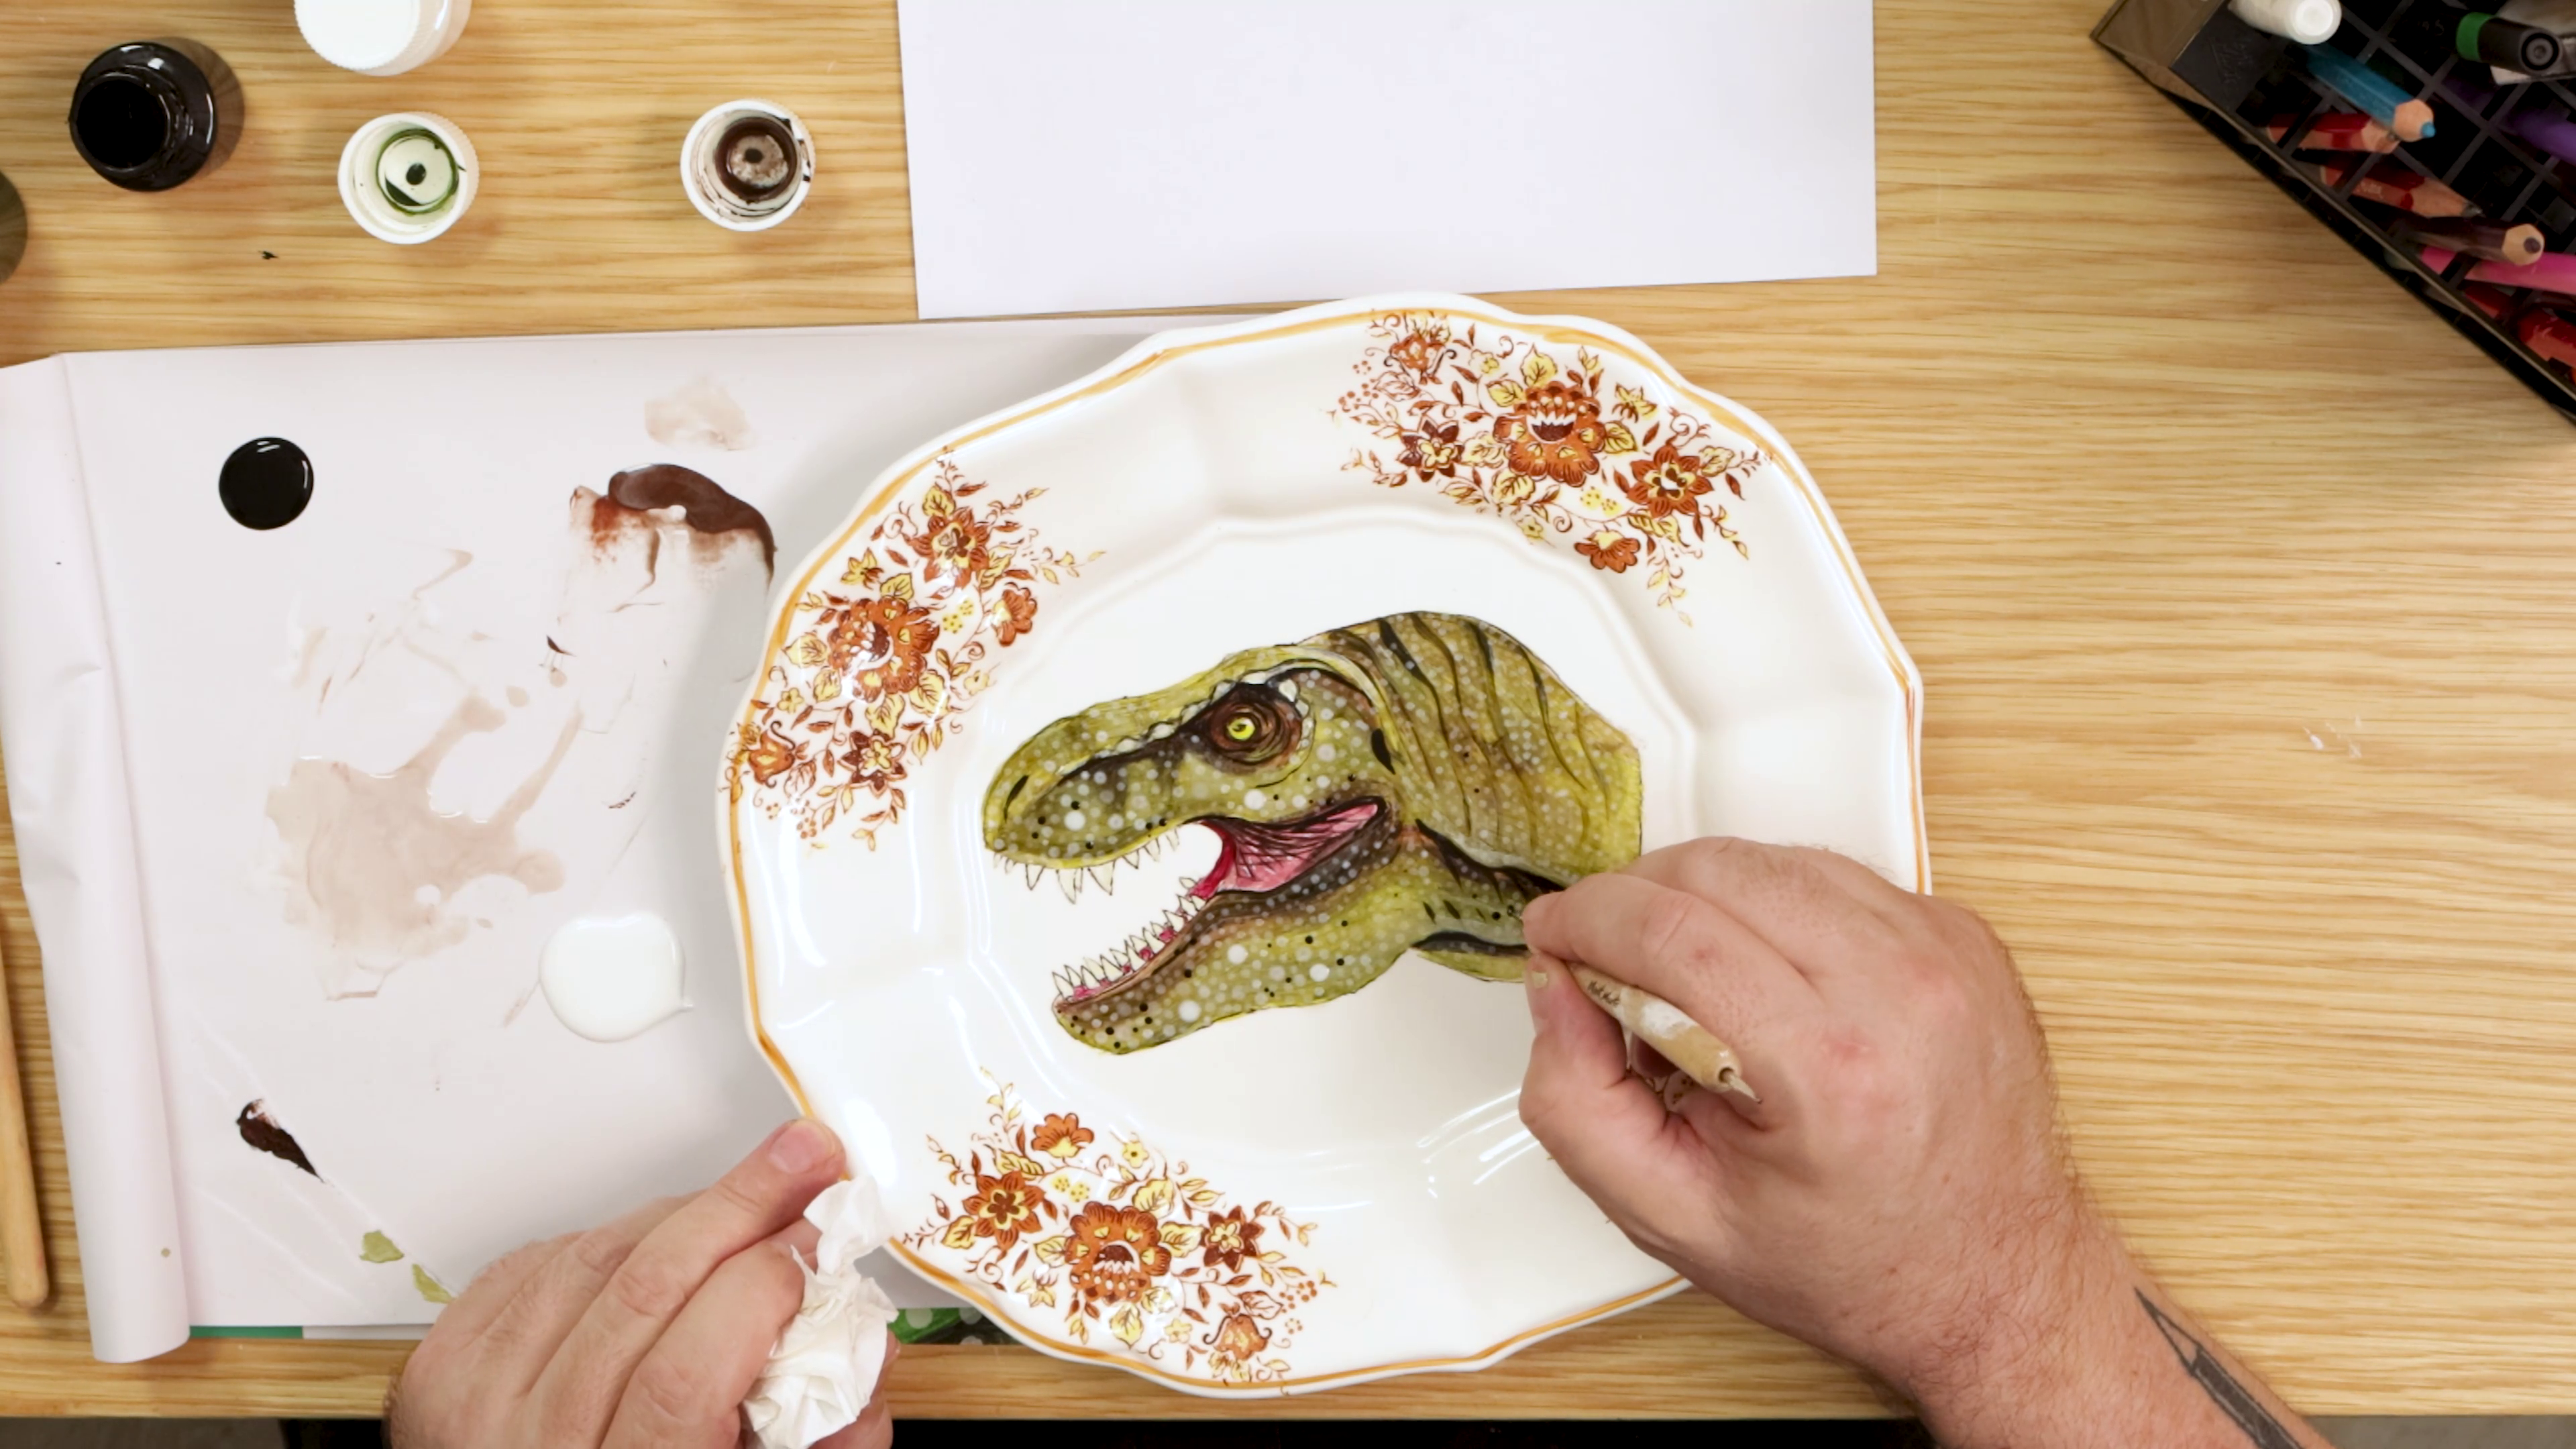
- Mix an off-white tone using ceramic medium and dot scales around the head
- Leave gaps between dots so the scales stay separate
- Let the first layer dry before filling in the remaining spaces
- Vary the size and colour of the scales for a more natural look
- Add darker scales using black paint for dimension
6. Baking ceramic paint
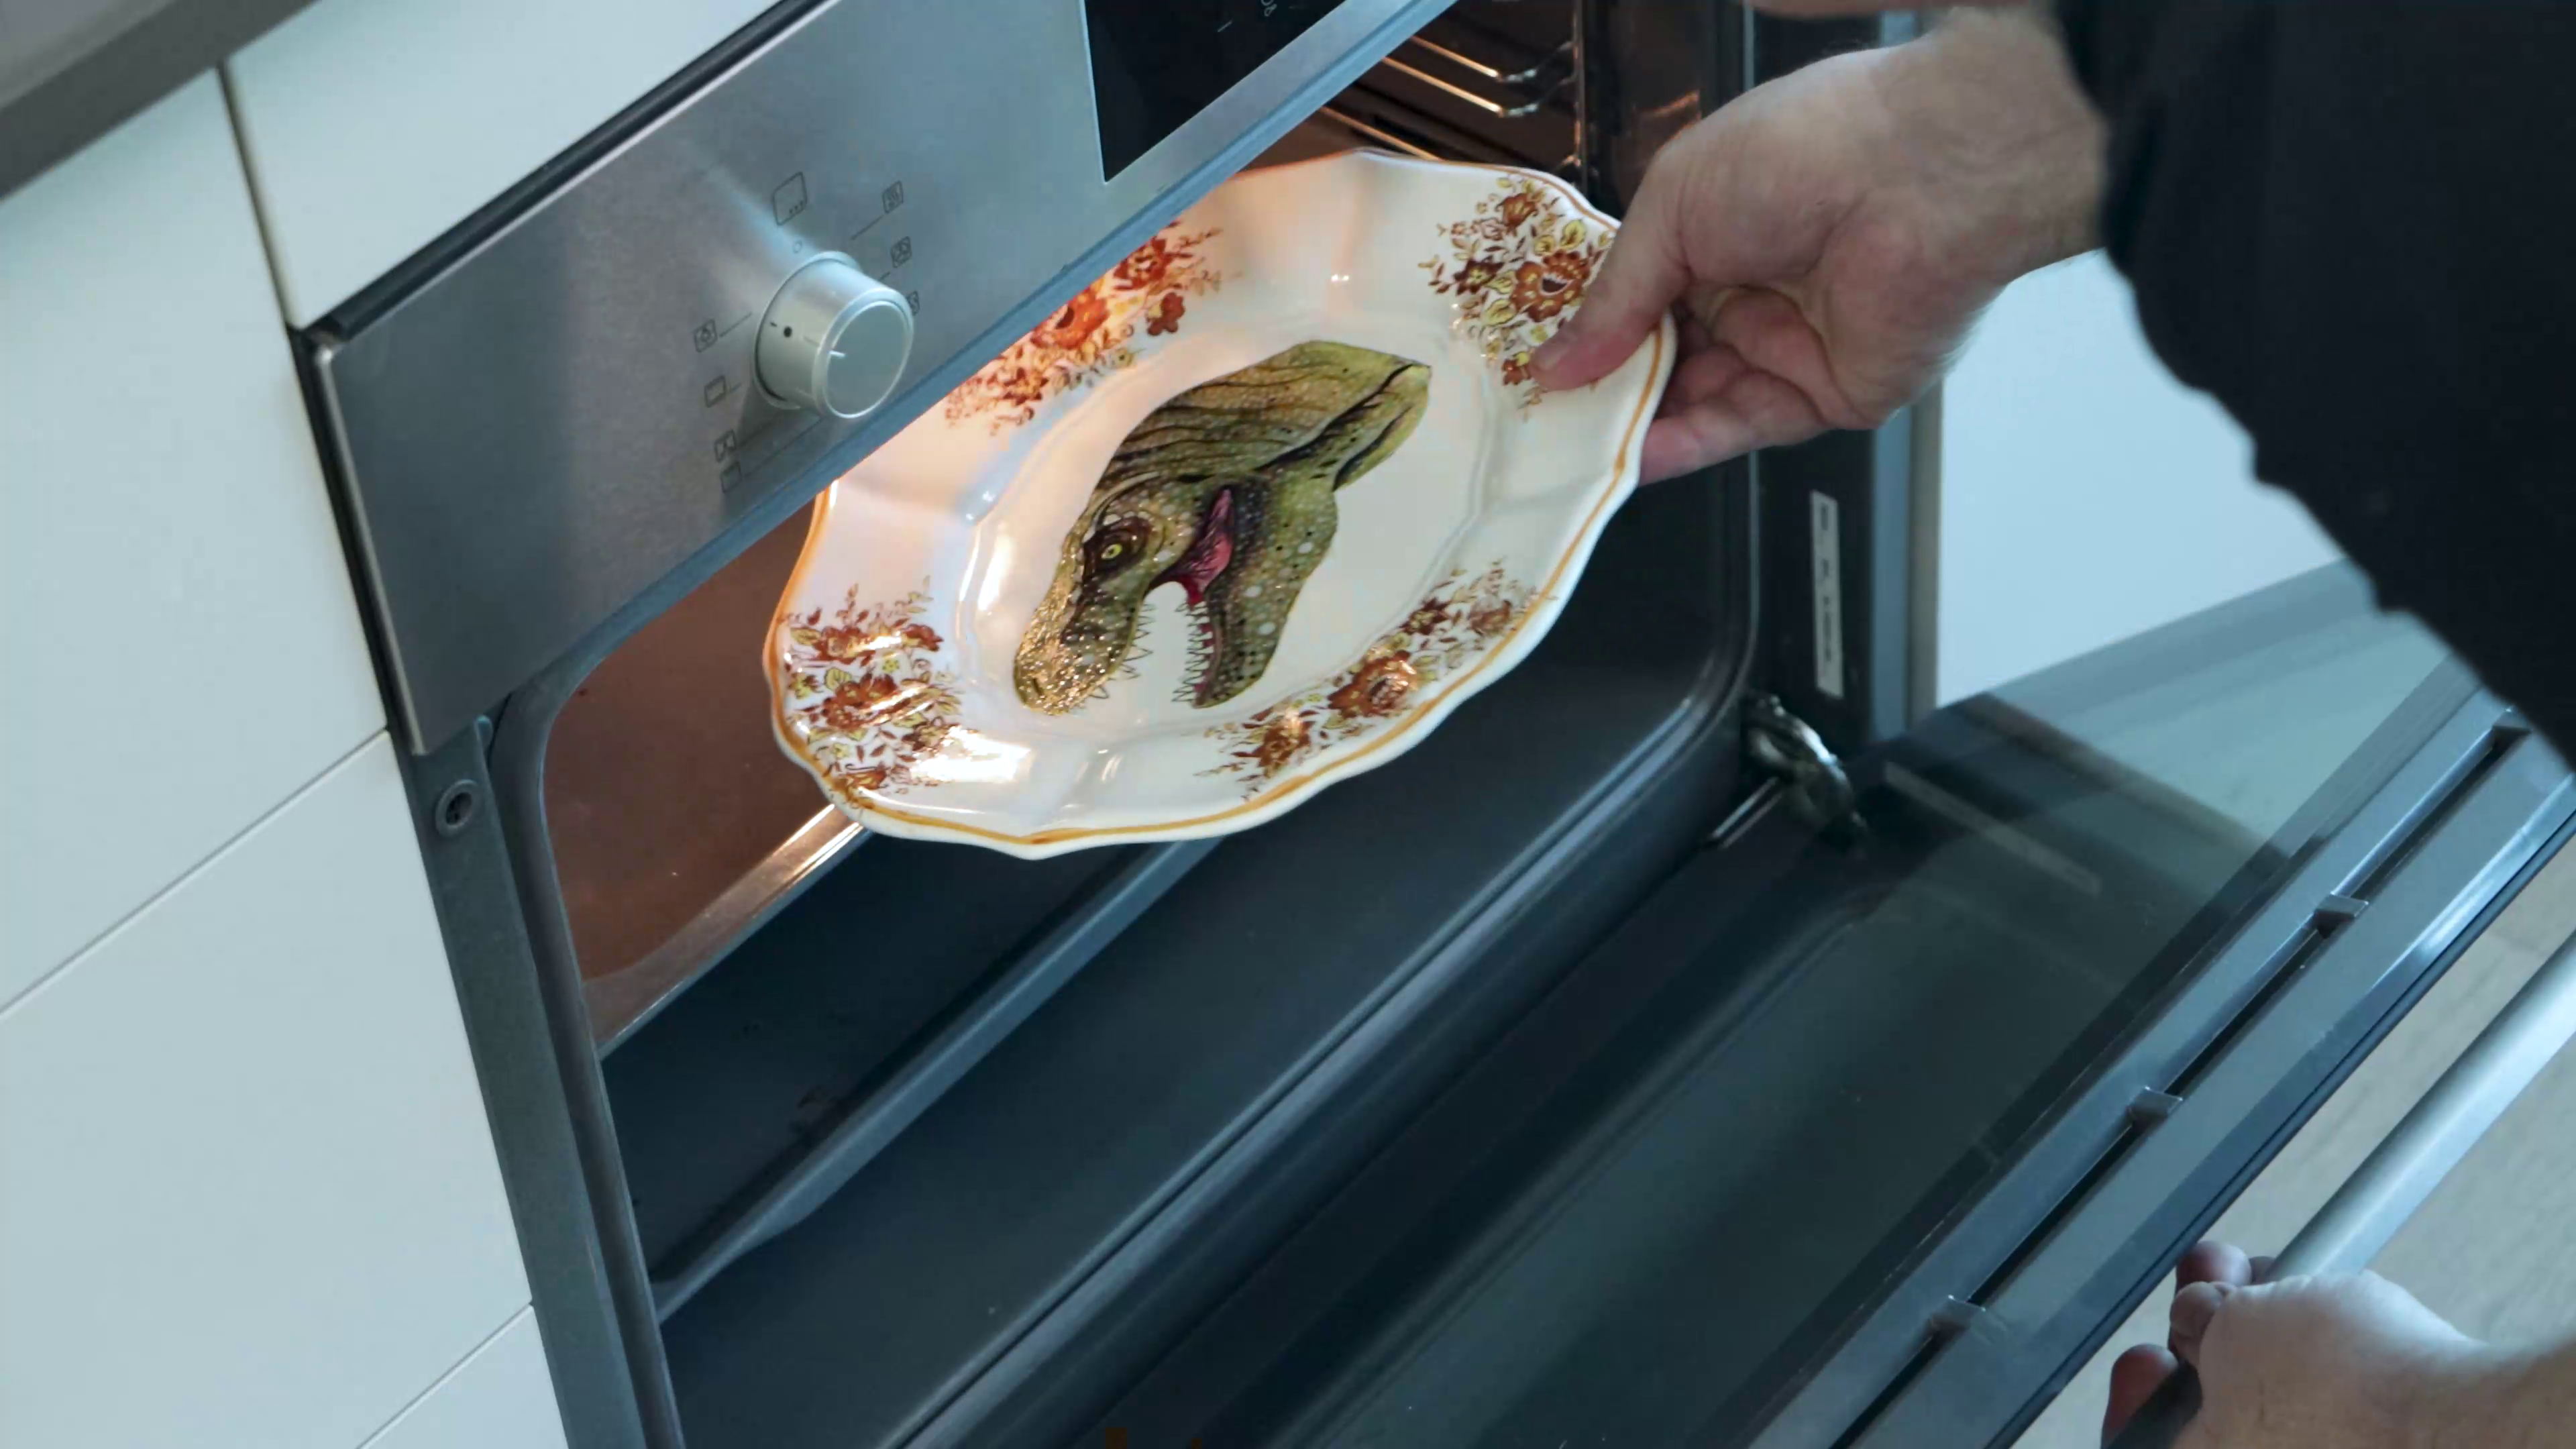
- Allow the plate to dry for 24 hours
- Bake according to the instructions on your Ceramic Paints box
- Let the plate cool completely before displaying
- Ceramic Paints
- Thrifted plate
- Graphic Fineliners
- Paint brushes
- Scissors
- Tape
- Printed dinosaur outline (optional)
You may also like

Peacock drawing in watersoluble oil pastels


How to use ceramic paint on a thrifted plate


