


Clay chess piece
Clay armature
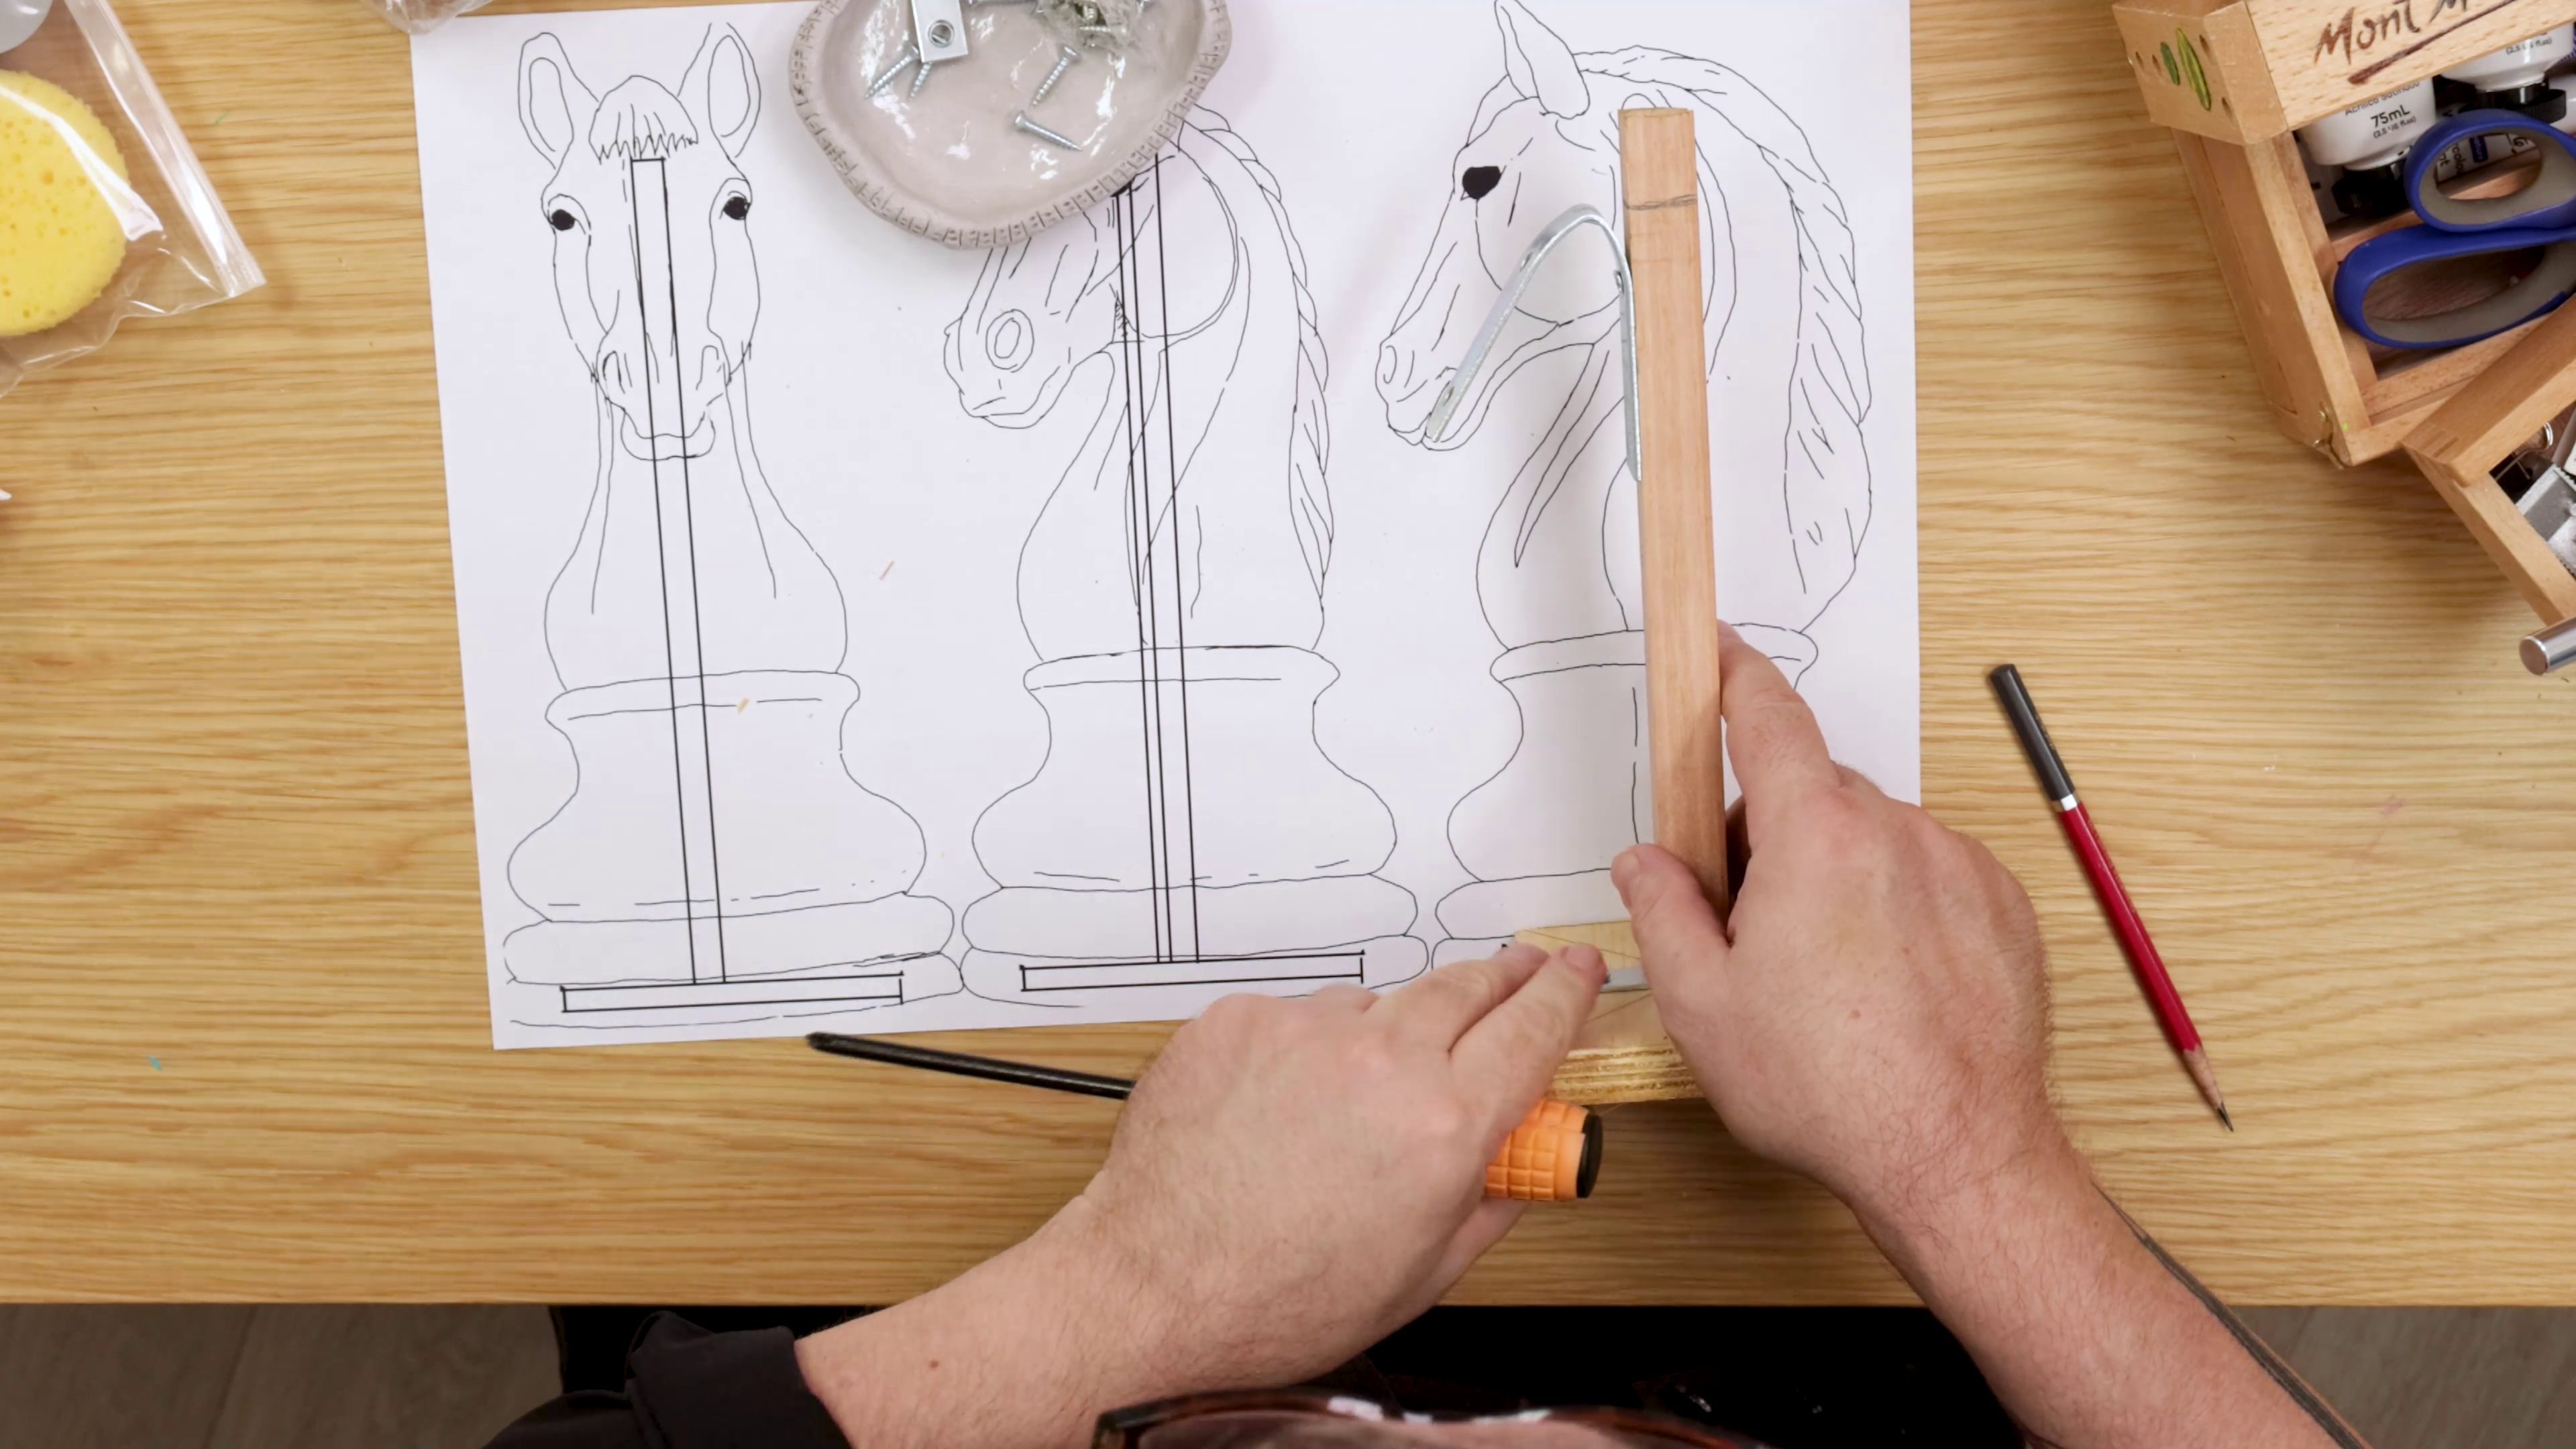
- Glue two pieces of scrap wood together to form a solid base
- Cut the base down to around 100 × 100mm
- Drill a hole in the centre for the vertical support rod
- Insert the rod and secure it firmly in place
- Bend and attach a small metal bracket to support the angle of the head
- Secure the base to your surface with a small amount of tack so it stays still while sculpting
Knight base
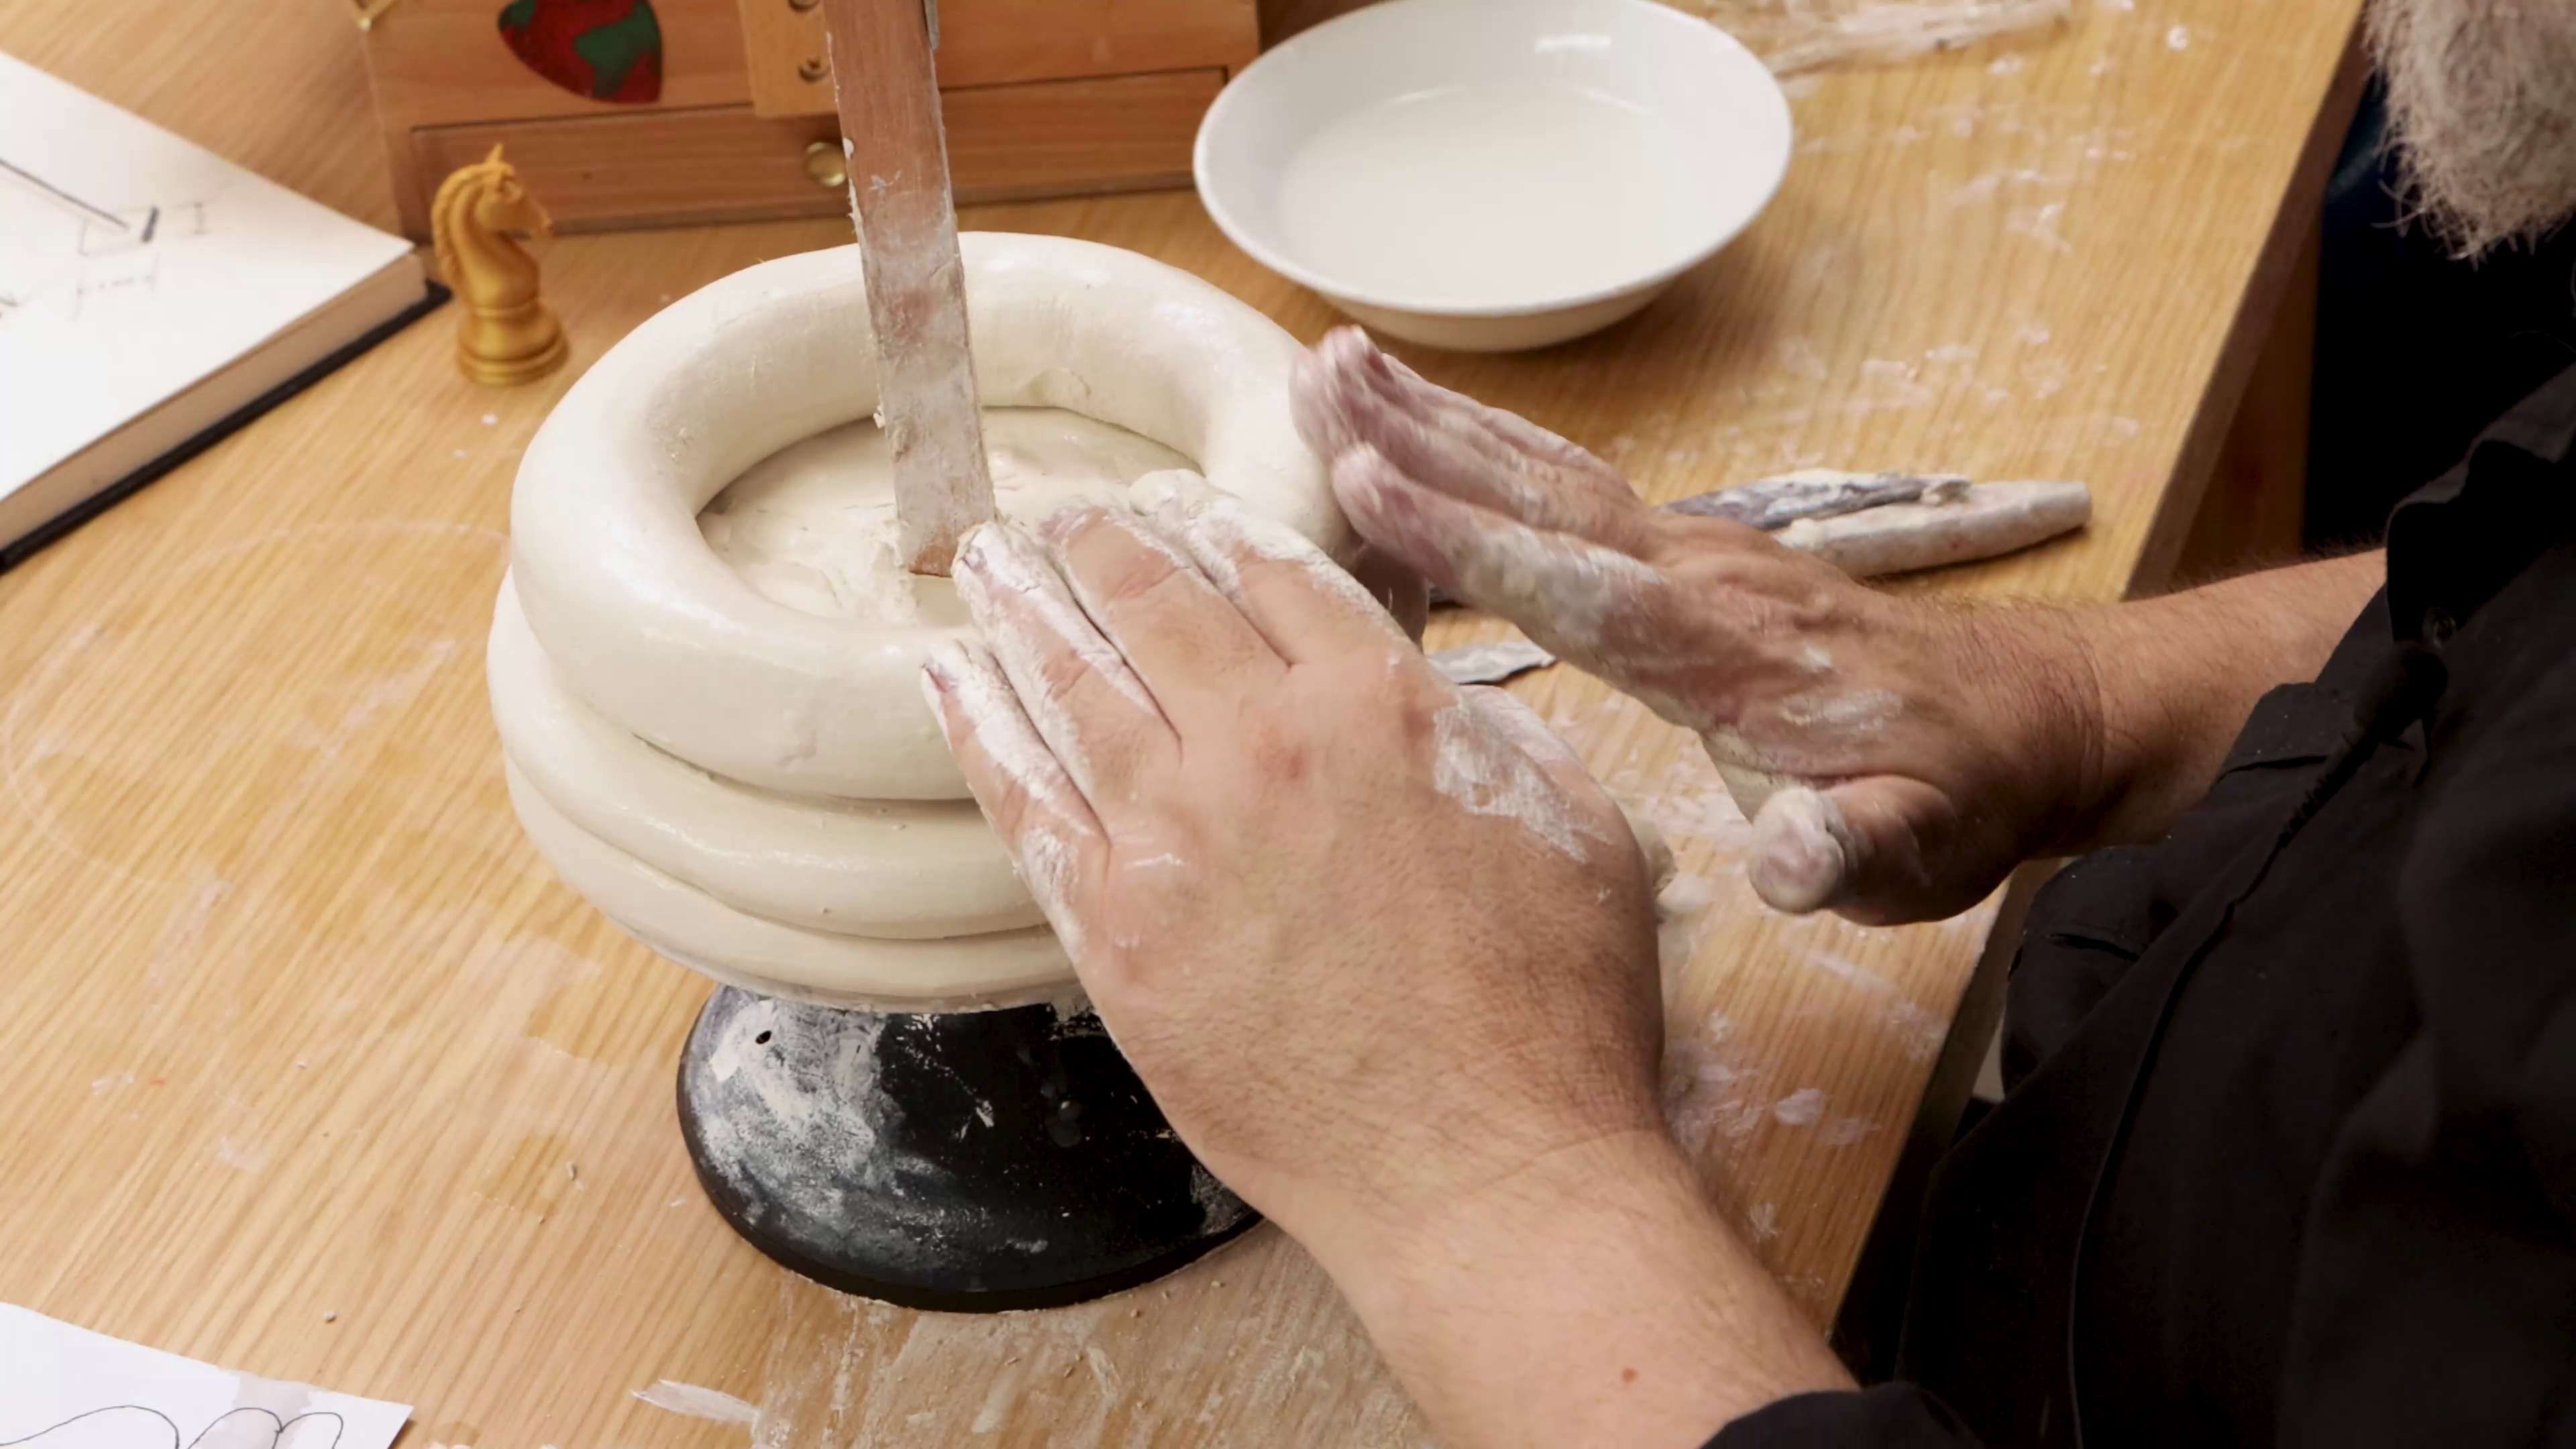
- Roll a long log of clay and wrap it around the base of the armature
- Press and smooth the clay to form the first ring of the chess base
- Fill in the gaps between the ring and the armature, smoothing the clay
- Create and stack a second ring of the same size on top of the first
- Fill in between the ring and the armature with more clay, smoothing it out
- Repeat once more, adding a thicker but shorter ring on top
Refining the base
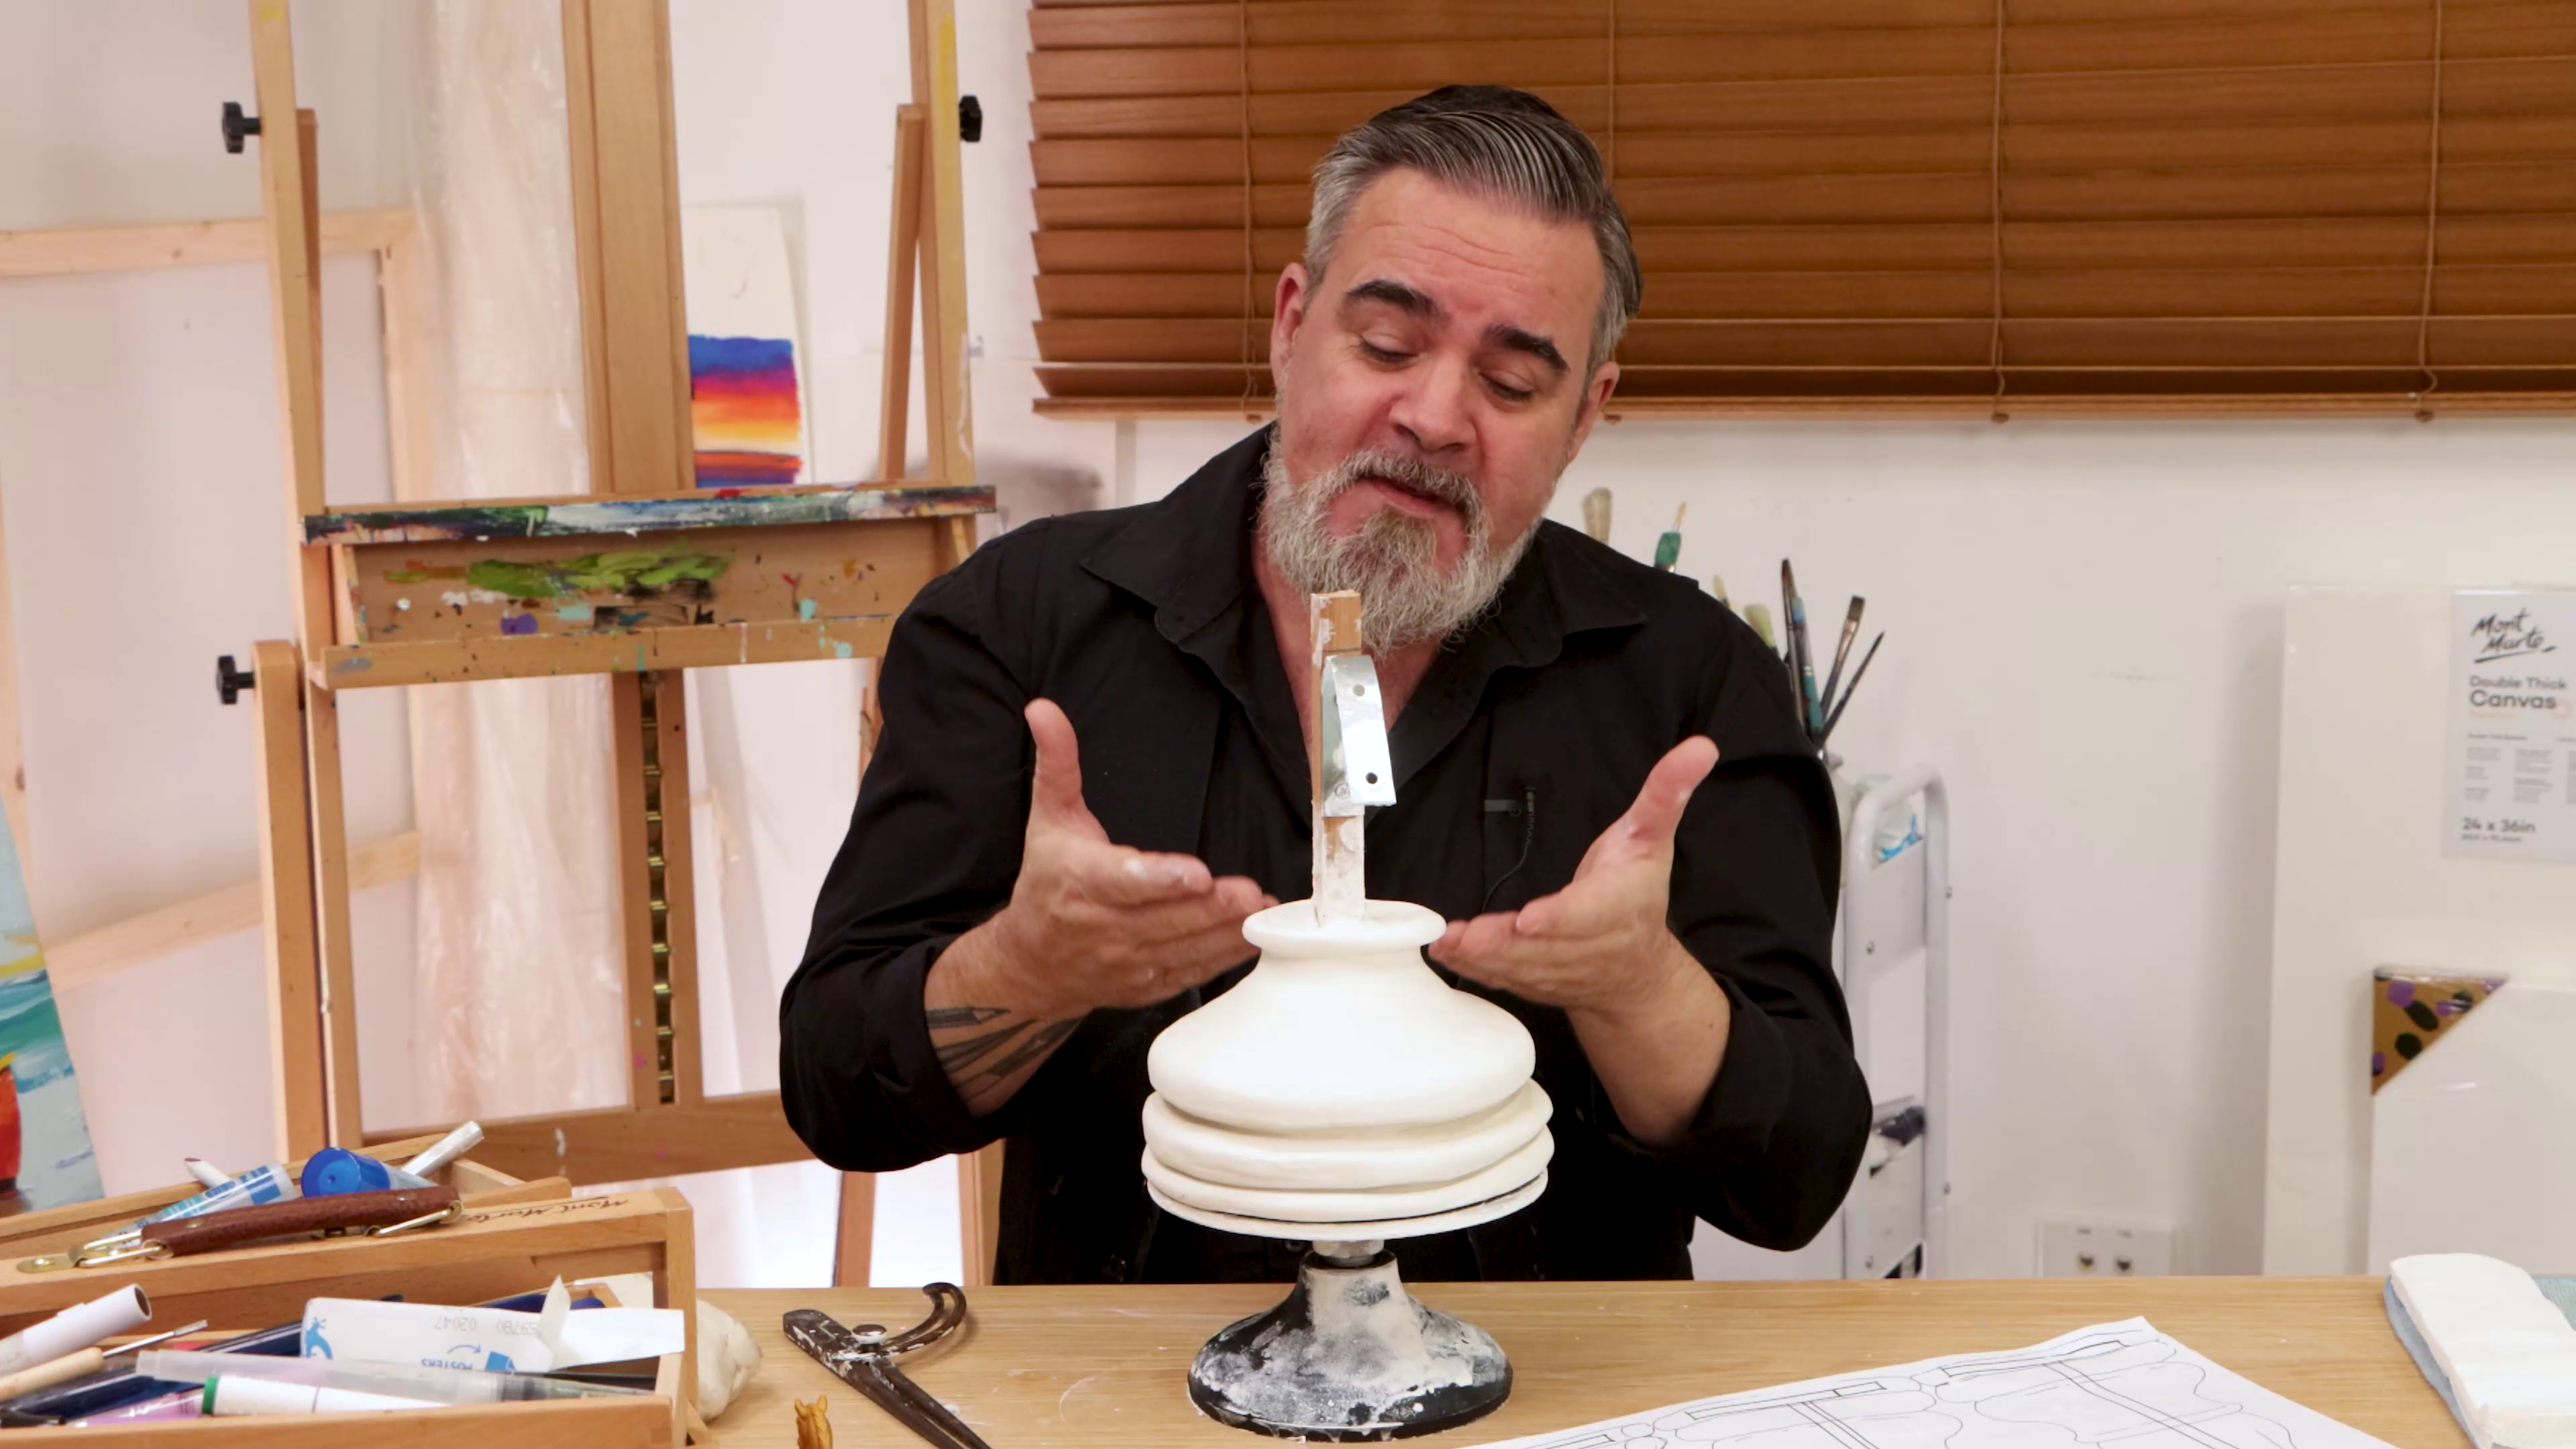
- Fill in the ring with more clay, and refine the transition so it slopes upwards
- Build up clay to flatten the top of the and create a base for your knight
- Lastly, carve and smooth the top of your base to the outer edge to create a gentle curve all the way around
Air dry clay horse – building the body

- Add clay around the top of your armature to form the neck and upper body
- Work slowly, adding clay piece by piece rather than large sections
- Use your thumb or a damp brush to smooth surfaces and blend joins
- Regularly check proportions against the reference drawing provided on the project page
Clay face sculpting
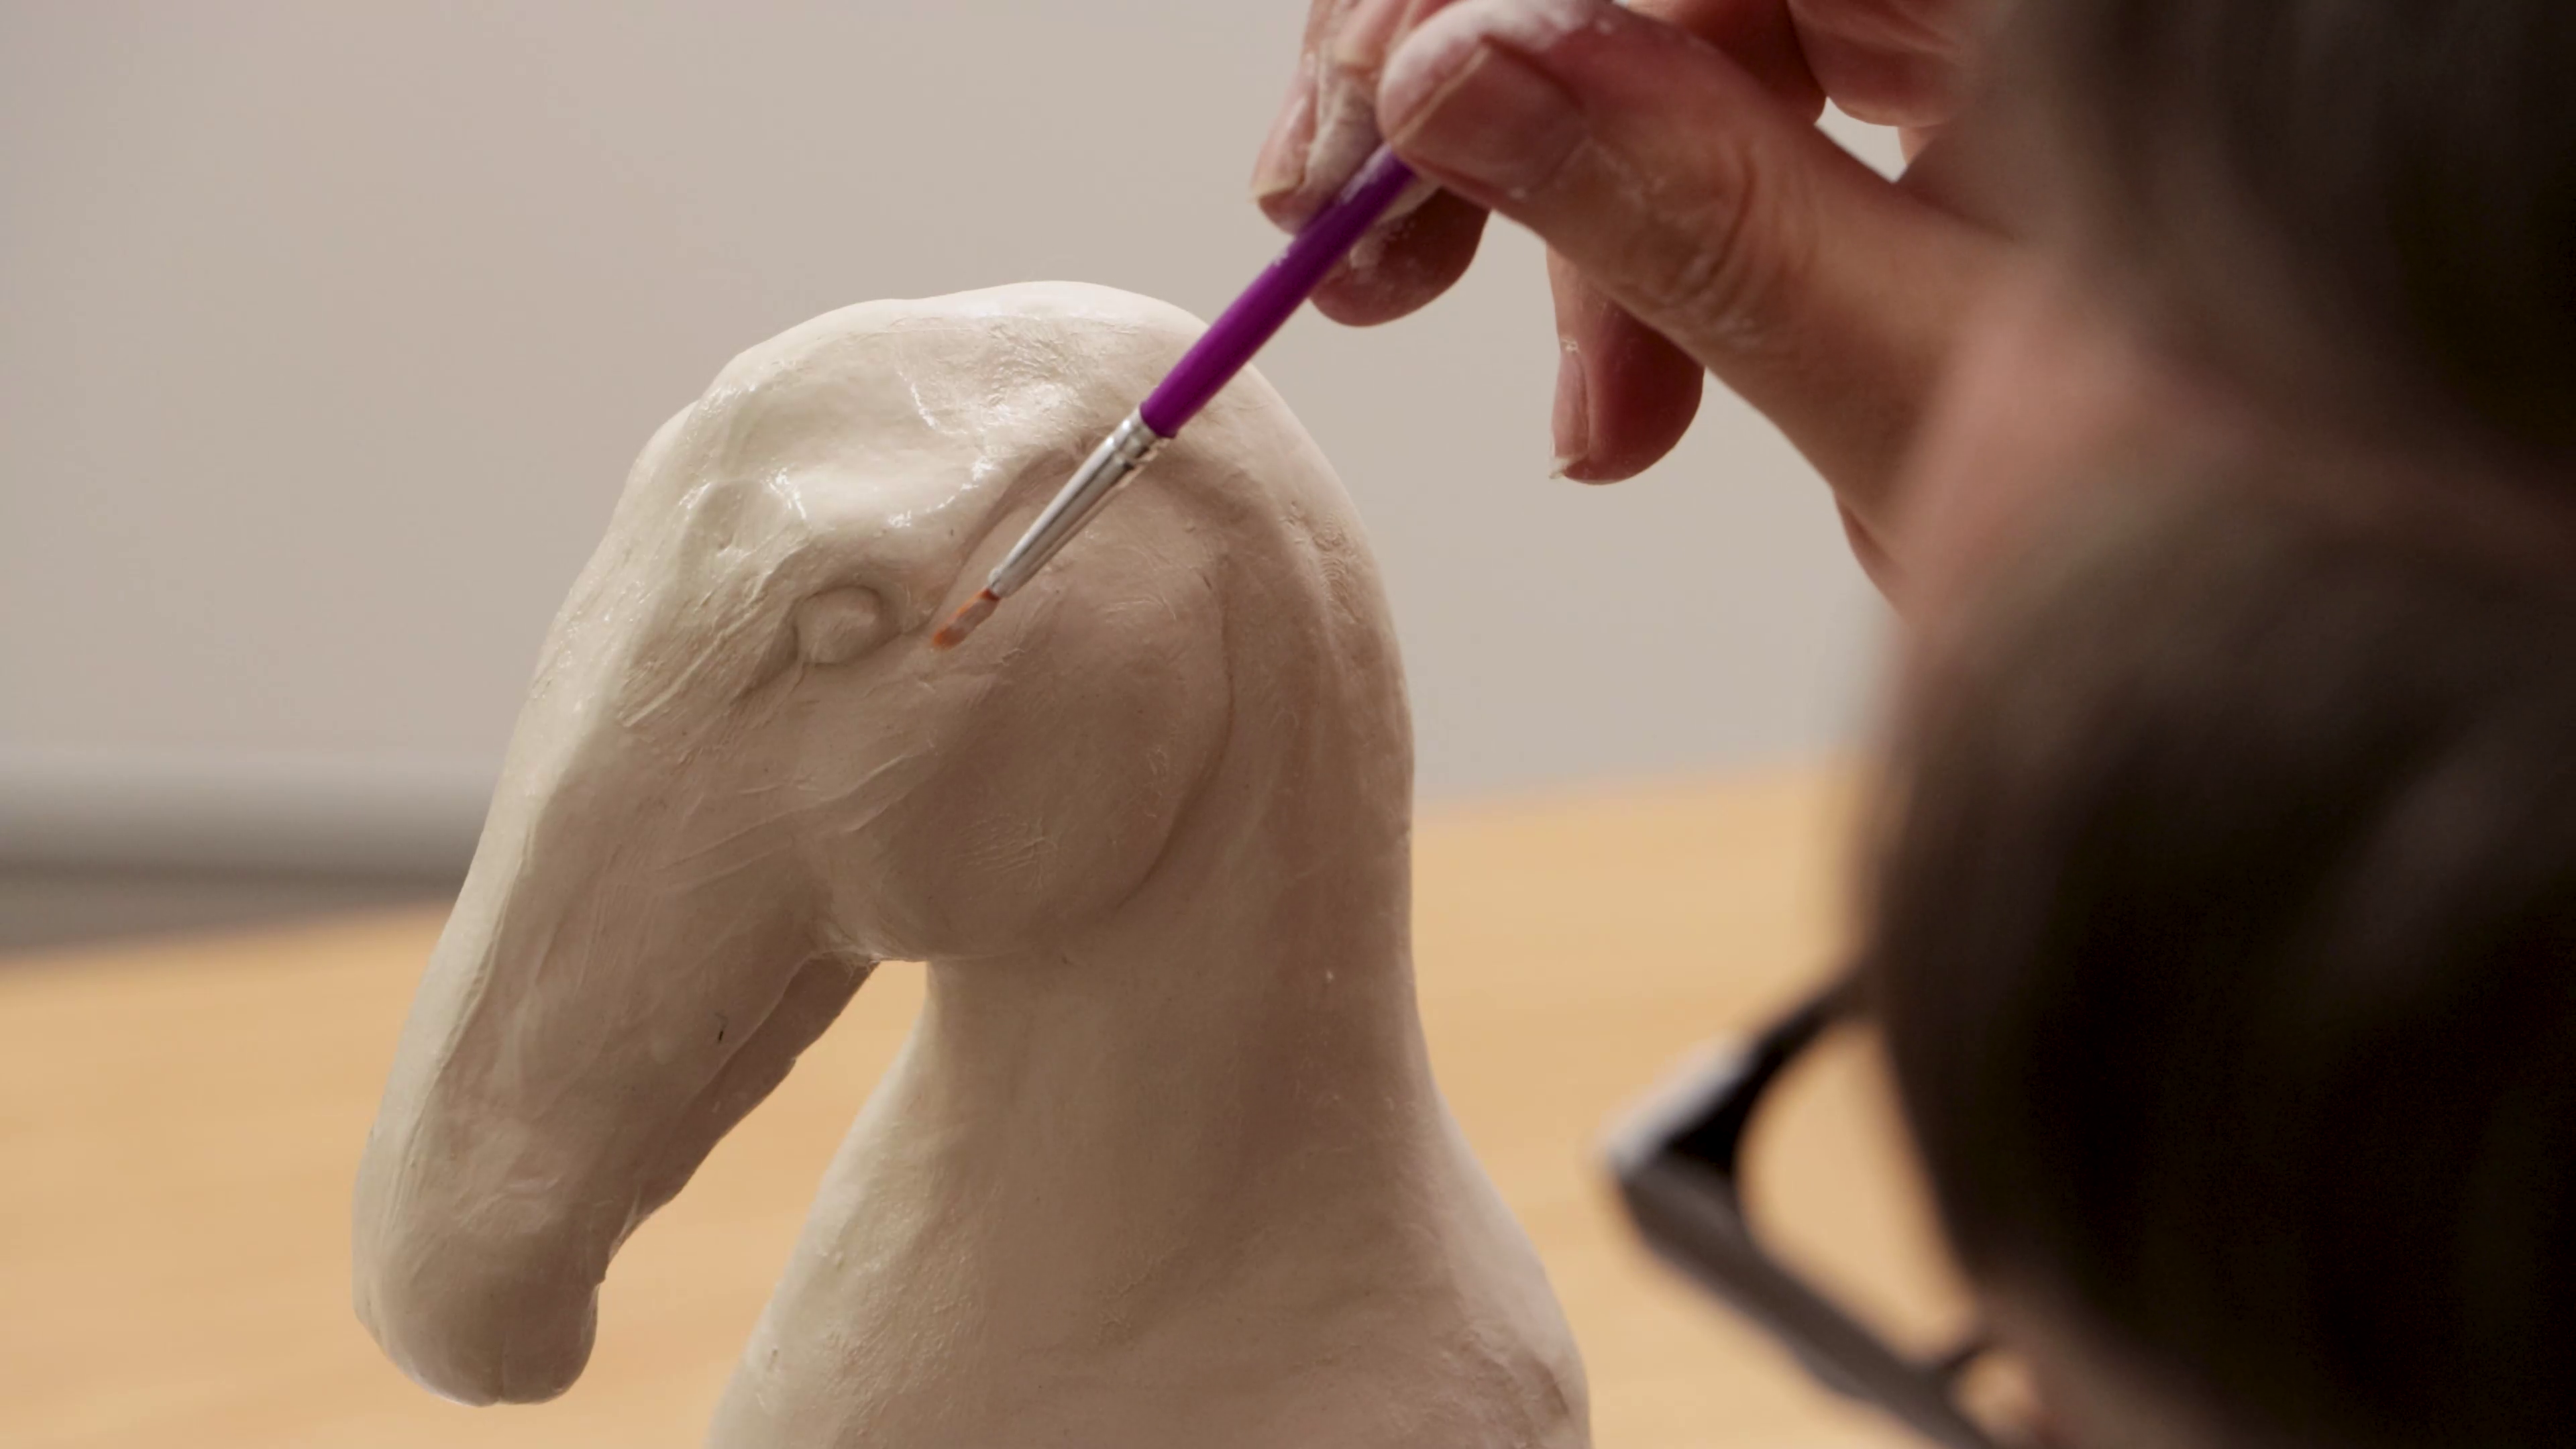
- Build up the main shapes of the head by adding clay gradually
- Form the eye sockets first before shaping the cheeks and muzzle
- Refine the nose and mouth area by carving and smoothing
- Continue adjusting shapes until the proportions feel balanced
- There’s lots of kinds of horses so make the head shaped how you like it
Clay mane
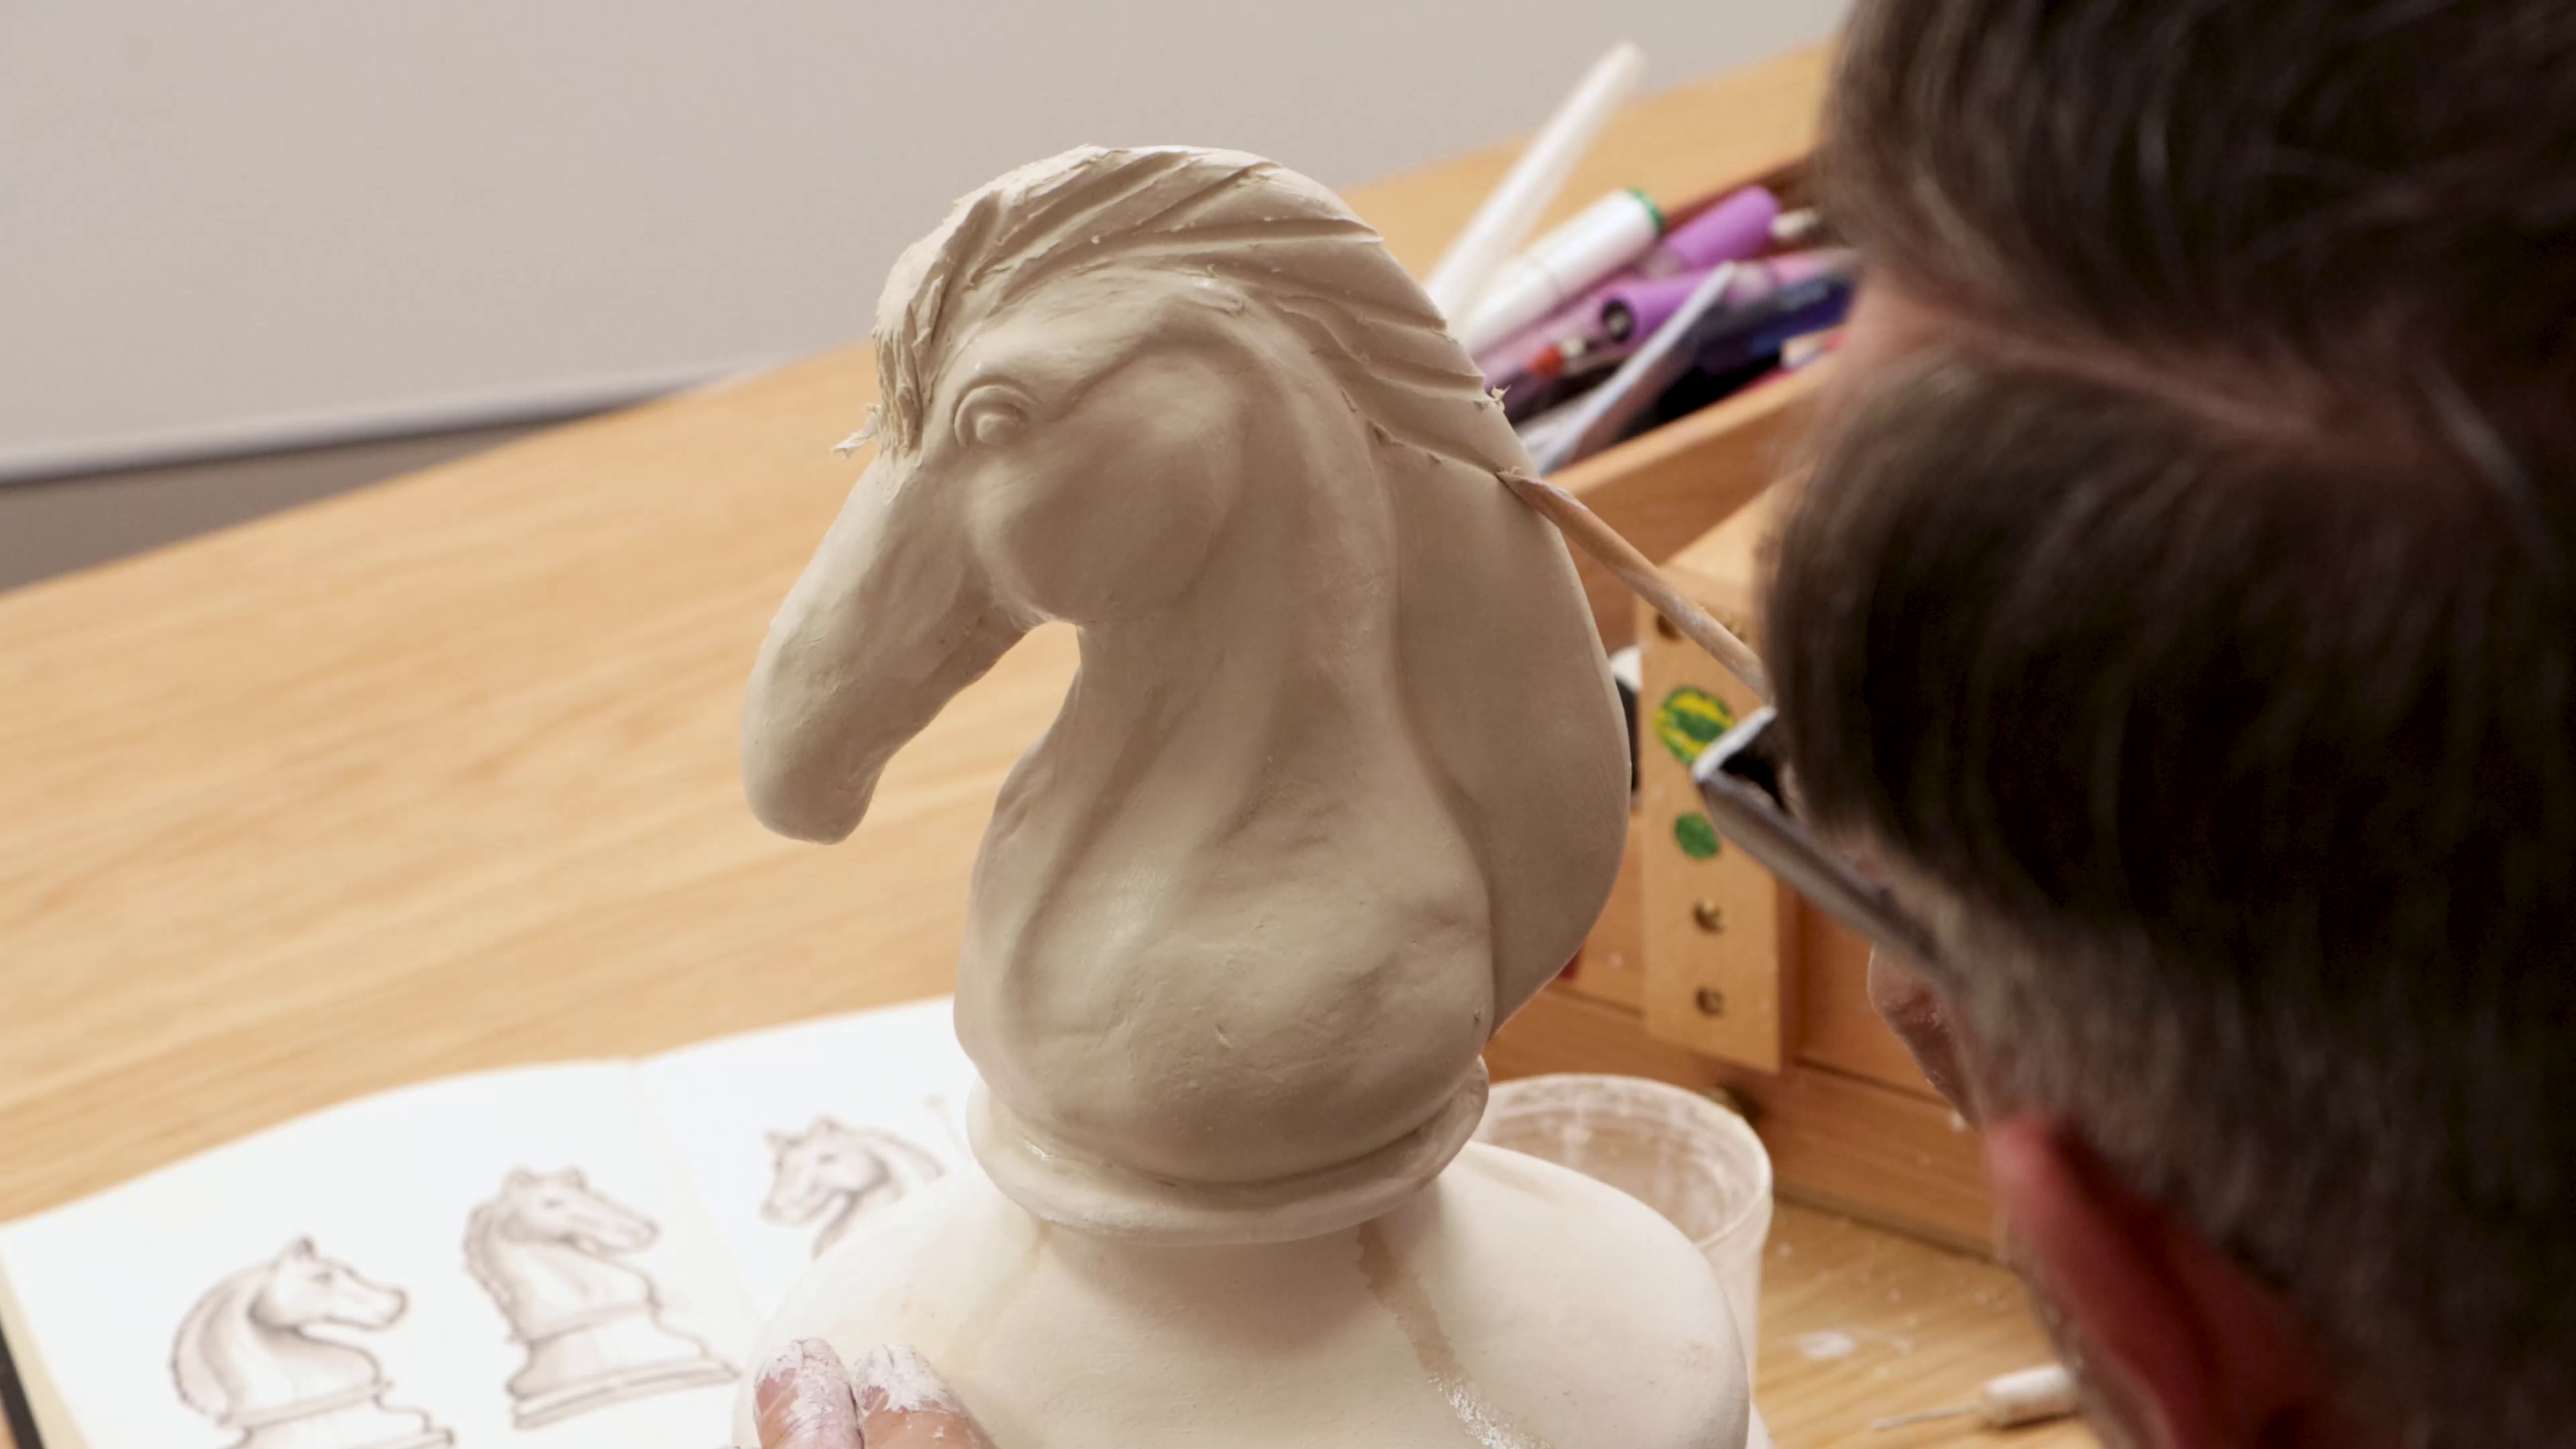
- Roll a long piece of clay and flatten the base
- Attach it along the back of the head to form the mane
- Blend the join using a brush with a small amount of water
- Cut it back to fit the shape of the head
- Carve or press lines into the clay to suggest hair texture
Final sculpting details
- Add small amounts of clay to refine the shape of the nose and cheeks, then cut a line for the mouth
- Shape some ears using two small balls of clay
- Create two curved triangle shapes and flatten the base
- Attach them carefully and smooth the joins
- Build up some extra clay where the nostrils and mouth line go
- Carve back the clay to refine the shape
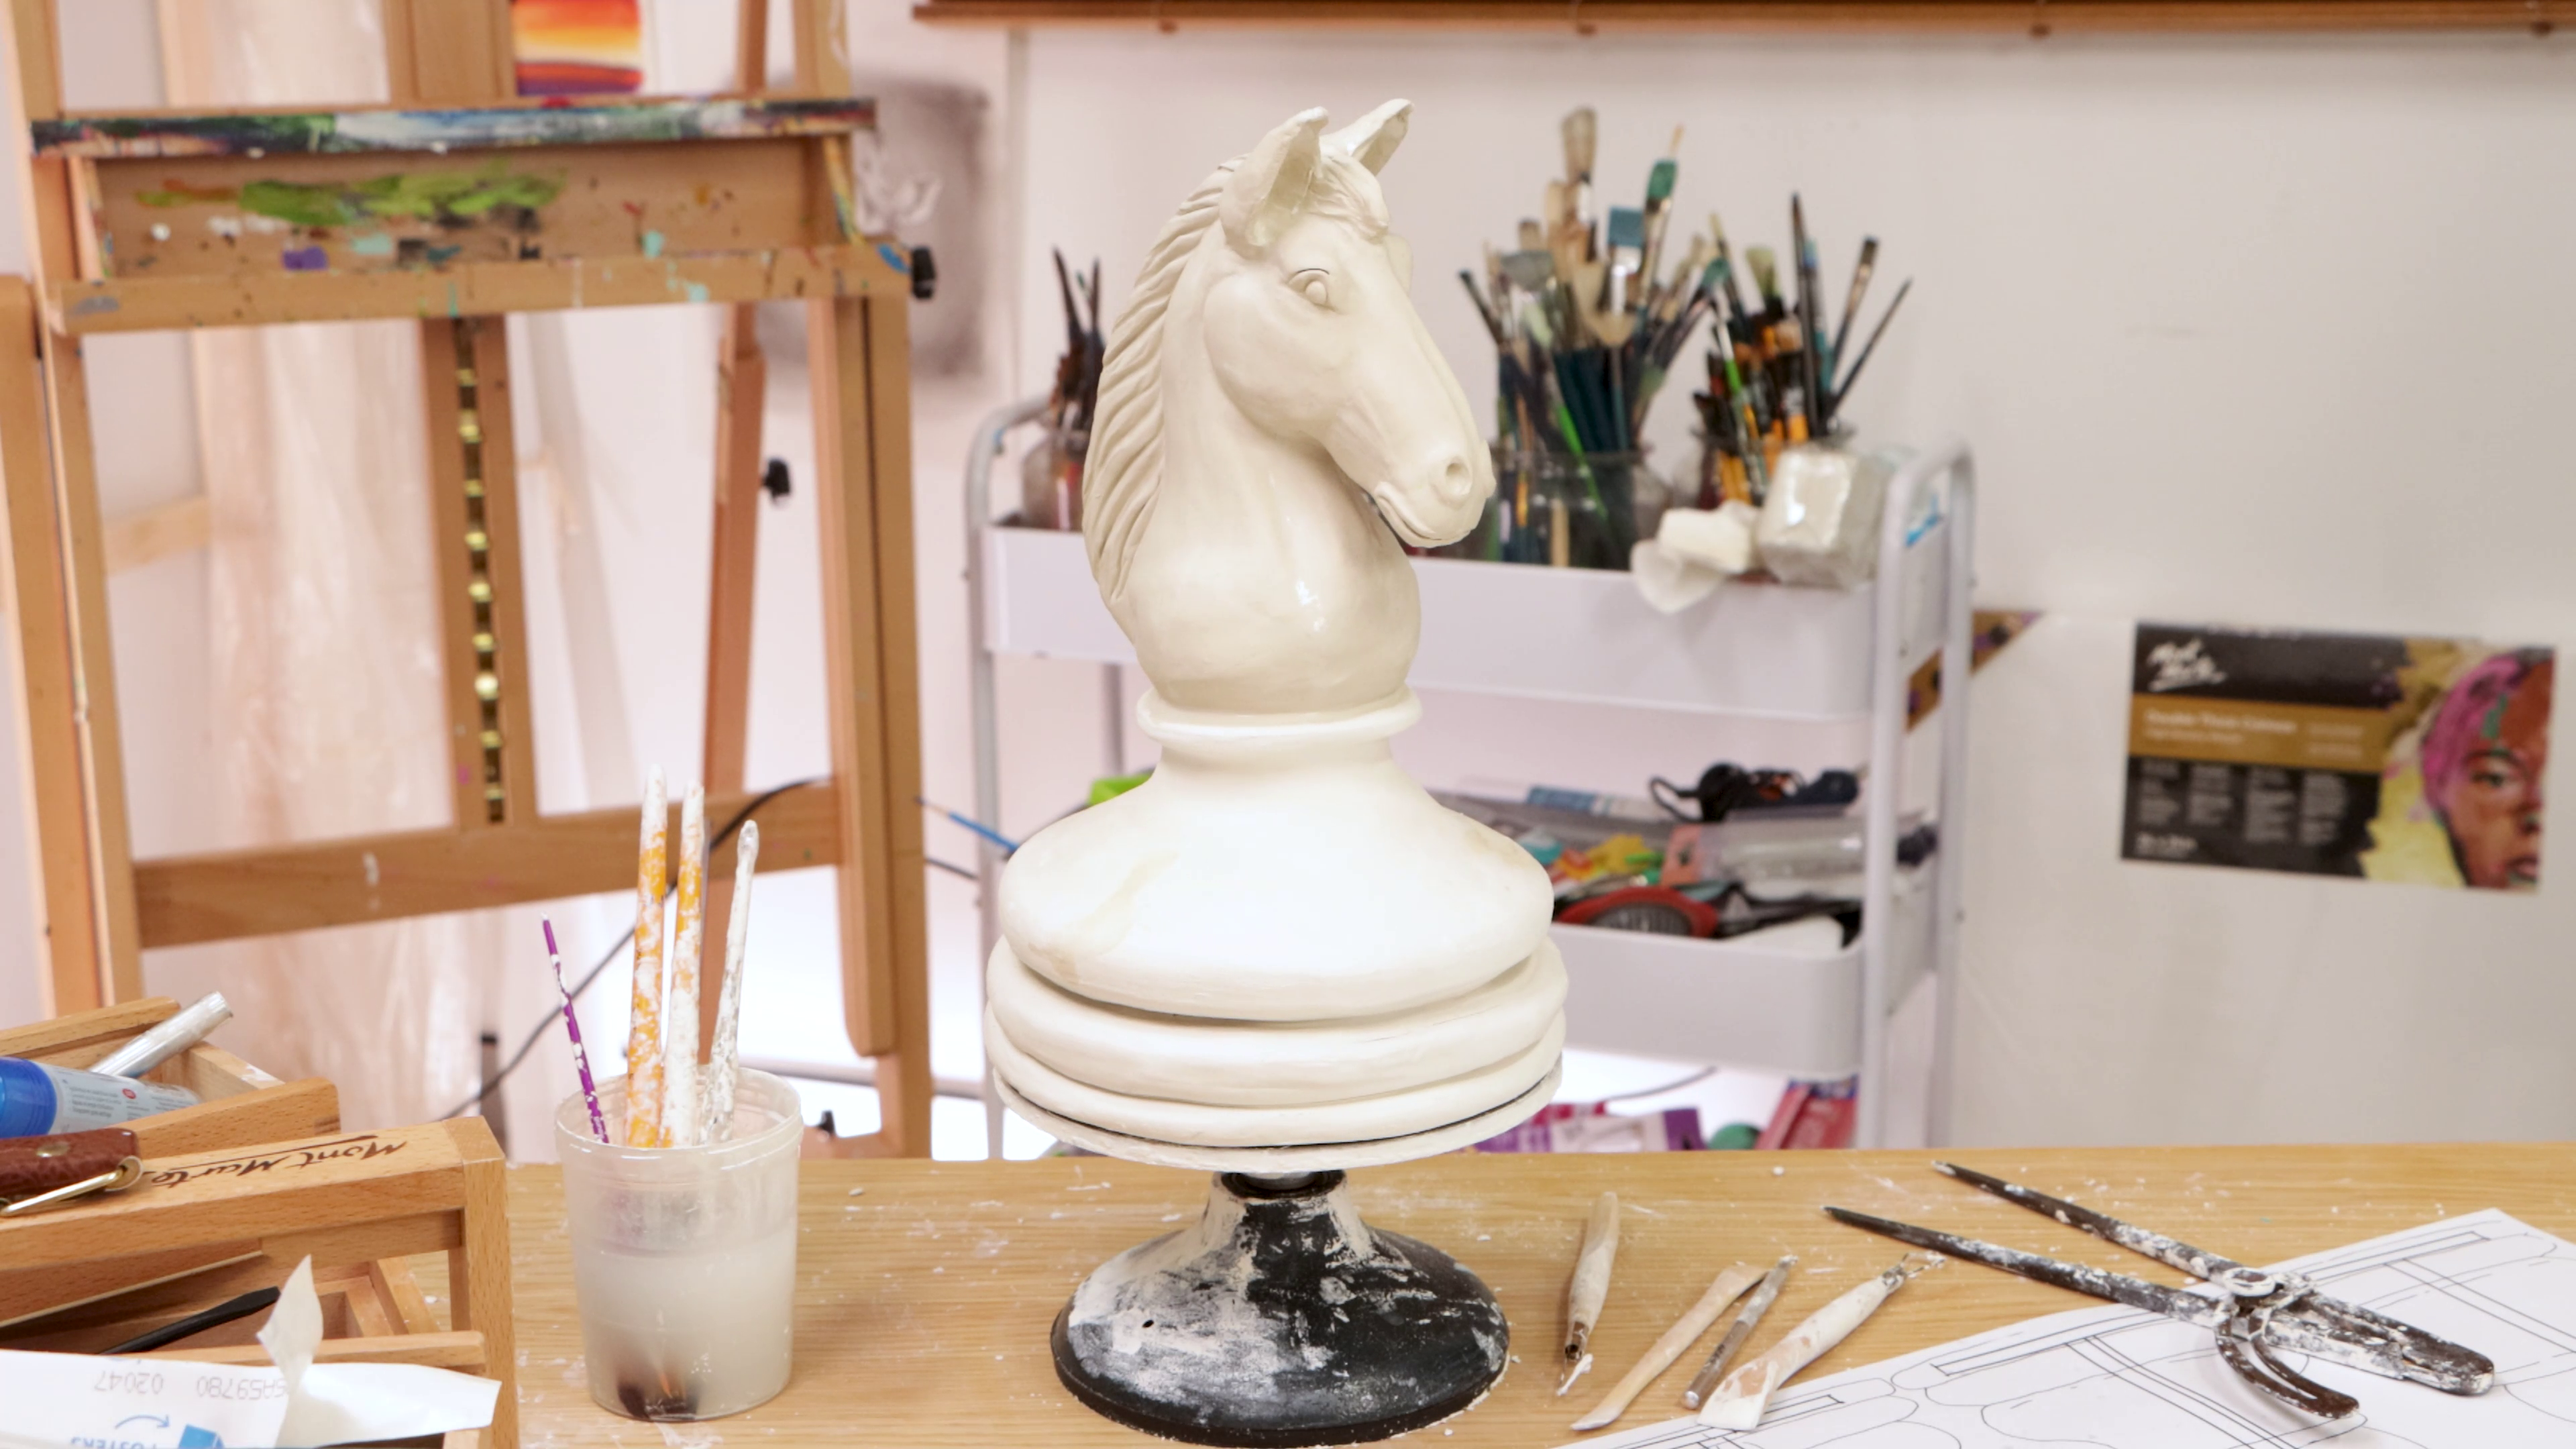
Drying and sanding
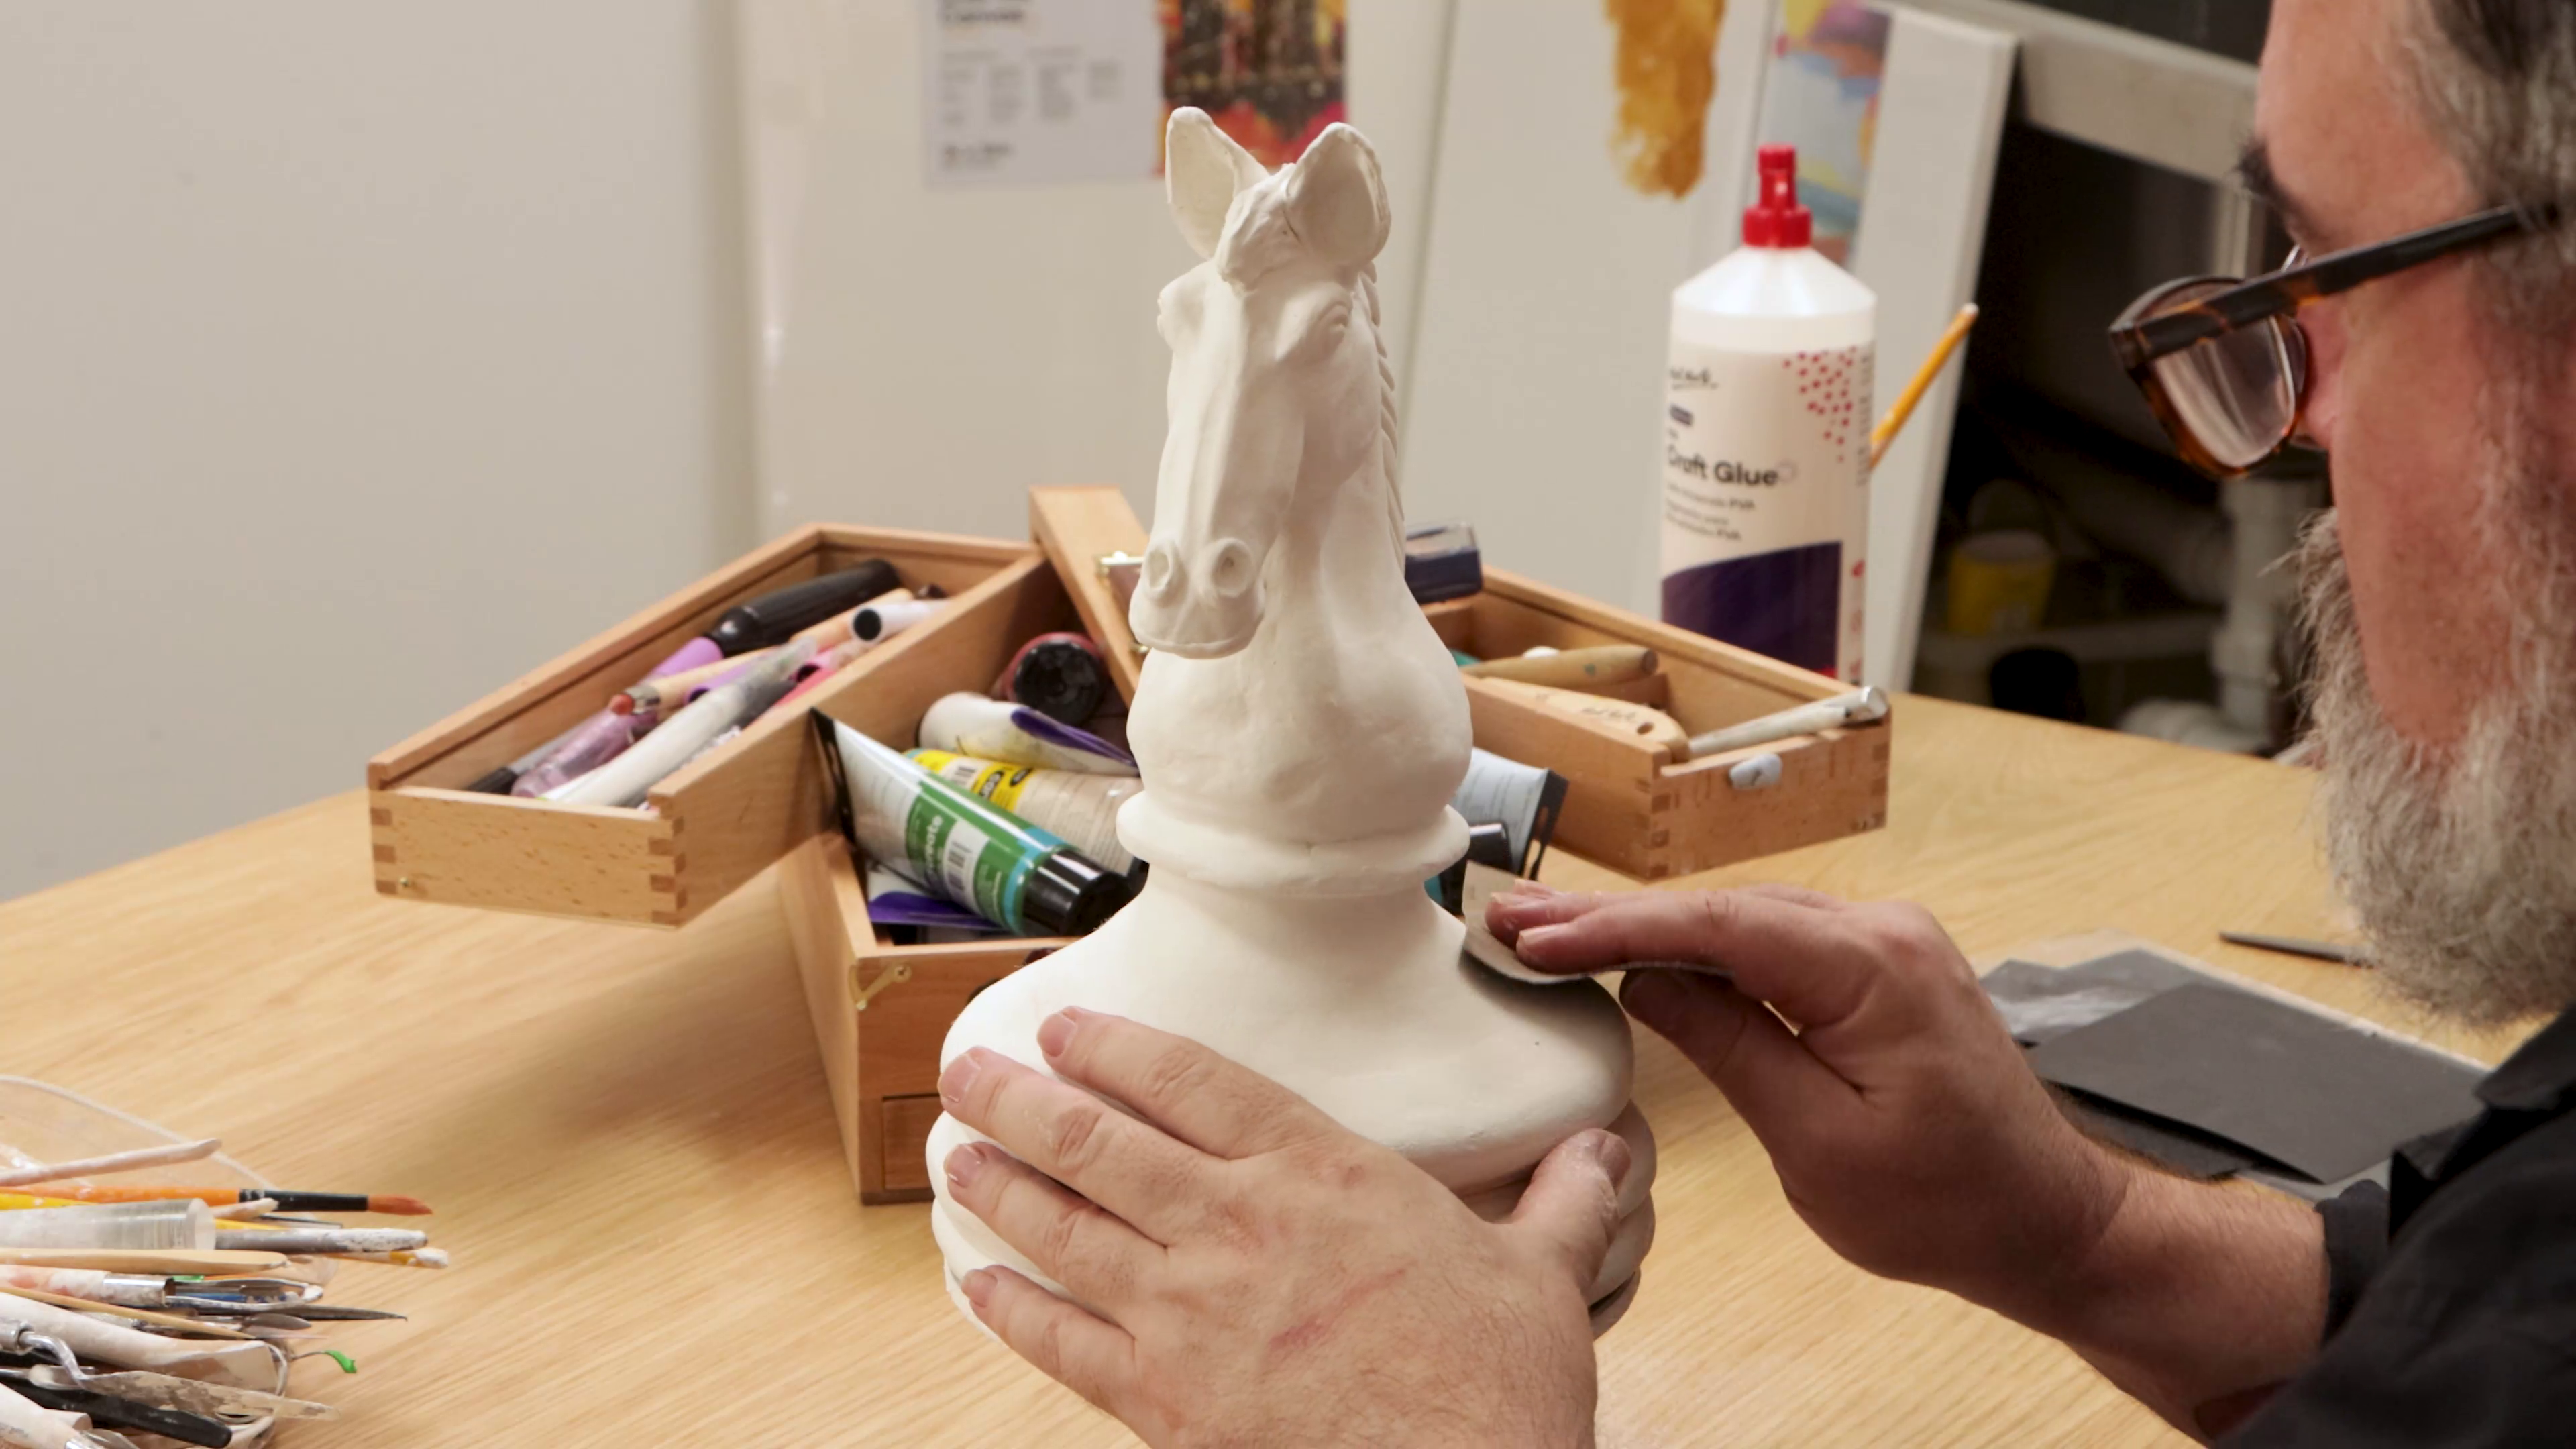
- Allow the sculpture to dry completely for a number of days
- Once dry, sand the surface gently to smooth any rough areas
Sealing and painting
- Mix equal parts PVA glue and water to create a sealing coat
- Apply this over the sculpture to help the paint adhere better
- Allow it to dry fully before painting
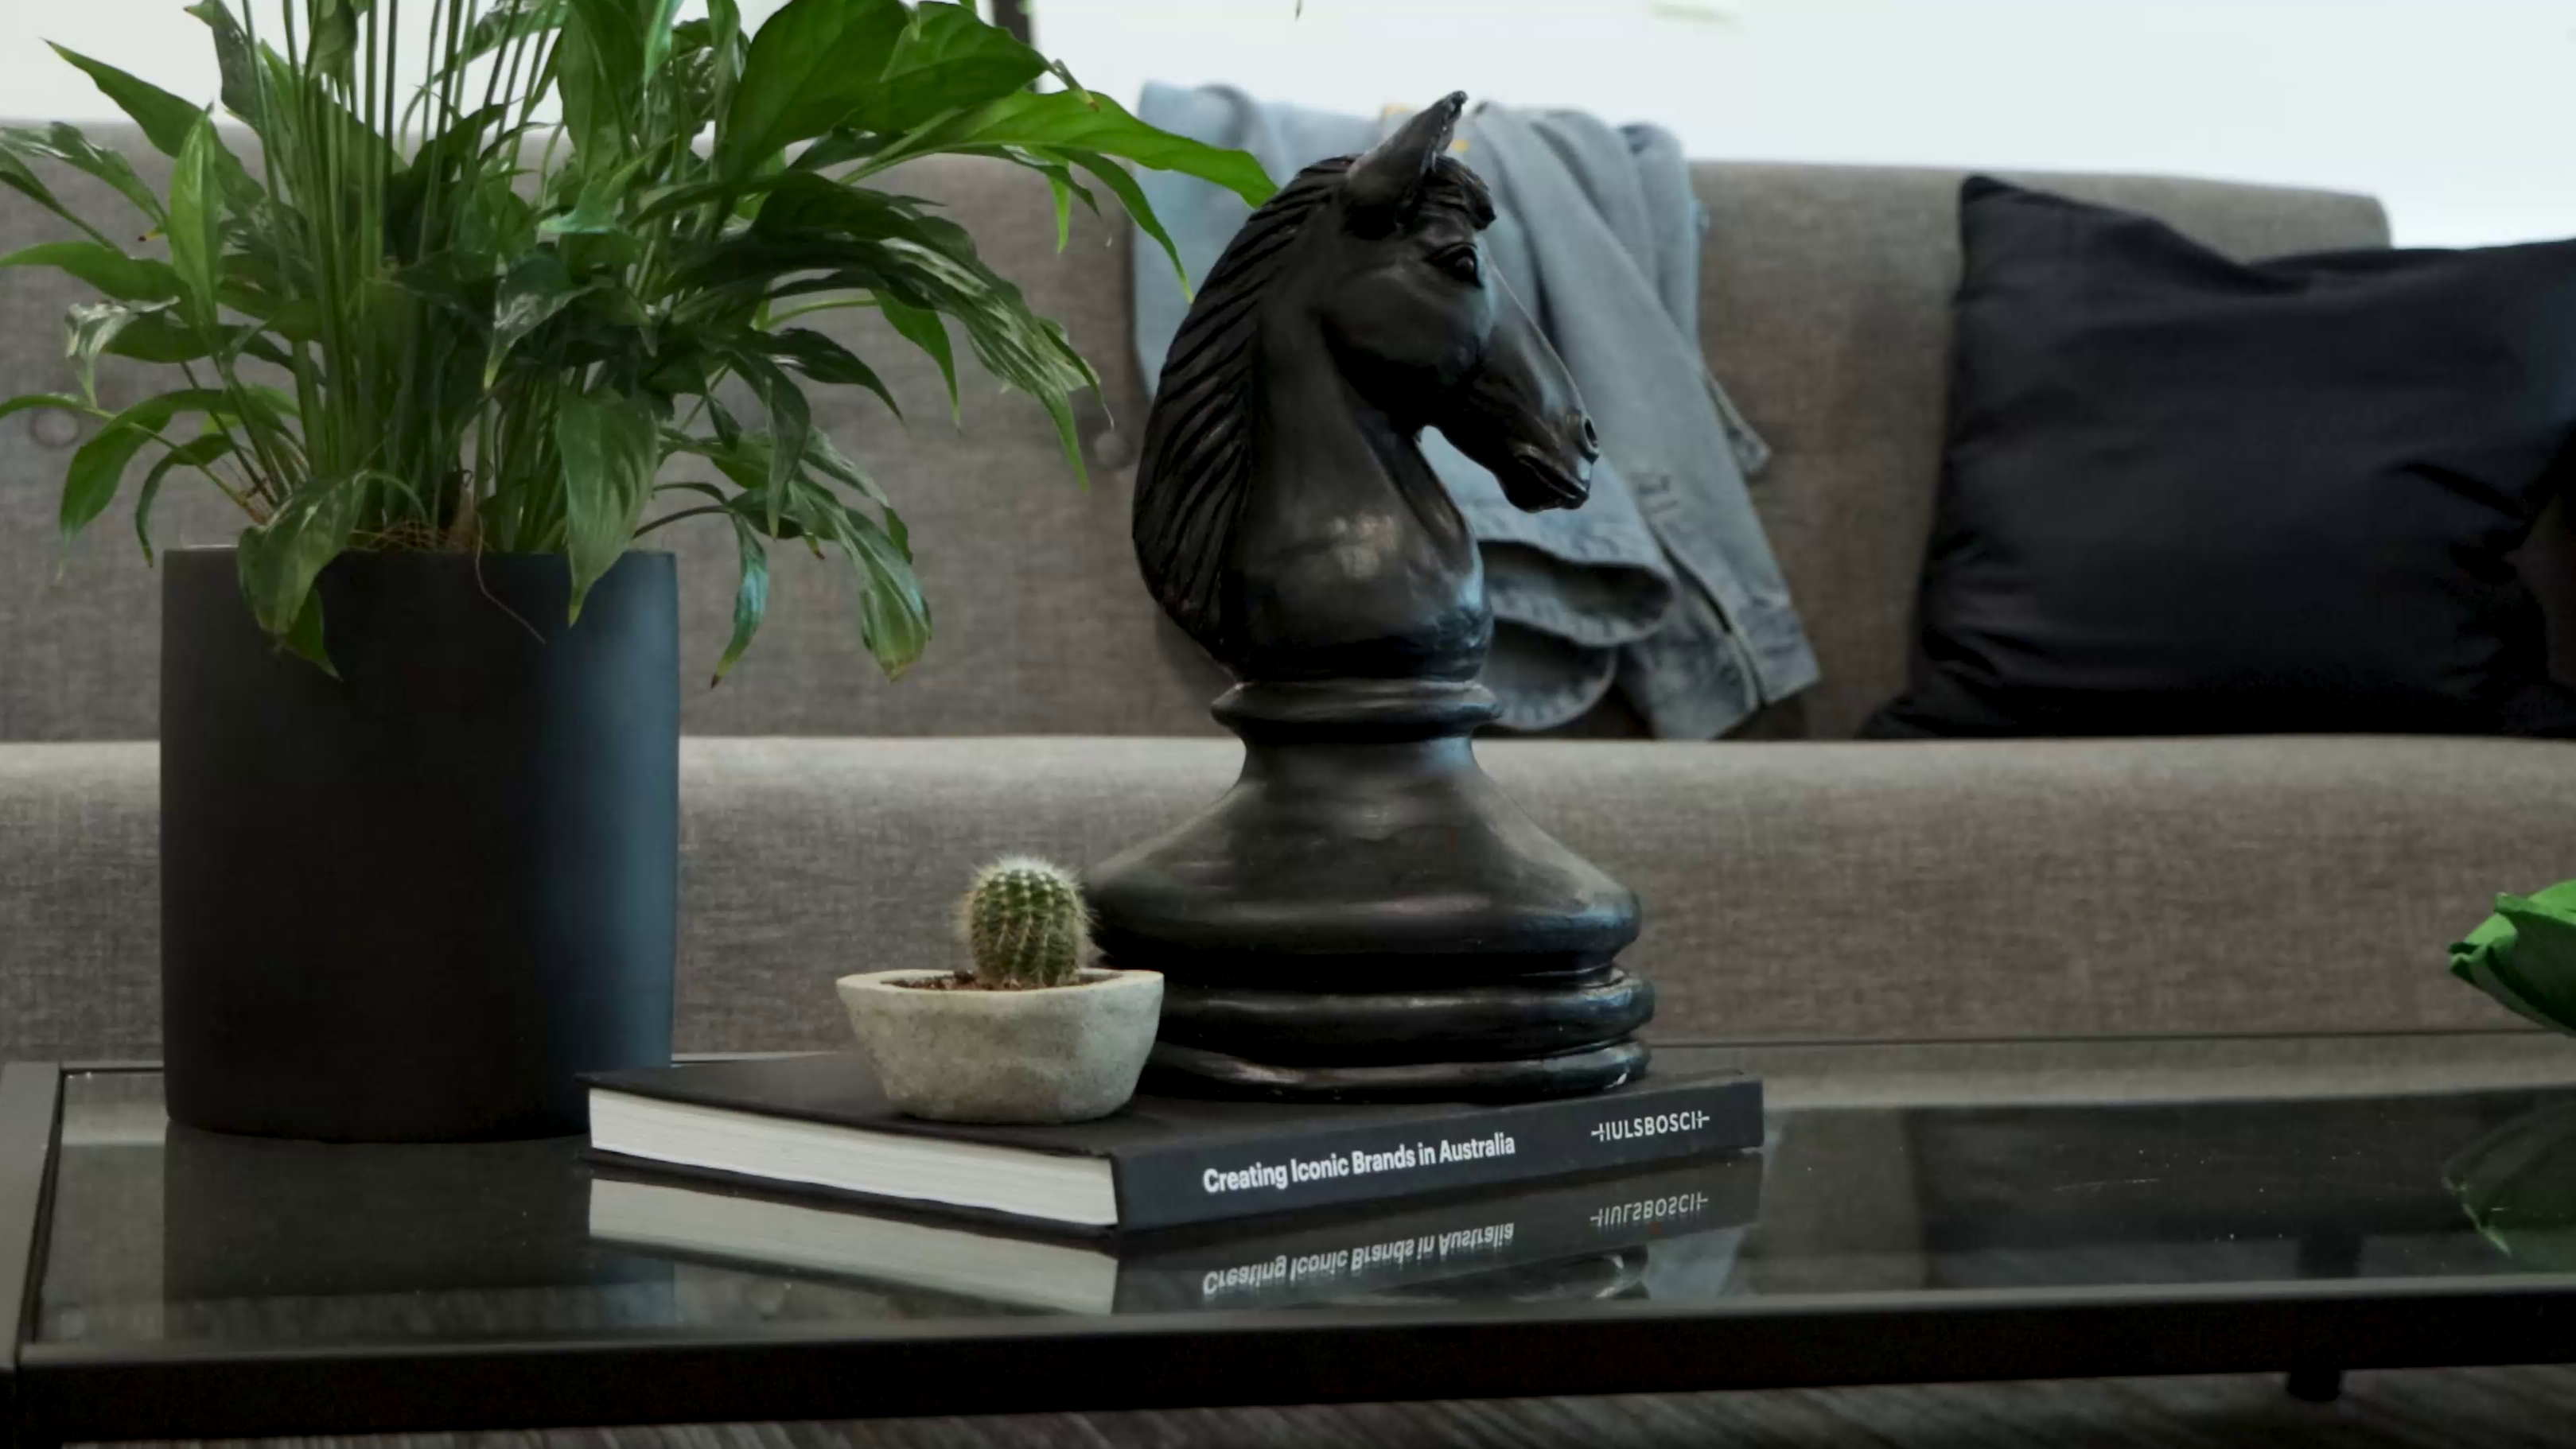
- Paint the knight using Acrylic Colour – we went with black
- Apply Natural Finish Clay Varnish to create a soft matte finish
- 3 x Air Hardening Modelling Clay 2kg White
- 1:1 PVA glue + water (for priming)
- Acrylic Colour Paint Lamp Black
- Natural Finish Clay Sealer
- Craft knife and sculpting tools
- Detail brushes
- Scrap wood (for base)
- Timber rod or dowel
- Metal bracket
- Drill and screws
- Sandpaper
You may also like

Peacock drawing in watersoluble oil pastels


How to use ceramic paint on a thrifted plate


